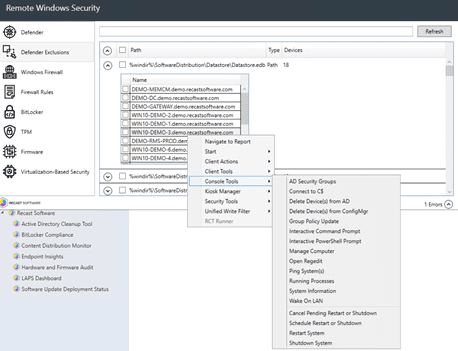


Right Click Tools
Overview of Microsoft UWF (Unified Write Filter)
Topics: Right Click Tools
Microsoft’s Unified Write Filter, its a windows feature included in your OS, off by default, but gives you the ability to prevent changes to your system. This post is geared toward a general overview and demo of implementing UWF. In the next post, I’ll cover the how Recast Unified Write Filter makes all this easier, but this post is straight up Microsoft native functionality.
Unified Write Filter, before I get ahead of myself, what is it? Unified Write Filter (UWF) is an optional Windows 10 feature that helps to protect your drives by intercepting and redirecting any writes to the drive (app installations, settings changes, saved data) to a virtual overlay. The virtual overlay is a temporary location that is usually cleared during a reboot or when a guest user logs off.
That clears things up right? Basically UWF gives you the ability to lock down a machine, tossing any changes that happen to a machine each time it reboots. You start clean each time, while still giving you the ability to perform updates, and maintenance. Configuration Manager is UWF aware and makes patching and servicing easier.
Troubleshooting UWF feels a bit rough around the edges, actually UWF in general feels that way. UWF uses a command line tool uwfmgr.exe to do the management of UWF. uwfmgr is to UWF as manage-bde is to bitlocker. However bitlocker continues to evolve and have updated management tools encompass that technology, UWF hasn’t seen much love from Microsoft in the management arena.
Import Docs you’re going to want to keep handy:
- Unified Write Filter (UWF) feature
- Using the Unified Write Filter (UWF) on Windows 10 IoT Core
- UWFMGR.exe – Command Line info
- Planning for client deployment to Windows Embedded devices in System Center Configuration Manager
- Write filter exclusions
So basics of how it works… you install the UWF feature, you enable protection, and you’re set. You can add exclusions and suspend protection to do servicing.
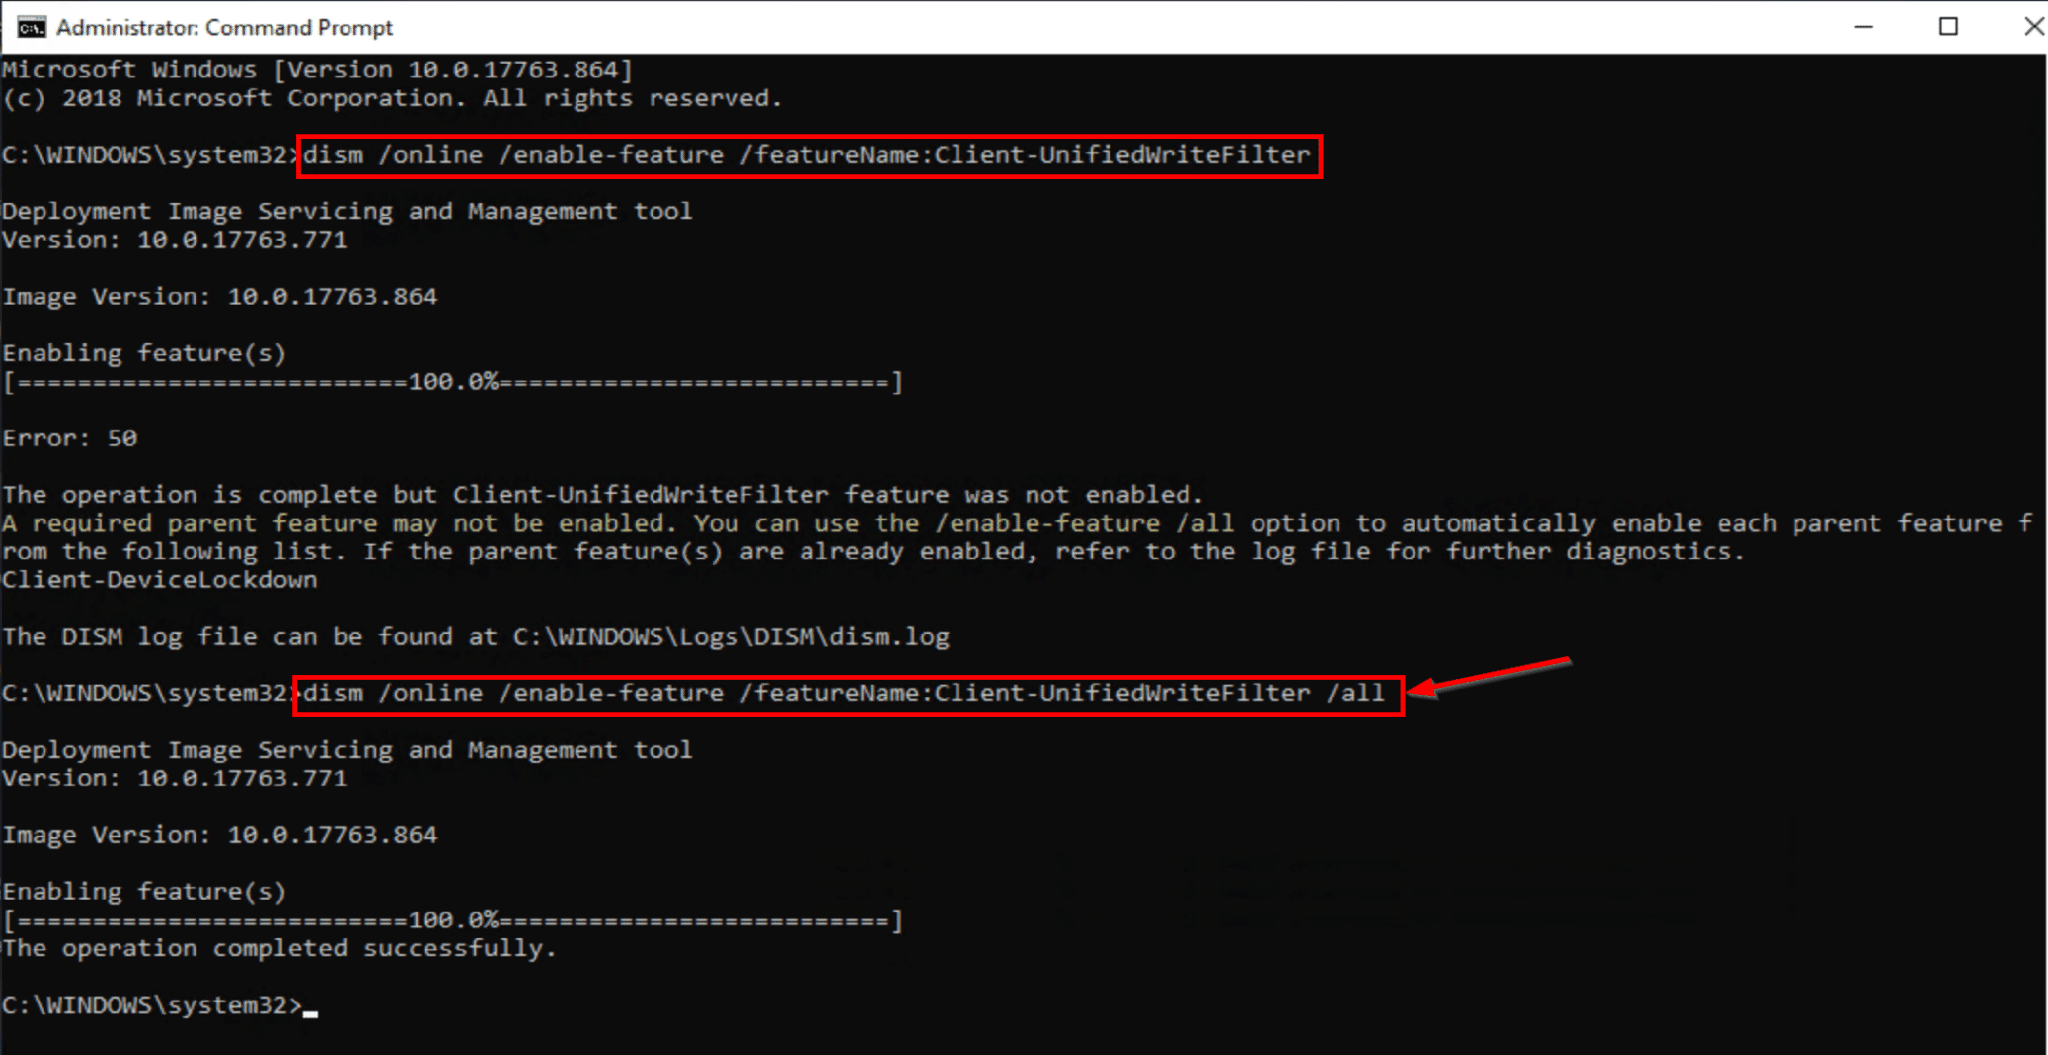
At the command Prompt:

Ok, so as I said, it’s optional, we need to install the feature first. If you follow the docs, it won’t actually install, as there are other features that are dependencies, if you add the /all to the command, it will install what you need. The feature does require a reboot.
After you’ve rebooted, you can now run uwfmgr, we’re going to get the config info for UWF
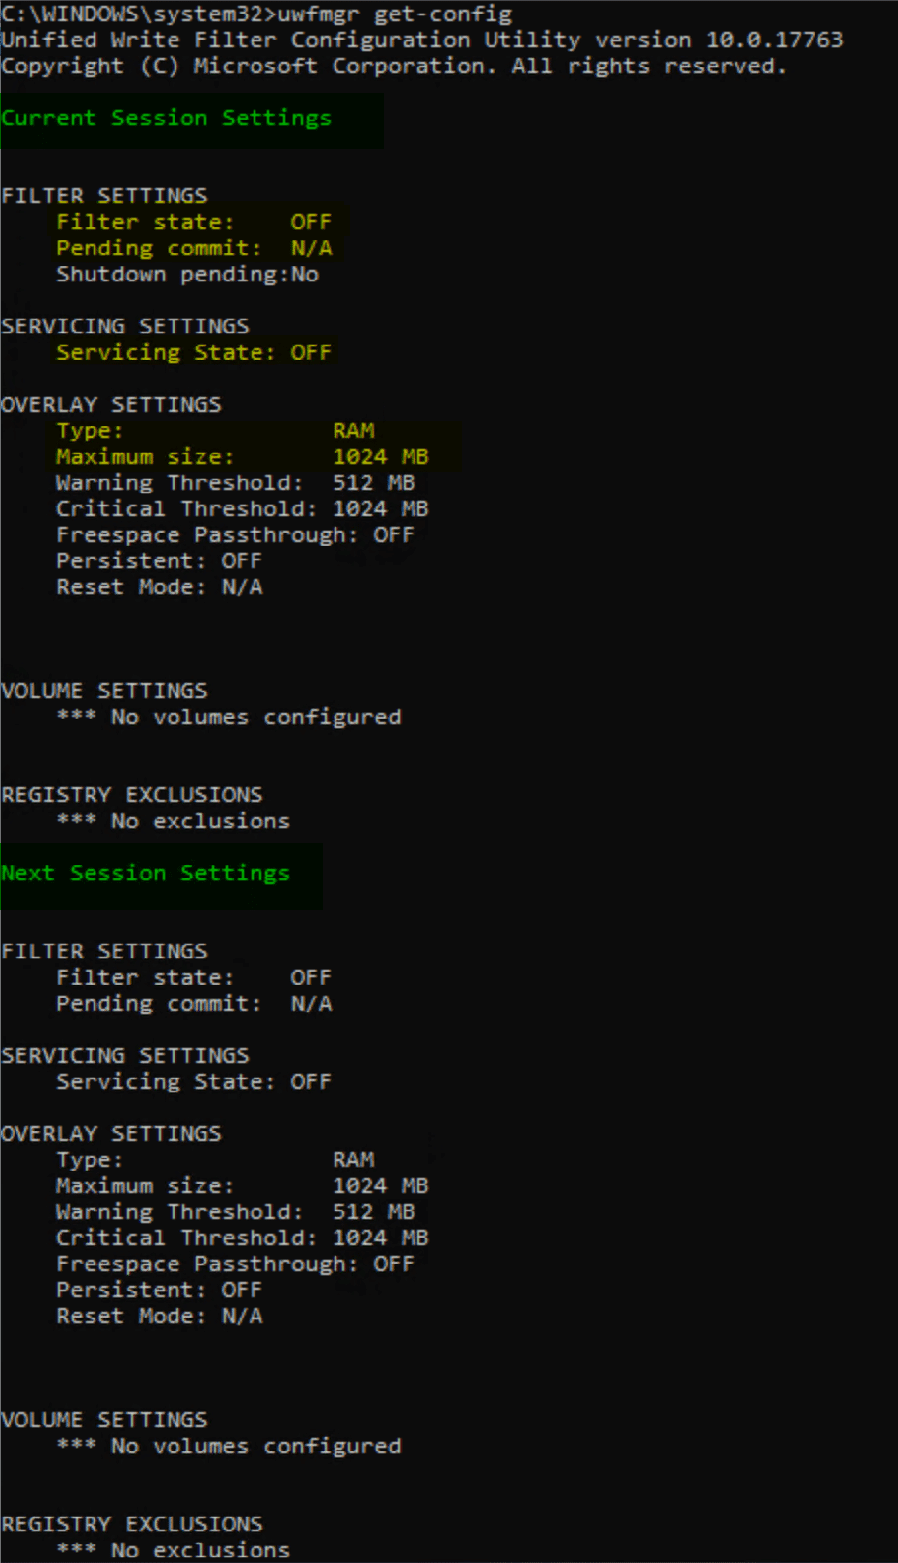
Quick overview of what you’re seeing here. Current Configuration Settings \ Next Session Configuration Settings (After you Reboot)
- Filter Settings (On/Off)
- Servicing State (On/Off)
- Overlay Settings (Type:RAM/Disk & Size)
- Volume Exclusions
- Registry Exclusions
On the test machine, Lets create two folders, then add the TestPersist to the file exclude list
- C:\TestPersist
- C:\TestNonPersist
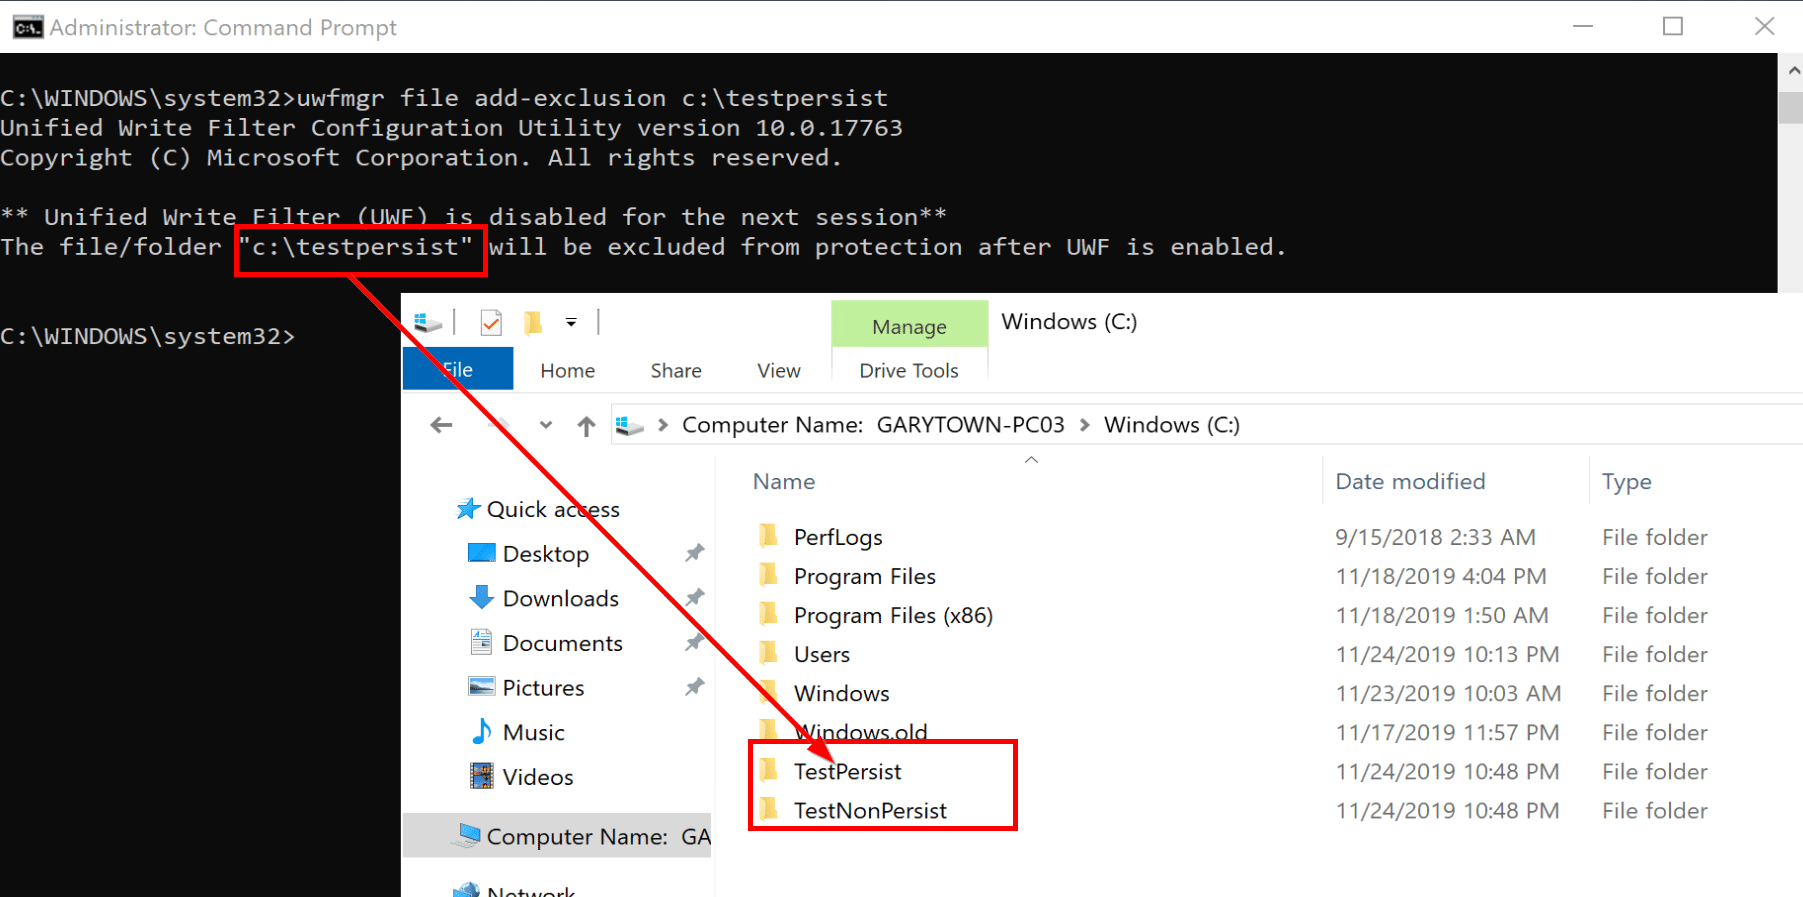
The command line return also reminded us that UWF isn’t enabled, while installed, it’s not enabled so all changes are still being saved. So lets go ahead and enable it.


After it’s enabled, you need to protect the drive. Then reboot
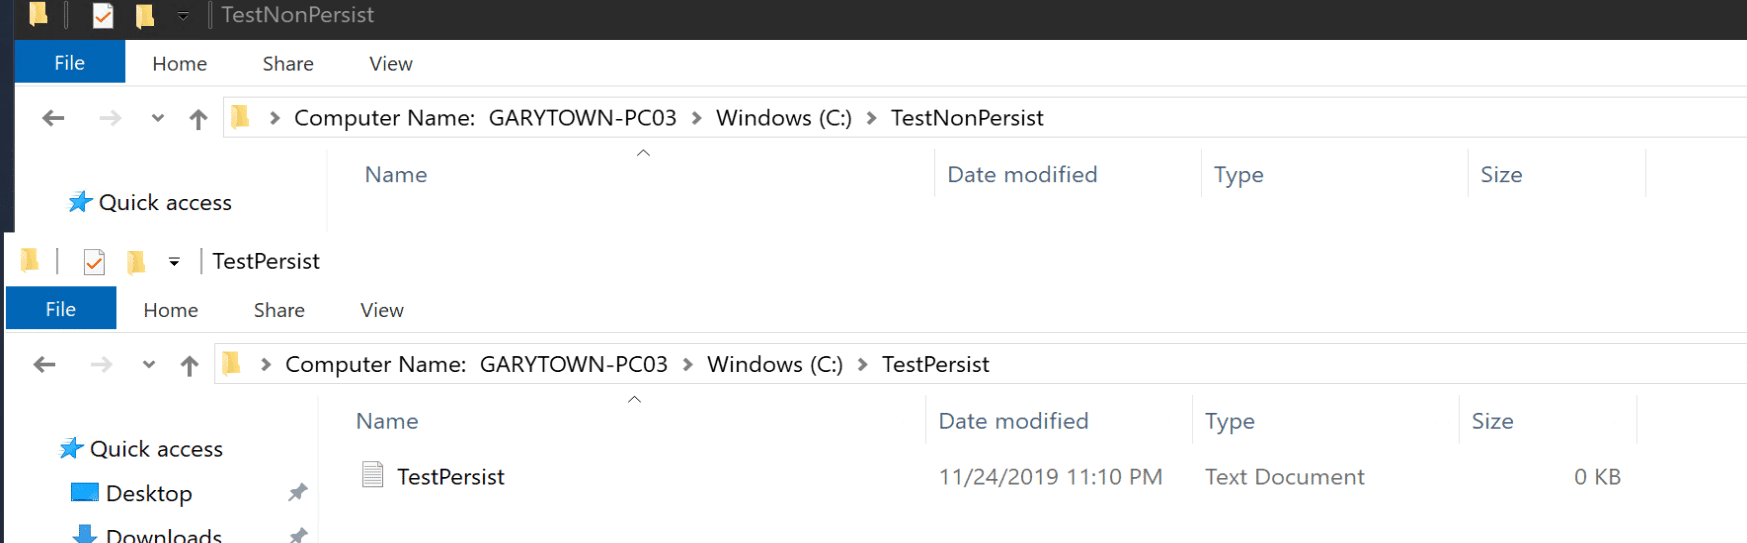
After the reboot, confirm settings and I create two text files, one in each folder.
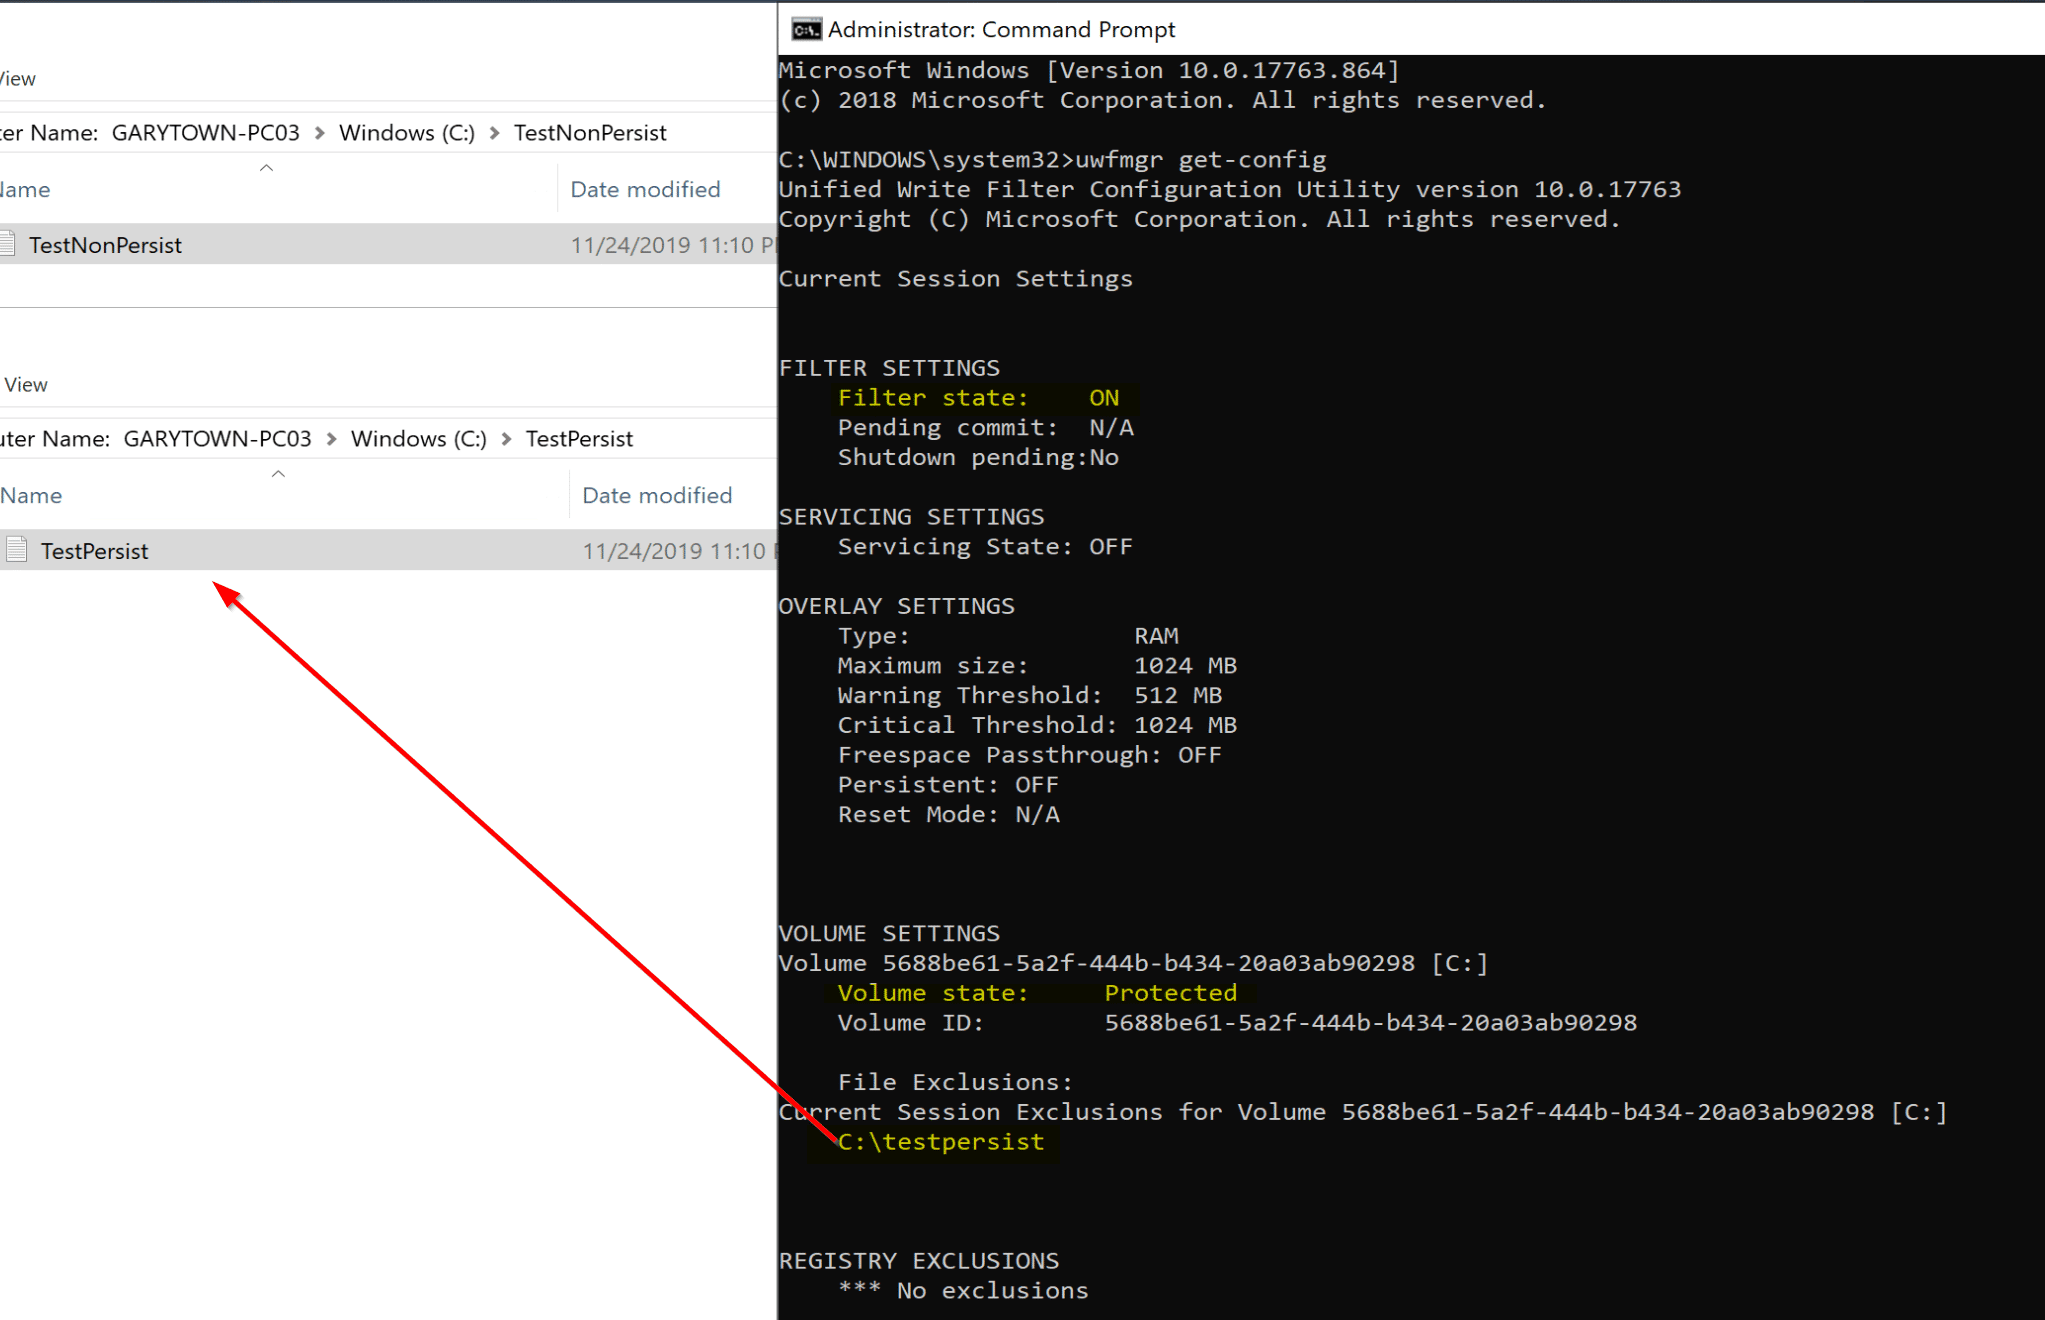
We can see that the Filter is ON, C Drive is protected and we have one folder that is excluded from the “reset” on reboot.
Lets reboot again and see what happens… look, the folder that we made a file in that we did not add to the exclusion list, the file is gone, whereas the other file in the excluded folder survived the reboot.
So that is a quick demo of unified write filter, registry works the same way, exclude the keys you want to have allowed to update.
You can see how this would be great in a Computer Lab, on a Digital Signage, Kiosk, or even a “thin client” image. If malware somehow gets on, it’s gone when you reboot. Make sure you test your important applications, some apps don’t do well being reverted each time. You might need to setup special exclude folders for each.
Common Exclusions include:
- Windows System Files (Just some select ones)
- Security Software Files (Defender / McAfee / Symantec, etc)
- ConfigMgr Client Files, including Cache Files
- Management Tools \ Software Caches
Its completely customization, and Microsoft provides a list common ones. Why add exclusions? Each time you reboot all the AV Def files are out of date, any updates you applied are gone, cached files are gone,
Now lets say, you want to update a software application, or install a new one, you can use servicing mode.

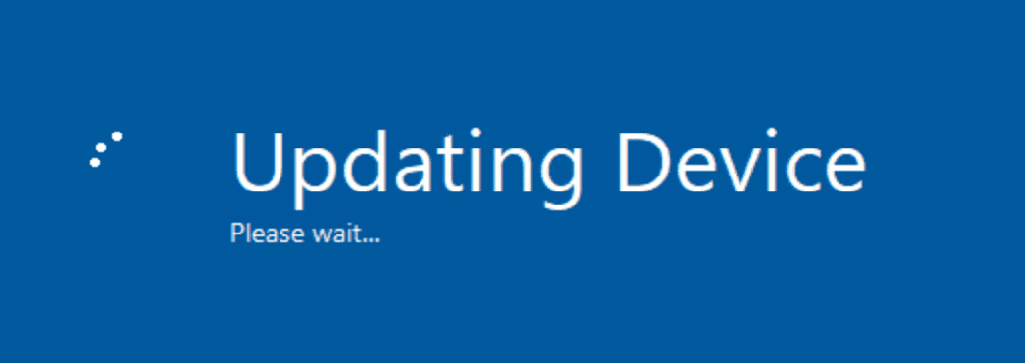
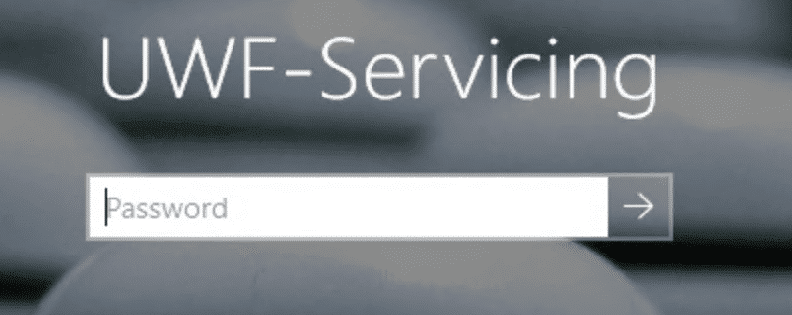
Once enabled and you reboot, you’ll see a special screensaver and a special account logged on:
From my Admin machine, I used remote powershell to create a file and disable servicing, then reboot.
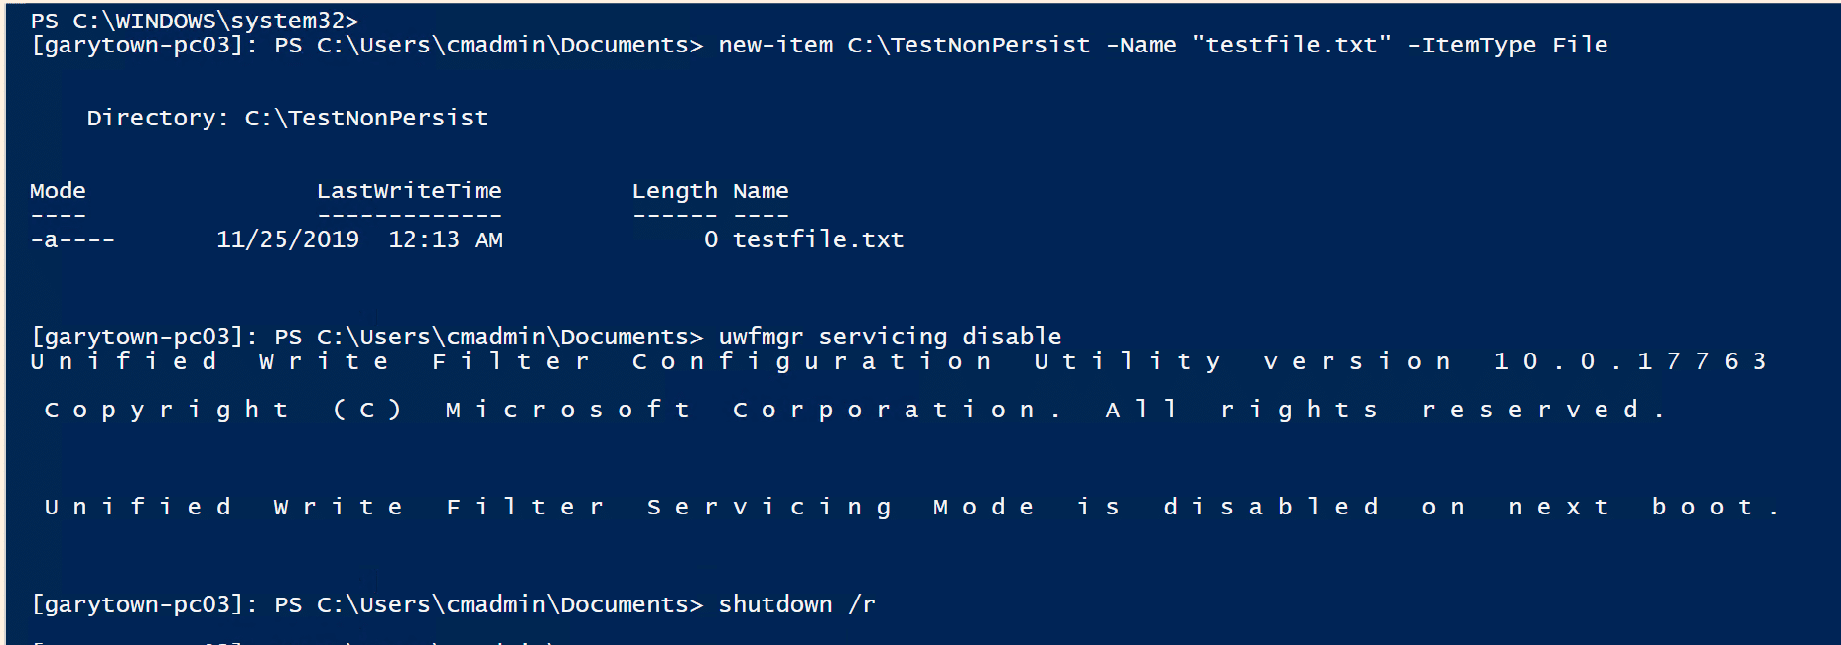
You can see I created the file in the TestNonPersist folder, which is not excluded. If Servicing was not enabled, it would automatically be discarded on the reboot, lets see what happens

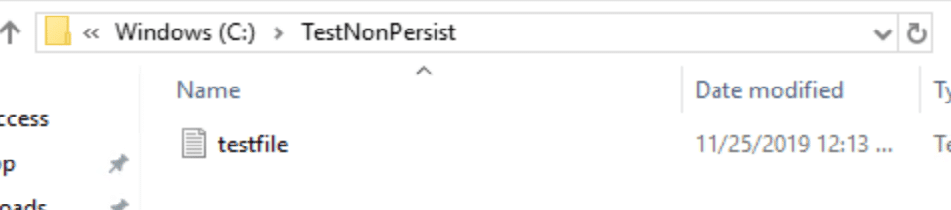
You can see the file was created and it survived the reboot.
So we’ve learned how to install and enable UWF. We covered the process to start servicing, and stop servicing, At this point you’ve seen the basics to get started.
Other things you’d probably change would be the type, change it from RAM to DISK, unless you have large amounts of RAM.
If you plan to leverage UWF, make sure you do lots of testing, and planing before you move to far ahead, things to consider:
- Goal of leveraging UWF
- Servicing Plan, Maintenance WIndows, Automation
- Exclusions
- What Apps will be running
- Hardware Specs
In the next post, I’ll go over how the Recast Toolset greatly simplifies this, and allows you to enable and deploy UWF “profiles” to machines via a Right Click Action.