




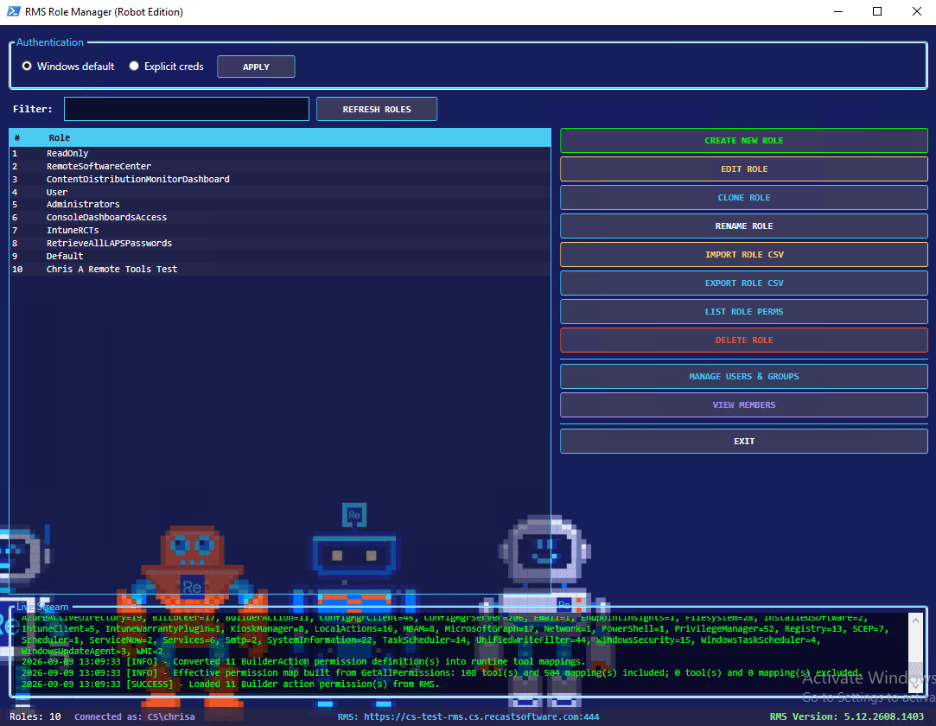
The first version had one job: take the permission map from Part 1 and make role creation easier. Then I started using it during onboarding, health checks, and customer conversations. Each time, I found one more workflow that would be useful to add.
Before long, the role-creation script could edit, rename, clone, import, export, manage assignments, and show role membership. At that point, a normal PowerShell prompt was not going to cut it. I needed a real interface. I won’t get too deep into WPF here, but the short version is this: Windows Presentation Framework let me take the PowerShell work I already had and put a real Windows interface in front of it. Instead of asking someone to run commands, read console output, and remember parameters, I could give them buttons, searchable lists, permission trees, progress messages, and clear confirmation screens. That made the tool feel less like a script and more like an application.

Starting with the Create Role wizard
The first window was a categorized permission tree. The categories followed the Right Click Tools structure as closely as possible, so an administrator could browse familiar areas such as Client Actions, Remote Tools, Security Tools, and User Management.
The administrator could select one capability or an entire parent category. Before anything was sent to RMS, the utility resolved those choices and displayed the exact category, friendly tool name, plugin, and action.
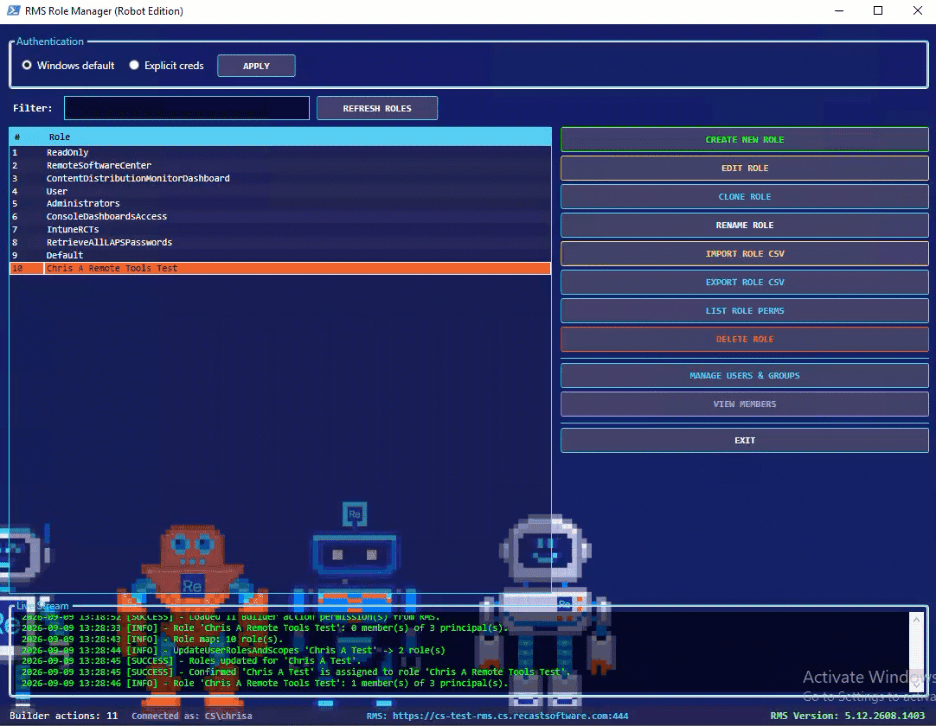
I liked this approach because it kept the workflow simple without hiding the technical details. You choose the access in plain language, then you get one more chance to review what RMS will actually receive.
I also learned pretty quickly that role creation and permission assignment need separate result handling. The role itself may be created successfully while one or more permission additions fail. So the final message cannot just say “Success.” It needs to show what was attempted, what worked, and what needs attention.
Why WPF?
PowerShell was already doing all the heavy lifting. It handled the RMS API calls, built the permission map, and transformed the response data. I did not want to throw that work away just to get a graphical interface.
WPF gave me a way to keep PowerShell as the engine while using XAML to build the windows, grids, controls, and styles. It also gave the tool the feel of a normal Windows application instead of a long sequence of prompts.
Well, that was the idea. Then I had to learn WPF.
The fun part of building the GUI
Honestly, this was one of the most enjoyable parts of the project. There is something satisfying about taking a PowerShell function you already know works and putting a clean interface in front of it.
A search box made a long user list manageable. A tree view made the permission map easier to understand. A progress bar showed that a batch operation was still working. A preview window gave the administrator a chance to stop before making the wrong change.
The feedback was immediate, too. Move a button, adjust a grid, change a label, and the workflow suddenly makes more sense. It turned the project into more than an automation exercise. I was also learning how to guide someone through an administrative task without making the interface feel heavy.
Was every experiment successful? Absolutely not. But that was part of the fun.
A helpful WPF resource
One of the resources I came back to while learning was the FoxDeploy Learning GUI Toolmaking series. It includes practical examples that move from basic GUI ideas into XAML, WPF controls, events, tabbed interfaces, and responsive applications.
If you are getting started with PowerShell GUIs, it is a great resource to have open while experimenting.
FoxDeploy, “Learning GUI Toolmaking | Series Home”
https://www.foxdeploy.com/series/LearningGUIs
A few things WPF taught me
Use the layout system
My first instinct was to think about controls in fixed positions. That works until a label changes, a list grows, or a window is resized. Grids, rows, columns, margins, and alignment take a little longer to learn, but they make the interface much more flexible.
Name controls clearly
PowerShell needs to find the controls defined in XAML. Once the application had several windows, generic names became a fast way to confuse myself. Clear control names made event handling and troubleshooting much easier.
Keep event handlers small
A normal script moves from top to bottom. A GUI waits for something to happen. Someone clicks a button, changes a selection, or closes a dialog. I found it much easier to keep those handlers focused and send the real work to reusable PowerShell functions.
Be careful with shared state
Multiple windows can easily start stepping on the same variables or controls. I learned to keep the data for each dialog as isolated as possible. That made it less likely that closing one window would leave another in a strange state.
Show what the application is doing
API calls and bulk changes can take time. If nothing on the screen changes, the application looks frozen. Status text, progress indicators, and temporarily disabling buttons made a huge difference. They also helped prevent accidental double-clicks and duplicate operations.
Role creation was only the beginning
Once the Create Role wizard was working, editing became the next obvious feature.
Deleting and recreating a role is not a great editing strategy. That role may already be assigned to users or groups. Recreating it introduces risk around assignments, scope, and partial failures.
The Edit Role workflow loads the current permissions into the same tree used for creation. When the administrator saves, the utility calculates what needs to be added and what needs to be removed. Before making the change, it displays a preview.
That preview became an important pattern throughout the application: Show the administrator exactly what is about to happen.
Adding the rest of the role lifecycle
From there, the utility expanded to include:
- Rename a role without deleting it
- Clone a role as a starting point
- Export a role and its permissions
- Import a role from CSV
- Export the full local permission map
- Delete a role after checking assignments
Each feature came from a practical need. Clone and import help with standardization. Export gives you something easy to review. Rename avoids unnecessary recreation. The assignment check makes it much harder to delete something that is still in use.
Managing users and groups
Roles are only half of RBAC. You also need to know who has them.
The Manage Users workflow lists the principals already registered with RMS and identifies each one as a user or group. From there, an administrator can filter the list, review assigned roles, add or remove several roles, register a new principal, or export the assignments.
I added an extra warning for group assignments. Assigning a role to a group affects everyone currently in that group and anyone added later. That is worth making very clear before the administrator clicks Save.
Looking at access from both directions
When reviewing access, I usually start with one of two questions:
- What roles does this user or group have?
- Who has this role?
The Manage Users window answers the first question. The View Members window answers the second. Having both views made the tool much more useful for day-to-day administration, not just initial role creation.
Making batch changes feel safe
Multi-select was another feature that looked simple but needed some thought. The interface can assign several roles or remove several principals, but the API does not always treat that work as one transaction.
That means one item can fail after several others succeed. The utility shows an itemized confirmation before the change and itemized results afterward. If the selection is especially large, the warning becomes stronger.
The GUI should make bulk work faster, but it should never make the risk invisible.
The result
The result is more than a nicer way to create roles. With RBAC configured, administrators can be intentional about which Recast actions each user or group can access. Instead of giving every administrator the same broad permissions, roles can be built around the work they actually need to perform. If the user doesn’t have permission to perform the action, it will either be grayed out in their menu if in the ConfigMgr console, or they will receive an “Insufficient Recast Permissions” error when trying to run the tool.
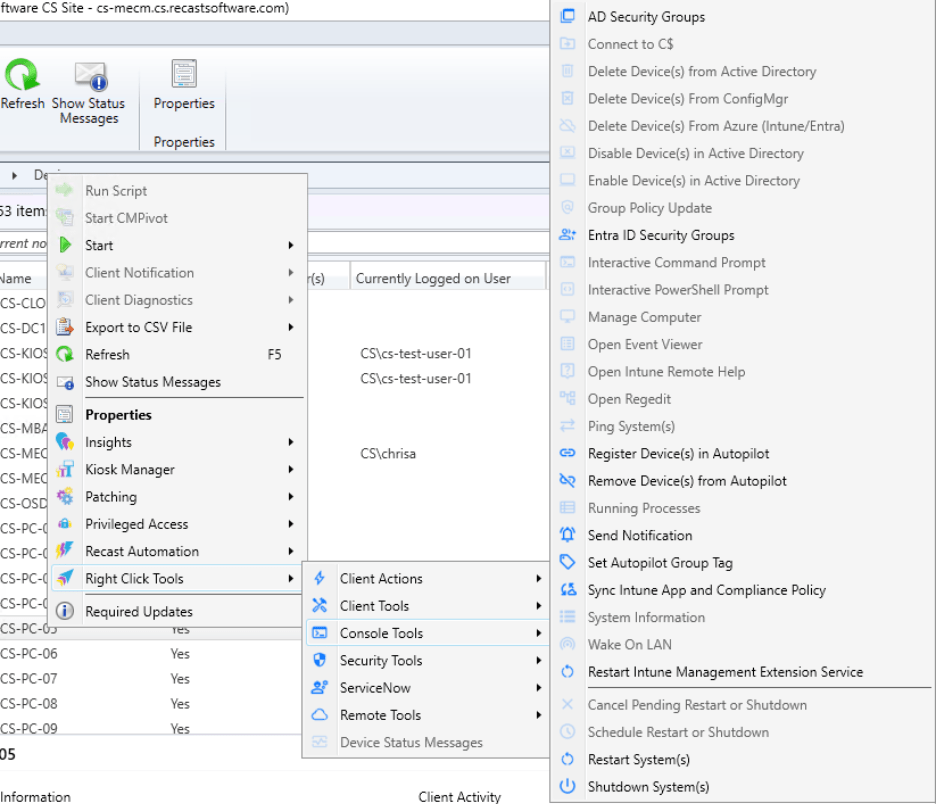
That means help desk teams can get access to the actions they use every day, security-sensitive tools can stay limited to the right administrators, and role assignments can be reviewed from both the user and role perspective. The goal is not just to make RBAC easier to configure. It is to make access easier to understand, safer to manage, and better aligned to how teams actually use Recast.
What I would improve next
Like any project, there are a few things I would clean up in the next version:
- Reuse one permission-tree component for both Create and Edit.
- Give every dialog its own state object.
- Cache role, user, permission, and assignment data during the session.
- Standardize progress, confirmation, and result windows.
- Add automated tests for the core workflows.
- Add scope-filter (limiting rules) selection during role assignment.
Wrapping up part two of the blog series
The RMS Role Manager started as a quick way to create roles. It became a much larger application because RBAC does not stop after the role is created.
The WPF work was a big part of that journey. It made the tool easier to use, but it also forced me to think more carefully about application state, user feedback, validation, and partial failures.
And yes, it was a lot of fun. PowerShell supplied the engine, and WPF gave me a way to make that engine approachable. But once the interface made those workflows easier to use, the next challenge was making sure the underlying RMS API behavior was handled safely and predictably.
If you want to try the RMS Role Manager in your own environment, you can find the script and README in our public scripts repository. In part three, I’ll move behind the interface and look at the API lessons that made the tool more reliable.