


Introduction
This is the second part of the PowerShell and Intune trilogy. This time, I will show you how to deploy PowerShell to your clients. This is a continuation of part 1: Getting Started with PowerShell and Intune In part 2, you’ll find more details to help you better understand and use PowerShell and Intune for single-use, scheduled, or on-demand remediation.
One reminder is not to use passwords or sensitive information in your scripts, as they can be read from client log files. Also, don’t use PowerShell scripts to gather information about your users.
Platform scripts
These can be found in the Intune Admin Center under Devices > By Platform > Windows > Scripts and Remediations > Platform scripts pane.

You can add scripts here that you want executed only once and do not need to rerun at a set interval, unlike the Remediation scripts that offer that possibility only for licensed users. (Windows Enterprise E3, E5, A3, A5, or a per-user Windows Virtual Desktop Access license for each device managed by that Remediation Script)
The scripts added here should exit with Exit Code 0 so that Intune knows the script ran without issue. Any other Exit Code will cause the script to be reported back to Intune as failed. The best way to build scripts here is to use a Try/Catch construction: Test and execute things, but use -Error Action Stop for each Cmdlet to stop execution after encountering your first error. (Intune will try to run it three times more after the first unsuccessful attempt.)
In the example below, I created a simple script that will try to create a C:\Scripts folder and a Logs Folder inside it.
if (-not (Test-Path -Path C:\Scripts)) {
try {
New-Item -ItemType Directory -Path C:\ -Name Scripts -ErrorAction Stop
New-Item -ItemType Directory -Path C:\Scripts -Name Logs -ErrorAction Stop
exit 0
}
catch {
exit 1
}
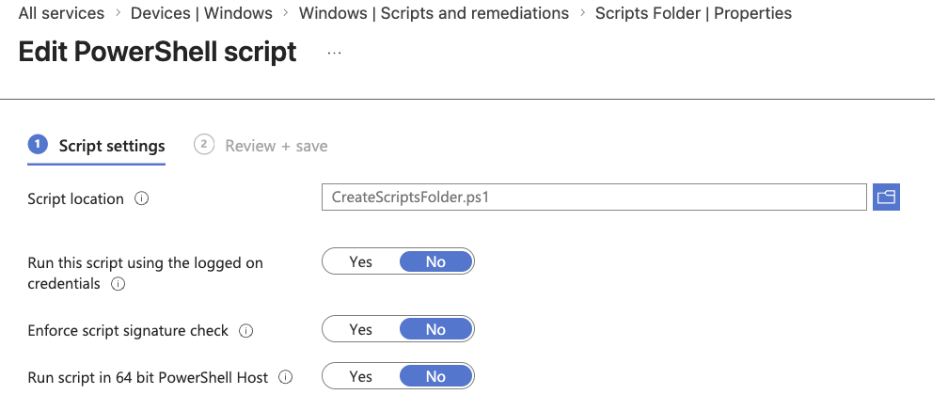
} After saving this PowerShell script as CreateScriptsFolder.ps1, I added it to the Platform script pane in Intune. I chose to run the script as SYSTEM, not as the logged-on user, without using the script’s signature check, and not in 64 Bit PowerShell Host.
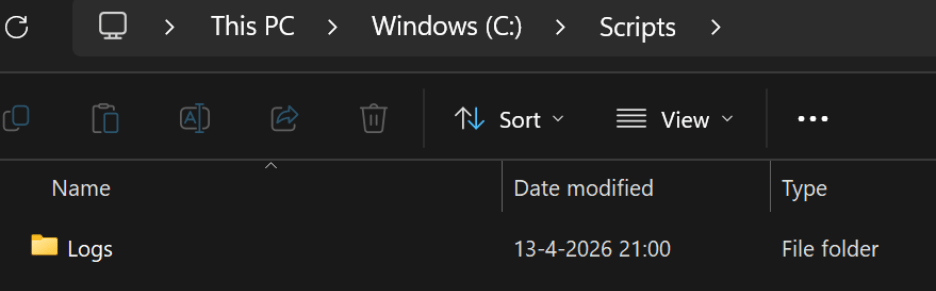
After assigning it to a test group and saving it, I started my Intune test device, and Intune created the C:\Scripts Folder with the Logs Folder inside it.
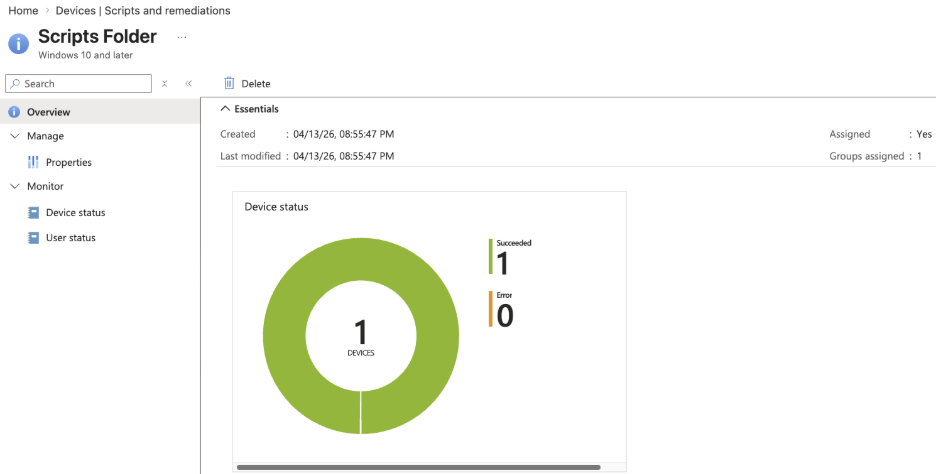
It will take some time to report it back to Intune, but you can see whether it worked on the Overview page of the Platform script you just created.
You can also check the Registry on the Device (HKLM\SOFTWARE\Microsoft\IntuneManagementExtension\Policies\) and verify the LastUpdatedTime of the policyID You can find this policyID in the URL when the Platform script you just created is open. It’s the last part of the URL after /overview/policyId.

You can use this value to search the Registry or browse to the specified path above inside HKLM:

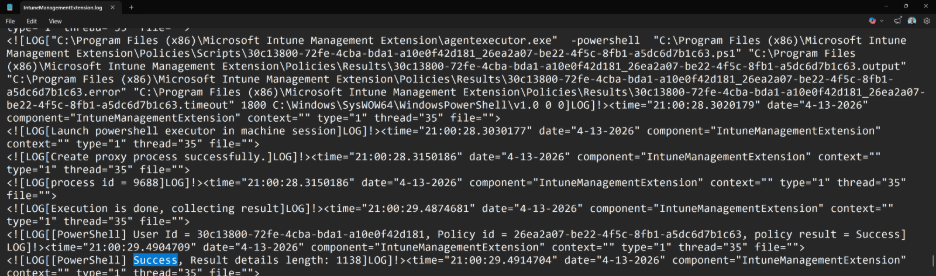
Another place to check the results is inside the IntuneManagementExtension.log found in C:\ProgramData\Microsoft\IntuneManagementExtension\Logs. (Open the most recent one.) I searched the file for the policyID to find this Platform Script specifically.
Remediations
I like this option for running PowerShell scripts in Intune the most, as it is the most powerful and, compared to Platform scripts, will keep checking (if configured) and fixing issues on your devices. However, as mentioned in the previous section, it does require you to have the correct licensing in place.
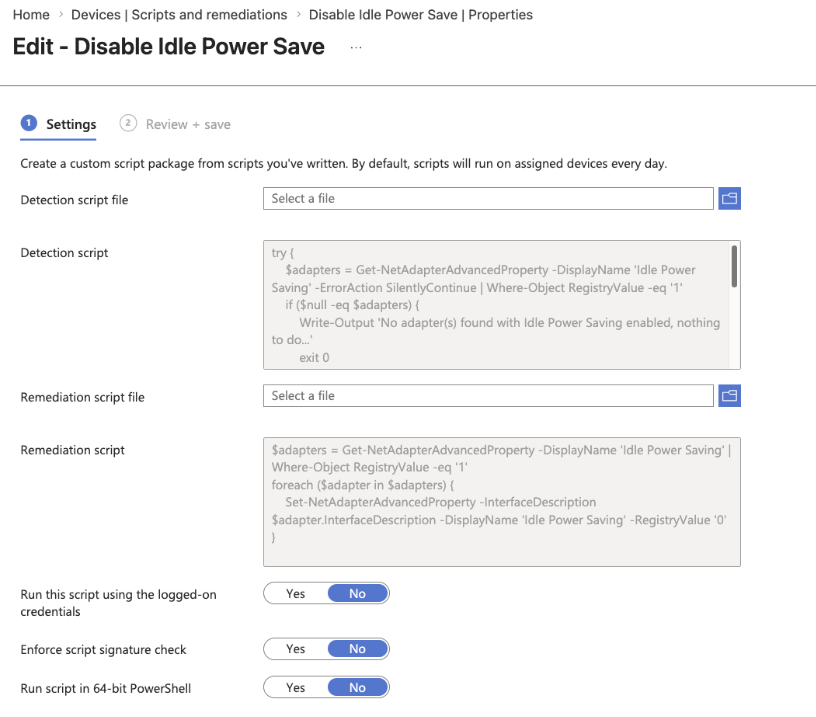
The concept is the same as Platform scripts: It needs to exit with Exit Code 0, but it also needs to output something while running. (Write-Output: you will see this output inside the logs, too). In the example below, I created a Detection and Remediation script that checks for a Power-Saving setting on network interfaces that might cause problems with RDP sessions and remediate it by disabling it. (Option is available on Realtek cards, for example, but not on all network interfaces.)
Below are the contents of the Detection script. It will check all network adapters. If it finds the ‘Idle Power Saving’ setting with a value of 1, it will exit with Exit Code 1 after notifying that an adapter with that specific setting and value was found using Write-Output. Because the script exits with an Exit Code of 1, it will start the Remediation script to fix it. (And re-check to see if the problem is still there. If not, then the Remediation will exit successfully.) It will exit the script with Exit Code 0 if no network adapter was found with that setting. As a result, it will not try to fix something unnecessarily.
try {
    $adapters = Get-NetAdapterAdvancedProperty -DisplayName 'Idle Power Saving' -ErrorAction SilentlyContinue | Where-Object RegistryValue -eq '1'
    if ($null -eq $adapters) {
        Write-Output 'No adapter(s) found with Idle Power Saving enabled, nothing to do...'
        exit 0
    }
    else {
        Write-Output 'Adapter(s) found with Idle Power Saving enabled, disabling now... '        exit 1
    }
}
catch {
    Write-Output 'No adapter(s) found with Idle Power Saving enabled, nothing to do...'
    exit 0
}
Below are the contents of the Remediation script. It will change the value of all network adapters found with the ‘Idle Power Setting’ set to 1 to 0 (thereby disabling the power-saving feature of that network adapter). After running the Remediation script, Intune will run the Detection script again to validate that the Remediation script fixed the issue.
$adapters = Get-NetAdapterAdvancedProperty -DisplayName 'Idle Power Saving' | Where-Object RegistryValue -eq '1'
foreach ($adapter in $adapters) {
    Set-NetAdapterAdvancedProperty -InterfaceDescription $adapter.InterfaceDescription -DisplayName 'Idle Power Saving' -RegistryValue '0'
}
The nice thing about Remediation scripts is that you can see their contents, making it easier to test and view their settings. This is something that the Platform script option does not have.
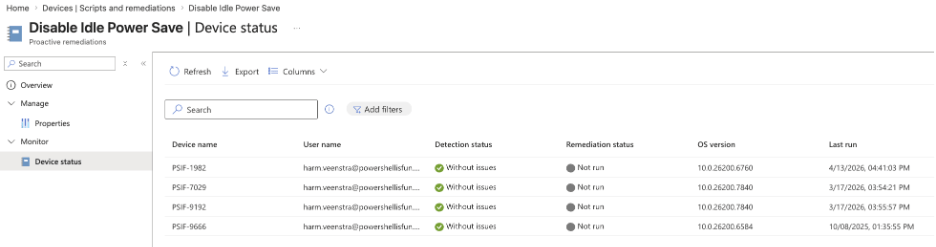
After creating and assigning the script to a test group (you can specify multiple groups with different intervals in which it should check the status using the Detection script), you can see the status of the Remediation for your devices and when the last run was triggered:
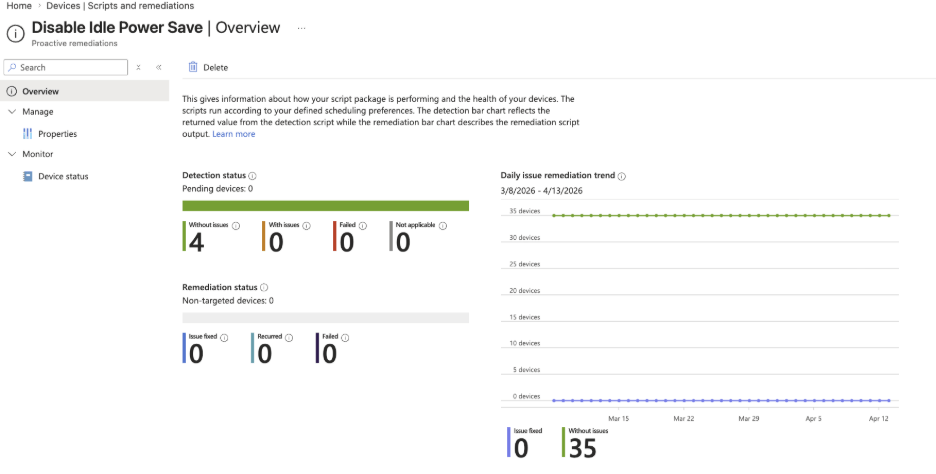
You can also see the number of times the Remediation script fixed the issue and how many times the issue was not detected in the Overview pane:
Manually running remediations
You can run remediations on specific devices manually if needed. The remediation doesn’t even have to be assigned to the user or device. The Admin running the Remediation script manually needs Intune Admin permissions or, when delegated, the Run remediation permission assigned to the Admin account. Also, the Intune Management Extension needs to be installed on the device. This is done automatically when a device has a Win32 App, PowerShell Platform Script, or Remediation assigned to it.
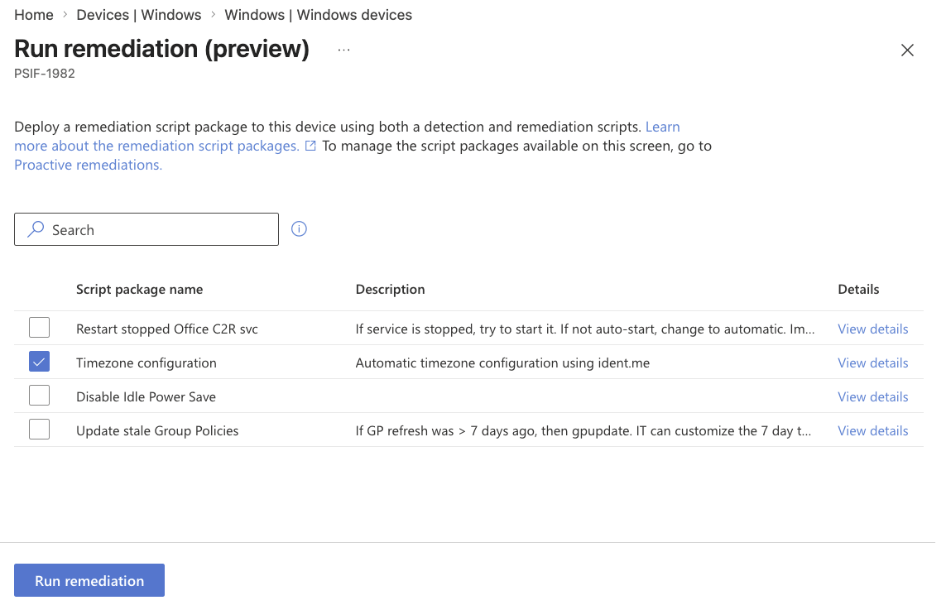
In the example below, I navigated to the PSIF-1982 device and selected Run remediation (preview) from the pull-down menu bar by selecting the three dots.
After selecting the Run remediation (preview) option, it will show all the available Remediations, including non-assigned remediations.
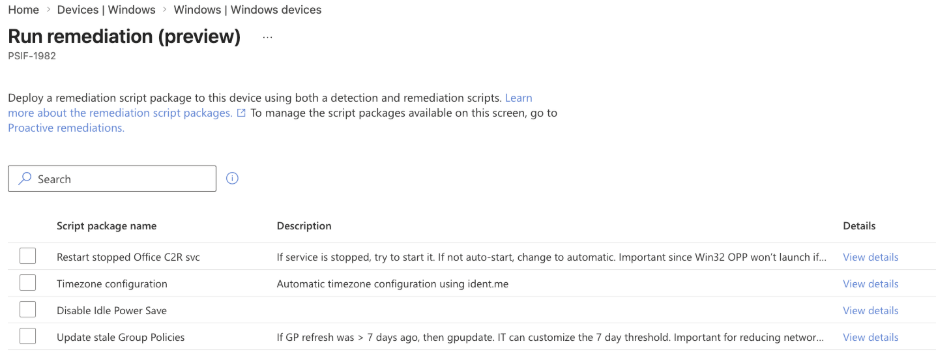
You can select only one Remediation. In this example, I selected the ‘Time zone configuration’ to be run manually on the PSIF-1982 device. (Don’t run too many manual Remediations in a short period of time. Let one finish before running another.
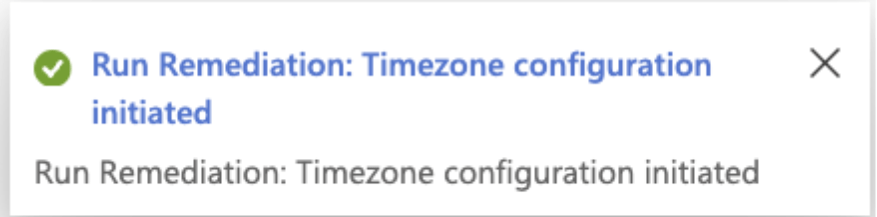
After selecting Run remediation, a notification will appear in the menu bar above:
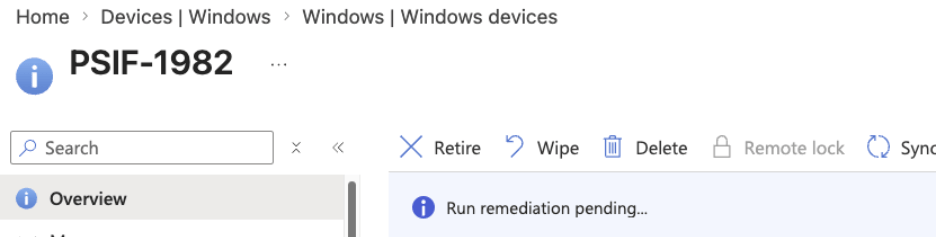
You will also see a Run remediation pending notification in the Overview page of the device:
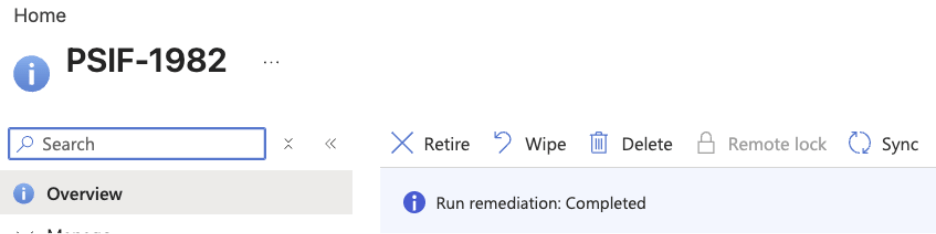
After a while, refresh the browser tab. It will show “Run Remediation: Completed.” This will remain visible until another notification overrides it.
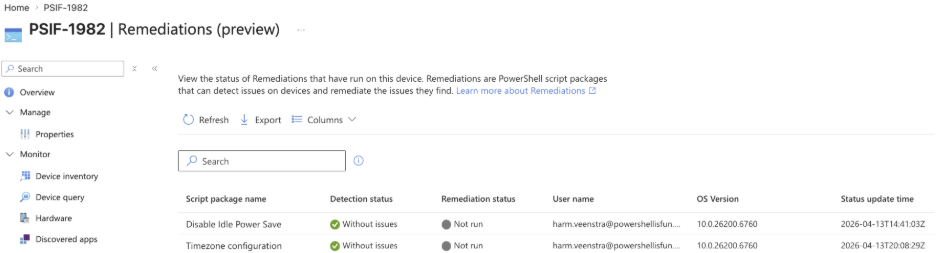
In the device monitor pane below, in the Remediations (preview) section, you can see that the Time zone Configuration Remediation was last updated just now and didn’t find any issues in this example.
Wrapping up
These are the PowerShell script options you can deploy, run, and monitor status in Intune. In an upcoming blog, we will dive into using PowerShell scripts for Win32 App Deployment.