


You might have noticed, while creating a context or access policy in Recast’s application delivery solution, Application Workspace, there is an option to use either a filter or role, or an option to use a script and find yourself asking: “What is this script option?” Filters or roles are normally the go-to method to configure a context or access policy, given they are easiest with their graphical nature within Application Workspace. Scripts are simply an alternative to using them. While using scripting can be a little more complicated, it is also more granular in nature when it comes to what someone can see or access, and I will attempt to show that, along with the benefits of it, in this article.
Before we begin, it’s important to understand that Application Workspace does everything through OData, and the script I will be demonstrating is comprised from an OData $filter object and is written as such. The trick is to figure out what each object is doing and how to form the $filter for the script. Now, I haven’t written many OData filters before and really had no idea what I was looking for or how to do it. So, I went and did some digging and although I am not an expert in any way, I am going to show you how you can do it in Application Workspace. I also want to caution you. Please be very specific when assigning access policies to users, including using scripts, because if you make a bad assignment, you may end up locking yourself out of your environment!
To start things off, I will focus solely on Access Policies. However, contexts are a similar process, and I will touch on that towards the end. We will also be working off the following premise: we want a user to be able to entitle certain packages to users, user collections, or contexts and nothing else. We’ll also say that those packages are all named with the same prefix as “WIN”. I know that there are other things we would want a user to be able to do, but for the purposes of this article, we are going to focus on that aspect.
Access Policies
Role-based access controls are configured as Access Policies in Application Workspace. They define what someone can access and with what level of access. Normally, you would configure these policies leveraging a filter or role type as those types are easier to visually identify and setup, but there are times you may need or want to get more granular than what a role type will give you. You also can’t configure a group of users to only be able to see or access certain packages with a role type of Access Policy, but you can with a script, it just might be more complex.
To begin, you must recognize that the default rule is a deny everything rule, which means if you don’t specify any exceptions to that rule, there is no access. Our goal with the script is to put in those exceptions as we want to grant access to certain resources. To do that, we must first identify what resources are needed for the user to perform the desired function.
Here’s what I’ve found to be the number one trick to make this easier: create a role type access policy for the bulk of the permissions you want to set. Yes, I know that sounds counter intuitive but quickly making a role-type policy also automatically creates a script for us that we can utilize to save time and achieve our goal.
In your role type Access Policy, we need to set the following permissions:
- View contexts – needed to be able to entitle to contexts
- View packages – see all packages
- Modify packages – modify packages, specifically to create entitlements
- View users – needed to be able to entitle to users
- View user collections – needed to be able to entitle to user collections
- Web access – needed so that they can log into the web console
Once we have that policy created, the second part of the trick is to use the Liquit PowerShell module to obtain that automatically created script that makes up our Access Policy. Here is a PowerShell script that I use to do that:
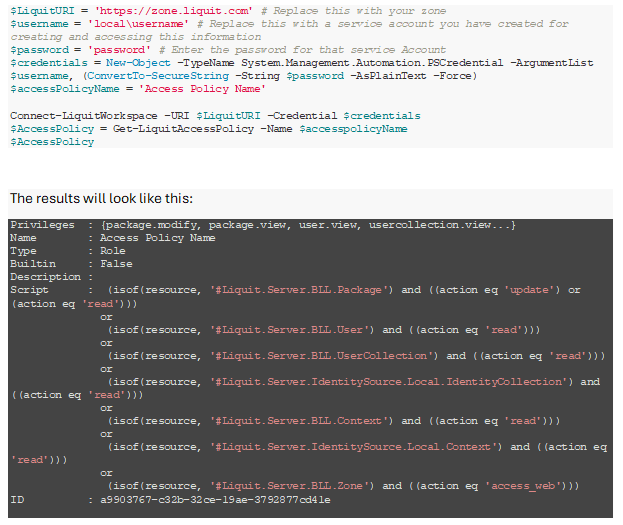
From the results, you’ll see a script was created resulting from the filters you put in. This is what we need to take to start our own script, so copy this and paste into your favorite code/text editor.
Let’s break down the resulting lines in the script we receive. Here is the first line:
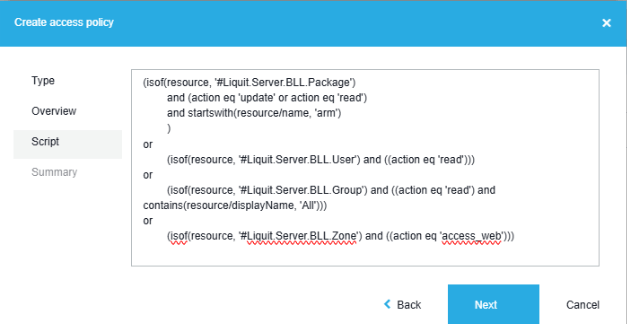
isof(resource, ‘#Liquit.Server.BLL.Package) and ((action eq ‘update’) or (action eq ‘read’)) This line specifies the “resource” to grant access to, in this case the “#Liquit.Server.BLL.Package” which is just the packages entity. The next section defines what “actions” are allowed to be performed. In this case, “update” and “read” allow the user to read and update all packages.
What we see overall is that each line is just specifying a new permission and then combines them with an “or” statement. And since all the rest of the permissions we set with the filter are read-only, this is the only one we will need to add additional conditions to, to meet our goal.
The next step is to now filter down the list of packages to just those that start with “WIN”. To do this, we need to identify the right property we want to add the filter to. Now, since we are putting everything in “Packages” into (in-essence) a “variable” called “resources”, we can use that variable in our next section of filter we need to add. So, in this case, we want to add the following to this line of script:
startswith(resource/name, ‘WIN’) So, our entire line for “Packages” now becomes:
(isof(resource, '#Liquit.Server.BLL.Package') and (action eq 'update' or action eq 'read') and startswith(resource/name, 'WIN')) Now that we have all the syntax we need, we can create a script type Access Policy:
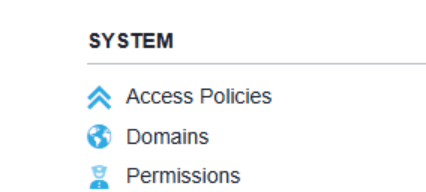
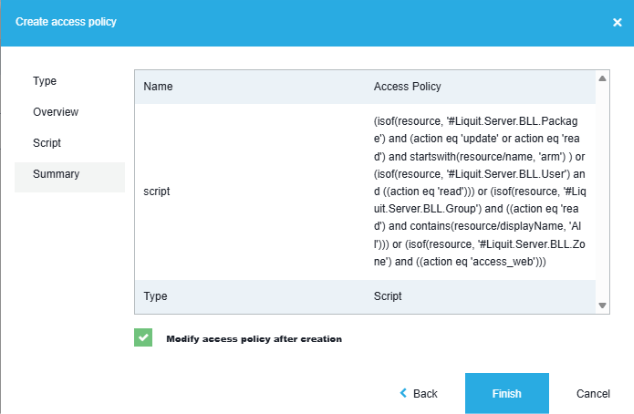
- Click on Access Policies
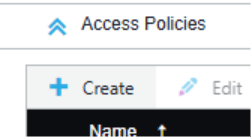
- Click Create
- Choose Script and click Next

- Give it a name and description (optional) and click Next
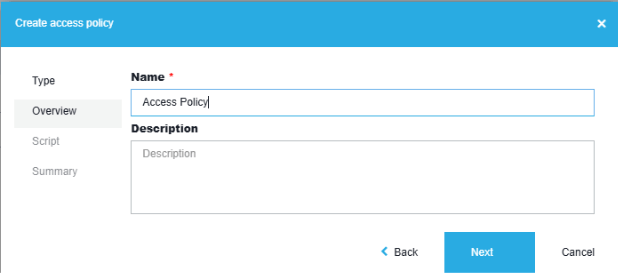
- Copy and paste your new script into the script pane and click Next
- Click Finish
- Assign to a test user to test the access and login to the workspace in a browser to test
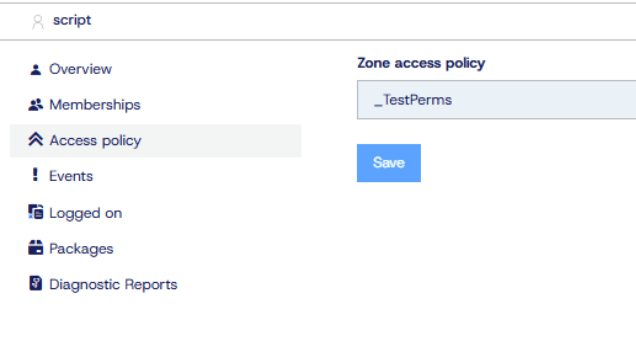
- Make any adjustments that may be needed and test again
Now, I only showed you how to limit what packages a user can see. Another idea might be that you limit what identities a user can assign a package to. This is Just a further way you can use the Script feature to control your environment.
I’ve gone ahead and made this chart that shows you all the resources you can assign as well as the correlated actions. I got this by just using a role-type access policy and just selecting everything and then using the trick above to see the Script.
Contexts
Contexts work the same way as Access Policies, just with a different way of specifying the information. You can use a process like the one we used above to get a starting point, by creating a context through a filter within Application Workspace, then use the PowerShell module to extract that script. Now, I’m not going to get into all of the settings you can set, but I went and created a Context with all the different options that are available (although the comparison operators and result values may be different from your environment). Here is an example if you set everything:
(('AzureAD\572f5153-bdea-4318-9f5a-714fbc255b84' in identities) and ((insubnet(request/forwarded,'192.168.1.0','255.255.255.255')) or (insubnet(request/source,'192.168.1.0','255.255.255.255')) or (insubnet(device/network/ip,'192.168.1.0','255.255.255.255')) or (device/network/additionalNetworks/any(n:insubnet(n/ip,'192.168.1.0','255.255.255.255'))) or (insubnet(localSession/ip,'192.168.1.0','255.255.255.255'))) and (domain/virtualHost eq 'demo-17') and (device ne null) and (device/agent/type eq 'Universal') and (device/agent/version eq '4.2.0.2142.1') and ('LOCAL\20ebb05b-889b-b8db-0406-37586968314b' in identities) and (tolower(device/network/fqdn) eq 'demo-17.demo.recastsoftware.com') and (tolower(device/name) eq 'demo-17') and (tolower(device/hardware/manufacturer) eq 'dell') and (tolower(device/hardware/model) eq 'latitude 5570') and ('LOCAL\eb4587cf-e06d-1fce-7583-377d1e3f249a' in identities) and (localSession/language eq 'en-US') and (localSession/timeZone eq 'UTC') and (localSession/timeZoneOffset eq '120') and (((device/platform ne null and device/platform/id eq 'Windows') or (device/platform eq null and request/platform eq 'Windows'))) and (device/platform/type eq 'Workstation') and (device/platform/architecture eq 'x86') and ((device/platform/id eq 'Windows' and device/platform/type eq 'Workstation' and compareversionrange(device/platform/version,'10.0.0-10.0.21999') eq 0)) and (device/platform/language eq 'en-US') and (device/platform/timeZone eq 'UTC') and (device/platform/timeZoneOffset eq '210') and (request/headers/any(d:tolower(d/name) eq 'john.liquit.com') eq true) and (request/headers/any(d:tolower(d/name) eq 'zone' and tolower(d/value) eq 'john.yoakum.com')) and (tolower(user/city) eq 'anchorage') and (tolower(user/company) eq 'recast software') and (tolower(user/country) eq 'usa') and (tolower(user/department) eq 'it') and (tolower(user/description) eq 'my account') and (tolower(user/displayName) eq 'john yoakum') and (tolower(user/fax) eq '555-555-5555') and (tolower(user/jobTitle) eq 'awesome person') and (tolower(user/mail) eq '[email protected]') and (tolower(user/mobile) eq '555-555-5555') and (tolower(user/name) eq 'jyoakum') and (tolower(user/postalCode) eq '34471') and (tolower(user/street) eq '510 se 17th pl') and (tolower(user/telephone) eq '555-555-5555')) I know it looks crazy, but I know you can do it. My recommendation is just to use the filter type of Context.
Summary
As you can tell, Application Workspace Script features can be cumbersome, but it can take your control to the next level. It takes time to plan your desired controls but try going in with a defined set of rules you want to achieve and give it a shot. I hope this has given you a better understanding of the Script feature and how you can have more stringent control within your environment.
Resources: application delivery solutions
Application Workspace Access Policy Documentation
Application Workspace Context Documentation