


Did you know that you can remotely browse the C: drive and registry for Entra-joined devices leveraging the Right Click Tools Intune Browser Extension? Well, the short answer is yes, you can with a few simple system changes.
Why would you want to connect to C$ or even the registry?
For C$, you might use this for troubleshooting without having to interrupt the end user. You can review logs, push scripts, or drop configuration files as needed.
What about Remote Registry? This gives you direct remote access to the registry on the target device, allowing you to check or fix client health and enable features, all without logging the user off so they can remain productive.
First, I’ll cover the high-level prerequisites we must have in place for this to work. Then, I’ll create a step-by-step guide to follow. 3
Prerequisites
- Administrator permissions on the target device
- DNS resolution in place
- Direct network connectivity between devices
- Firewall rules must be in place for file sharing and remote registry
- PKU2U auth enabled (on by default for Entra-Joined Windows 11 devices)
Network connectivity
First, we want to make sure the devices are on the same network (LAN, VPN, etc.) and confirm that Device A can reach Device B.
Open Command Prompt, and run Ping <Device Name>
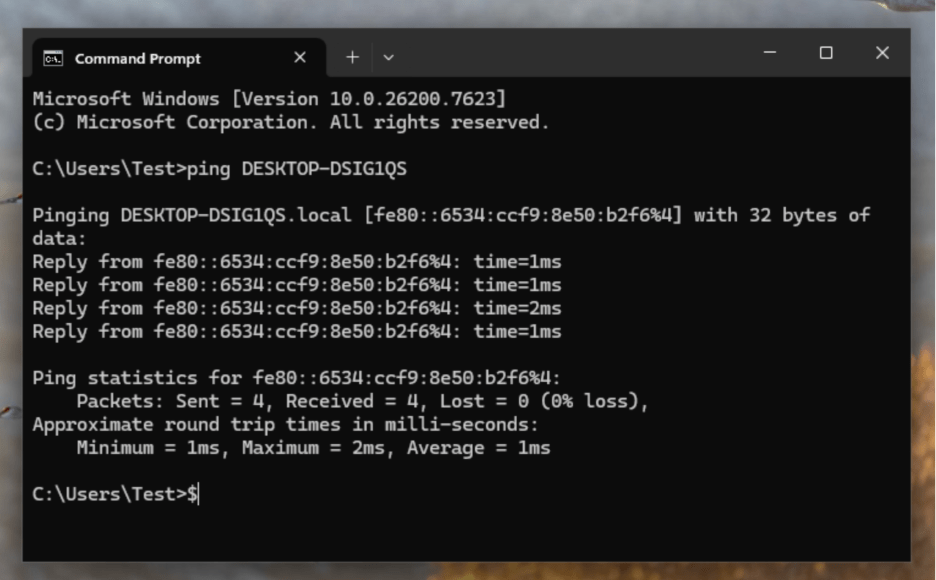
The image above confirms that you can connect to the device and successfully resolve its name through DNS.
Enable firewall rules for file sharing
Next, we are going to open the required firewall rules so that Device A can reach Device B’s C$ admin share over TCP 445.
We can enable this in a few different ways. I’m going to show you how to enable it with a PowerShell script first, then using Microsoft Intune.
Option 1: Open PowerShell as an administrator and run this command on the target device.
Note: This option should only be set on domain or private networks.
Set-NetFirewallRule -DisplayGroup “File and Printer Sharing” -Enabled True -Profile Domain, Private
Set-NetFirewallRule -Name “FPS-SMB-In-TCP” -Enabled True -Profile Domain, Private

Option 2: Intune proactive remediation
Part 1: Create a detection script (checks if firewall rules are already scoped correctly).
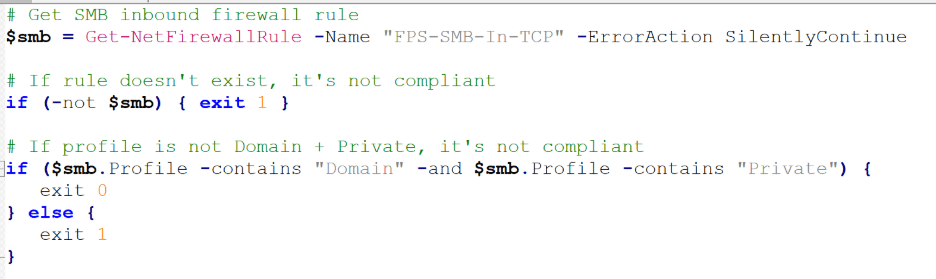
Part 2: Create a remediation script (enforces the rules exactly how you want them).

Part 3: Deploy with Intune
Go to Microsoft Intune > Devices > Scripts and remediations > Create Remediations
Name your custom script; Enable SMB (445)
Upload the detection and remediation scripts from above (Part 1 & Part 2)
Run script using logged on credentials; No
Enforce Script Signature Check; No
Run script in 64-bit PowerShell; No
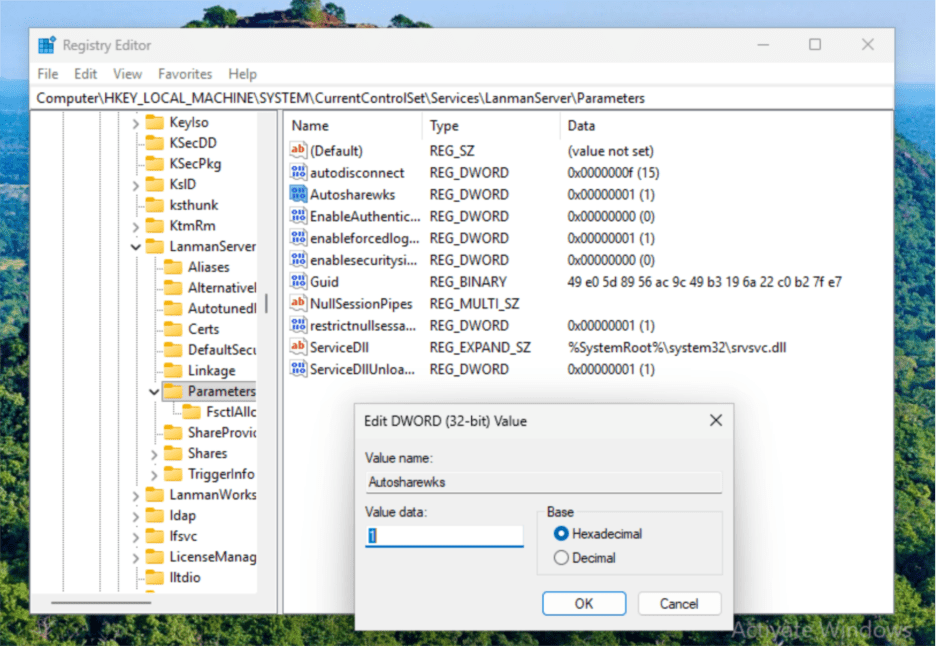
Admin shares enabled
This step ensures that the operating system is actually publishing the C$ admin share. To confirm if this is already enabled, check the registry value to confirm Autosharewks is set to 1.
HKLM\SYSTEM\CurrentControlSet\Services\LanmanServer\Parameters\AutoShareWks
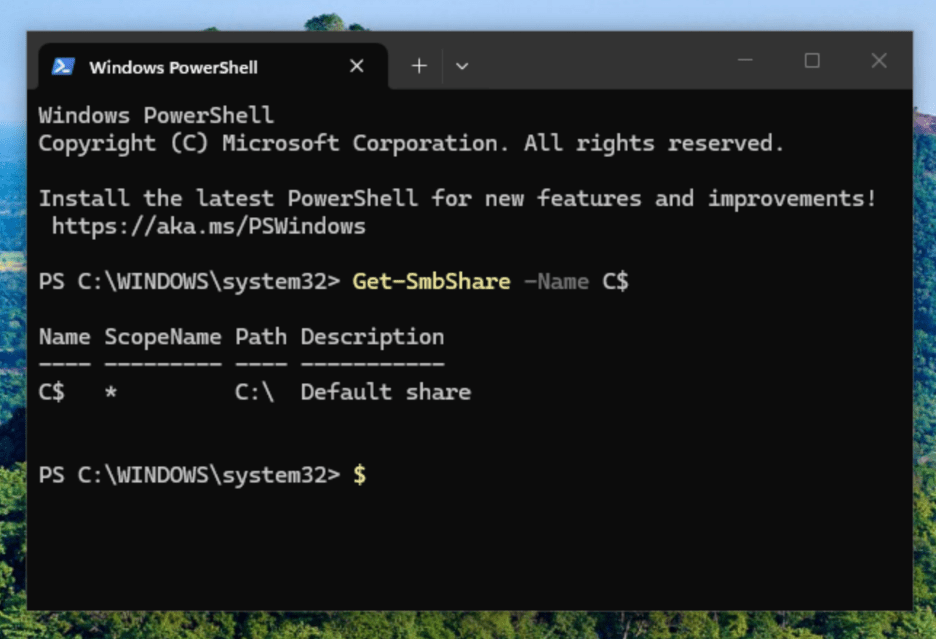
You can also verify by running the following in PowerShell: Get-SmbShare –Name C$
Local administrator rights
Confirm that the connecting user is a Local Administrator on Device B (Remote Device)
Method A: Adding users manually (requires local administrator rights)
- Open Command Prompt (run as administrator)
- Type net localgroup “administrators” AzureAD\<userUPN> /add
Ex. Net localgroup “administrators” AzureAD\[email protected] /add
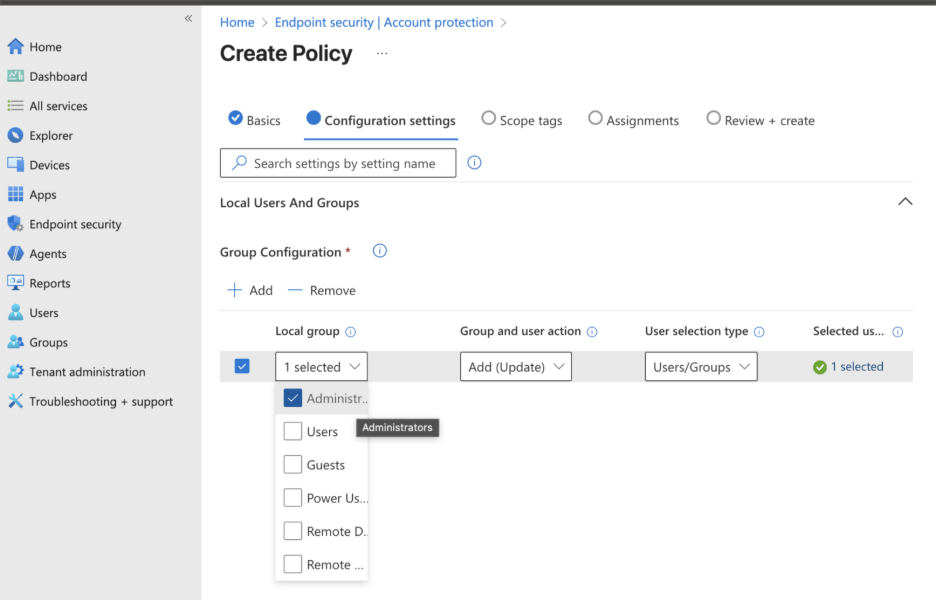
Method B: Adding users/groups to Administrators role in Microsoft Intune
- Create policy in Microsoft Intune, Endpoint Security > Account Protection > Local User group membership
Add your IT admin group or end users to: Administrators
Make sure PKU2U is Enabled
Enable via Microsoft Intune
Go to Devices > Windows > Configuration > +Create > Settings Catalog > under the Browse by category; select Local Policies Security Options > select Network Security Allow PKU2U Authentication Request > Set to Allow
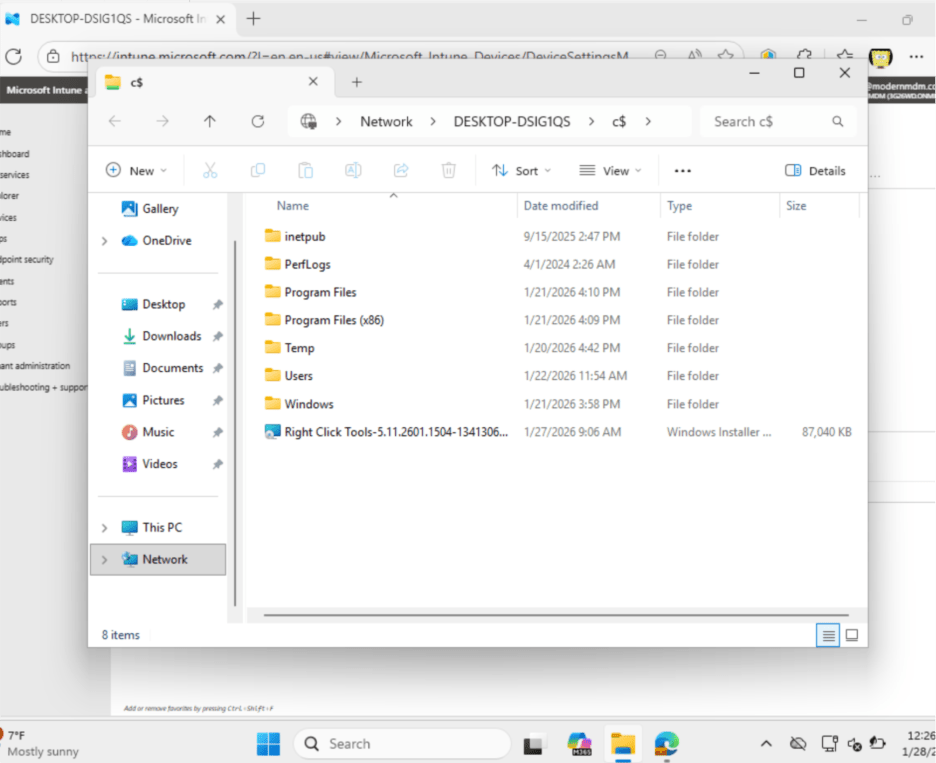
IT Admin Experience: Once we have all those options enabled and configured, let’s test the C$ function in Microsoft Intune.
Remote Registry on Entra Devices
To use Remote Registry on Entra devices with the Right Click Tools Browser Extension, simply enable the firewall rule and set the Remote Registry service to Automatic, then start it.
Enable the Remote Registry Service with PowerShell (Local or Remote)

To keep Remote Registry running when it’s idle, set DisabledIdleStop to 1 in the appropriate settings.
HKEY_LOCAL_MACHINE\SOFTWARE\Microsoft\Windows NT\CurrentVersion\RemoteRegistry
- DisableIdleStop = 1

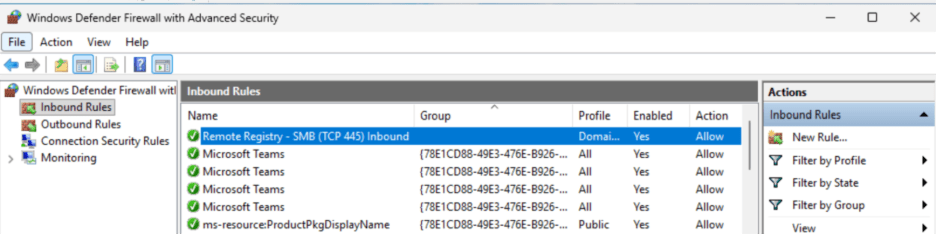
Set up Firewall Rule for Remote Registry
This rule is required to run on the target devices. This is because Remote Registry requires port 445 as it communicates over SMB-based named pipes, and SMB uses TCP 445 for all remote registry access.
Create a custom inbound firewall rule to open port 445.
Open Windows Defender Firewall > Create New Inbound Rule
Configure the Rule
Rule Type: Select Port
Protocol: Chose TCP
Specific Local Ports: 445
Action: Allow the connection
When does rule apply: Domain, Private
Name: Remote Registry – SMB (TCP 445) Inbound
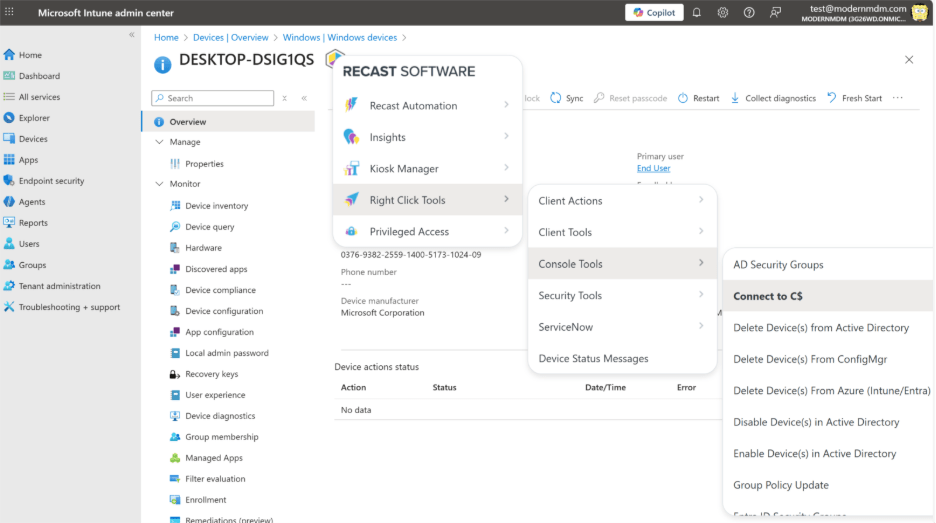
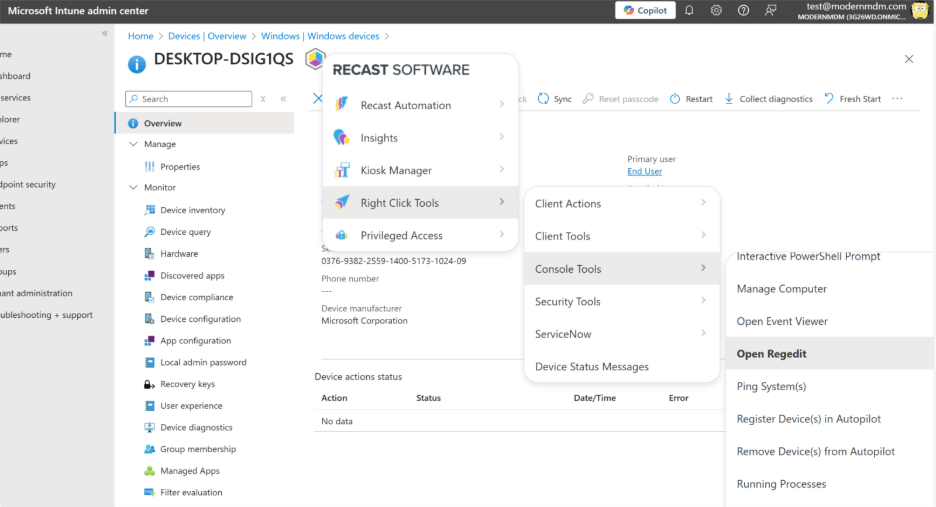
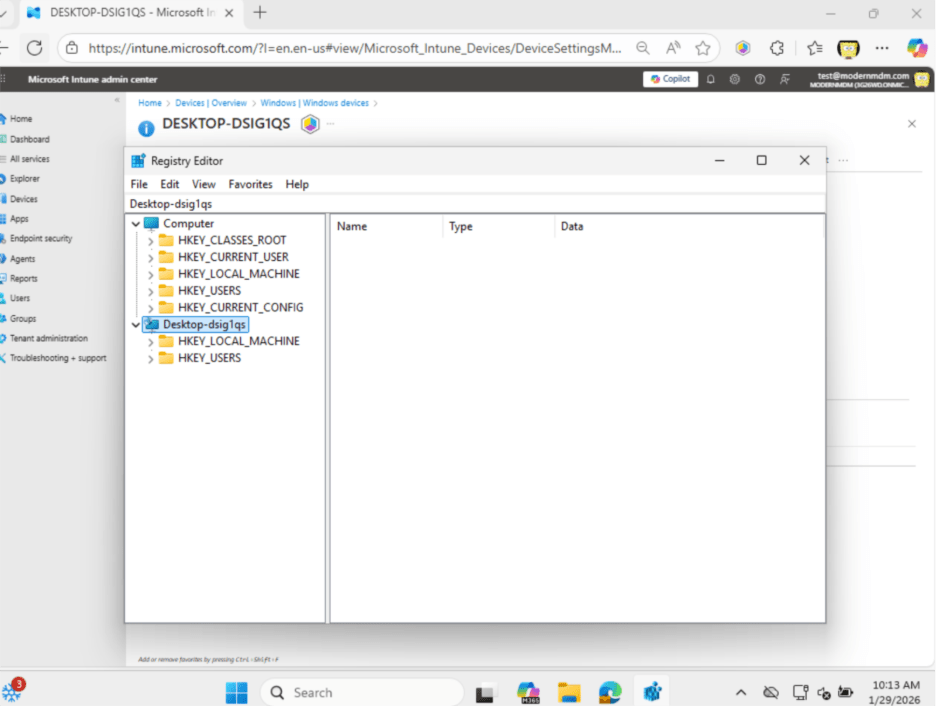
IT Admin Experience: Using Remote Registry with Right Click Tools Intune Browser Extension
Conclusion
After meeting the prerequisites above and following the steps, you should now be able to access File Sharing for Entra Devices. This gives your IT administrators access to C: on your end users’ devices for troubleshooting logs, or access to Remote Registry to make necessary changes there. These are functions that can be amplified with the ability to leverage Recast Right Click Tools to further explore the possibilities.