


Now that we have the Recast Management Server installed, it’s time to set it up.
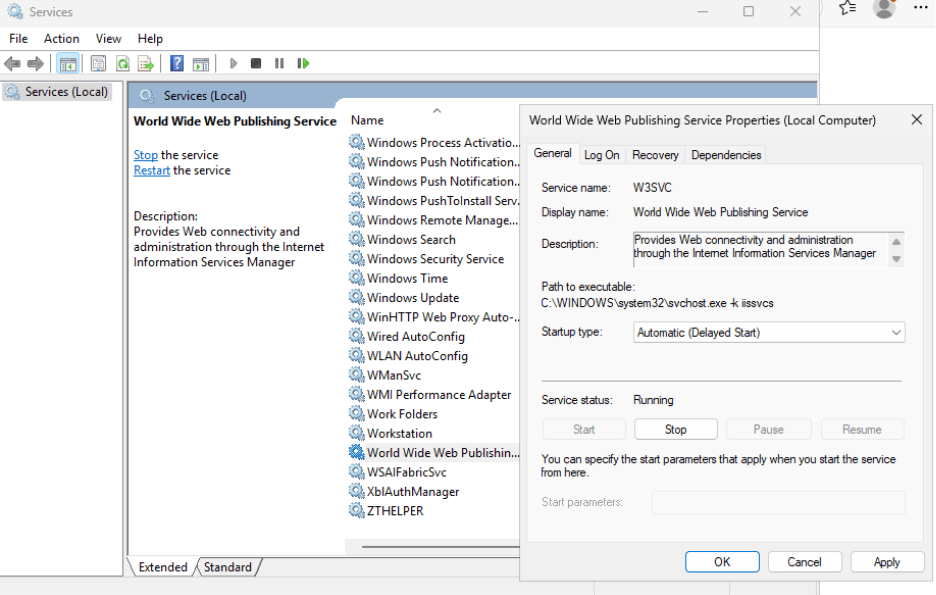
The first thing we are going to do is go to Services on the RMS and change the World Wide Web Publishing service startup type to Automatic (Delayed Start). This will ensure that when the RMS reboots, it will start after all the prerequisite services. If you see a 500.30 error after reboot, restarting the site in the IIS Manager will fix this problem. Changing the WWW Publishing Service to Automatic (Delayed Start) will stop it from occurring in the future.
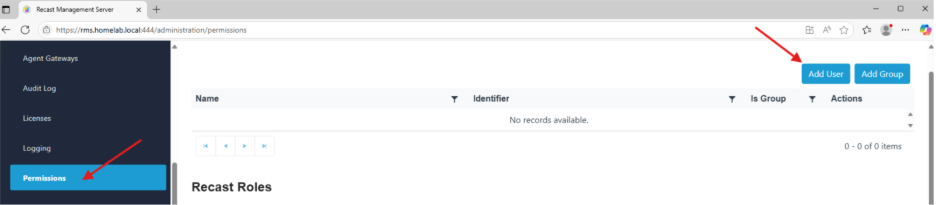
- The first thing we are going to do is add our account into the Permissions section of the RMS. Click Permissions on the left side under Administration. Once in that window, click Add User at the top right.
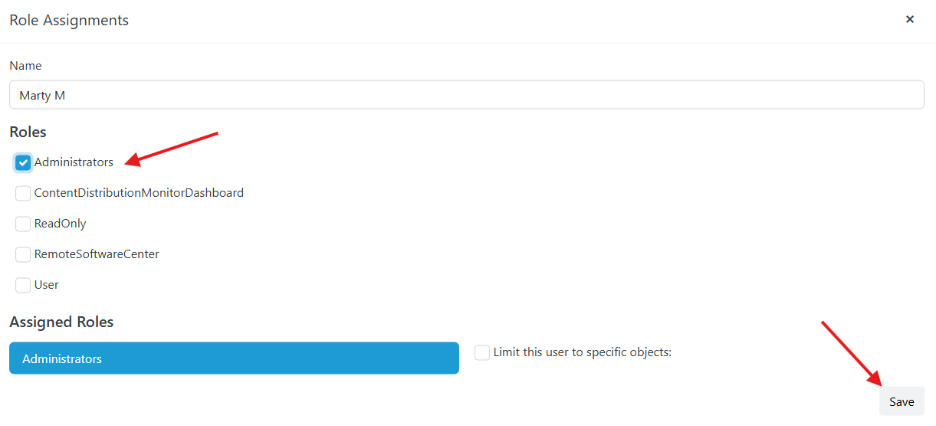
- After you’ve added your user account, we also need to add a role. Click on the pencil icon to the right of your username to add the Administrators role.
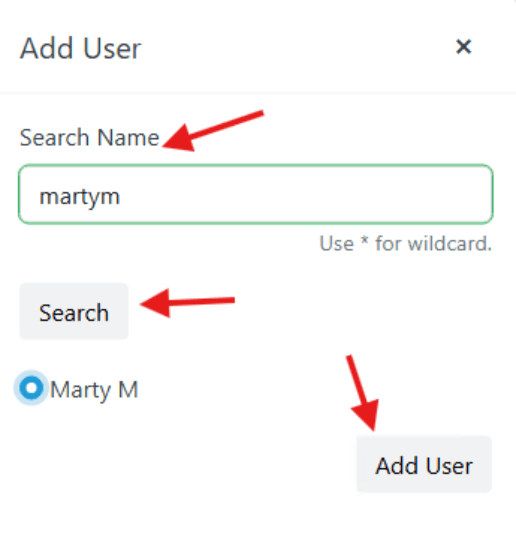
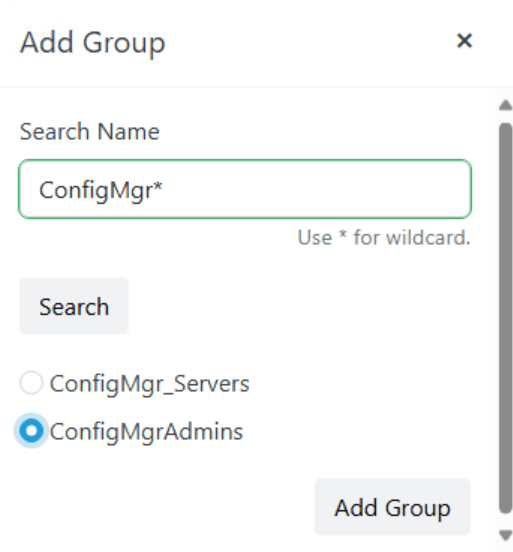
- Add any other users or groups that you want to allow to use the Recast Management Server. You can also use the wildcard character “*” when searching.
- After you have given yourself Admin permissions, let’s add some important information to the Recast Management Server. Following installation, you may have service connections added into your RMS, but more likely you will need to add them yourself.
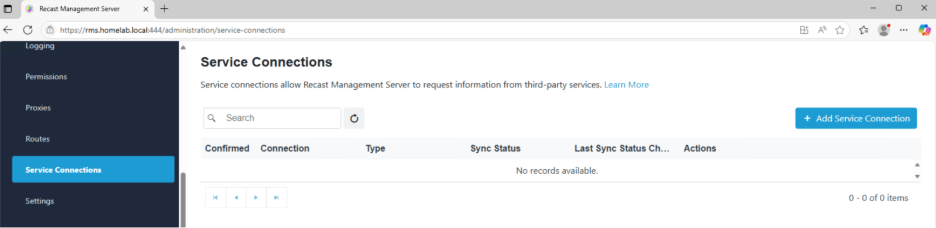
- On the left-hand side of the interface, under Administration click the Service Connection section.
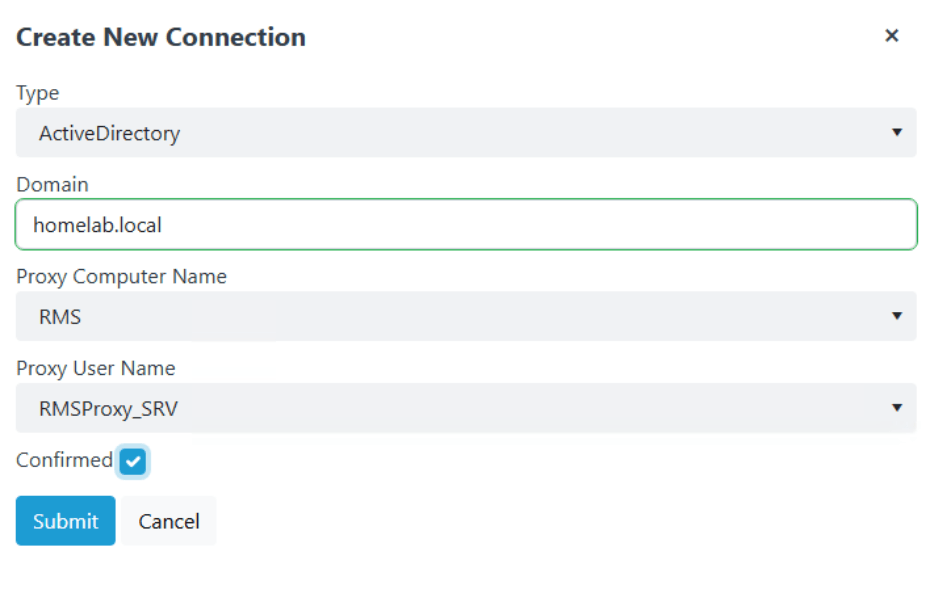
- Click Add Service Connection to add connections for Active Directory, Configuration Manager, and if you are so inclined, EntraID (AzureAD).
- The Proxy Computer should be the RMS. A proxy was installed there when you installed the server. The Proxy Service Account should be the service account you configured when installing the RMS.
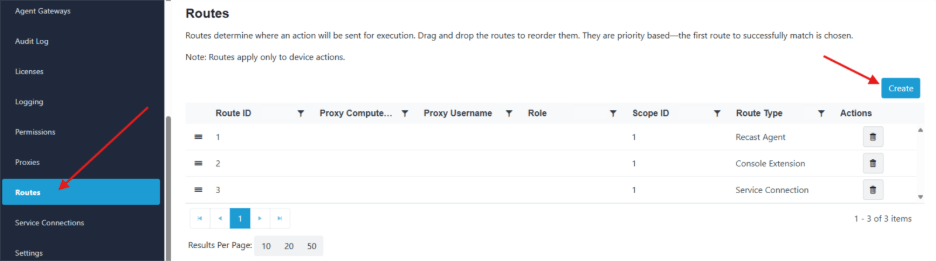
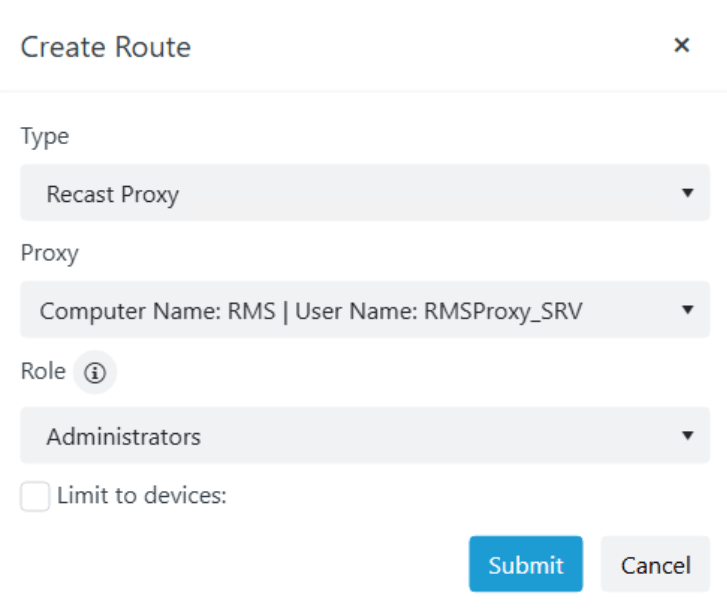
- Next let’s set up a proxy route so we can use the Recast proxy when needed. To do this, go to Routes > Create on the right-hand side. In this section the Type should be Recast Proxy. The Proxy should be the computer where the proxy is installed with the username you selected when installing the RMS. Role should be Administrators so the proxy can run all actions needed. This is where you add additional proxy routes if you have a more complex environment than the one we are building here. The route will be created at the bottom of the list. For now, leave it there. We’ll move it later.
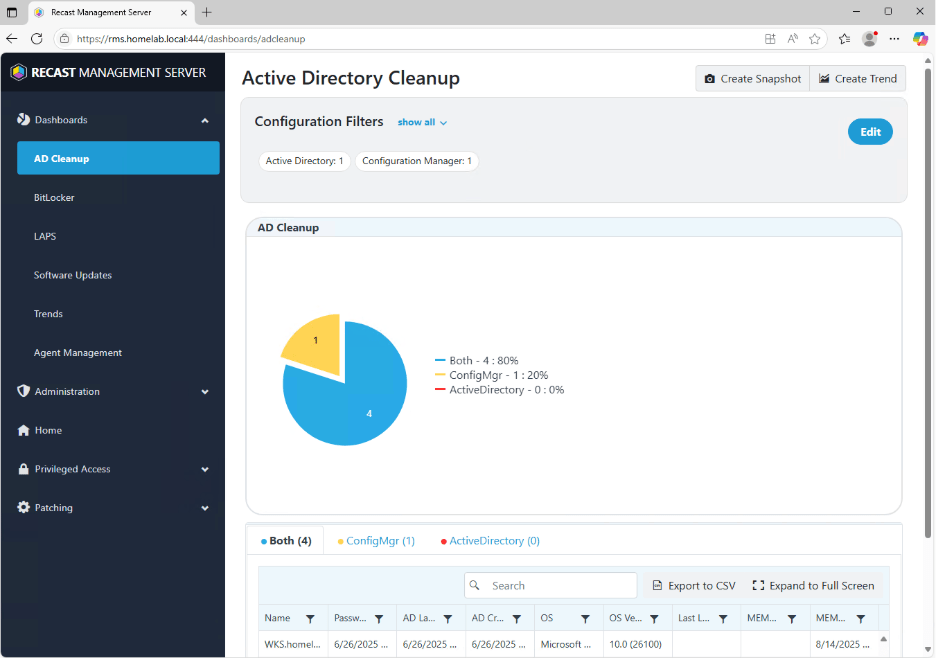
- To make sure everything is working correctly, let’s try using one of the dashboards. The Active Directory Cleanup dashboard is a good one to start with. Click the Select Service Connections button and select an OU in AD and a collection in ConfigMgr that should have roughly the same devices. When you click Save and Run Scan, you should get some data. You can examine what the data means later. As long as you are getting data, the proxy is working correctly.
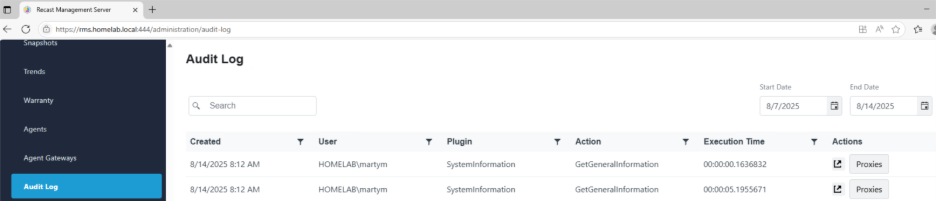
- To make sure your Right Click Tools are really connected to the RMS, let’s go into the ConfigMgr console. Select a device and run one of the Right Click Tools. Check to make sure it works correctly, then look at the audit log in the Recast Management Server. You should see that your username just ran an action. If you like, you can click on the arrow to the right to see the results of your action, or you can click on the Proxies button to see how the action was routed.
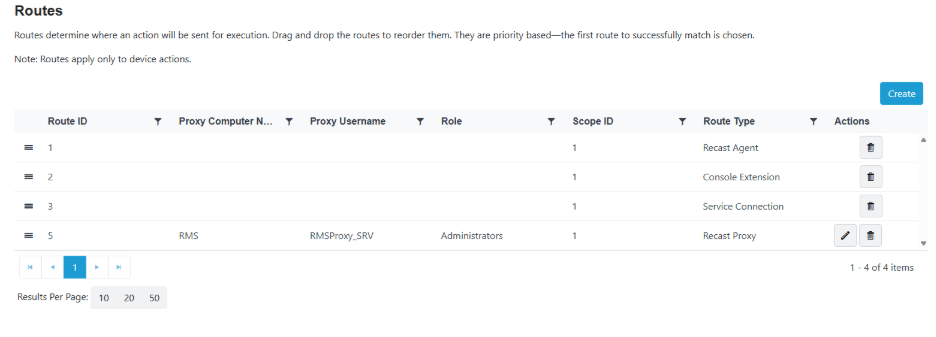
- Speaking of actions being routed, let’s go back to routes and talk a little bit about how this works in the RMS. This table specifically determines how actions that are run in Right Click Tools will be sent to the target device. The RMS will start at the route at the top and will run the action on that route if possible.
- Based on the way our routes are configured above, the action starts at the Recast Agent route and checks to see if there is an agent on the target device connected to the RMS. If it does not have a connected Agent, it will skip this route and drop to the next one.
- In this case, the console extension (Right Click Tools) route is next. This can be considered a catch-all. If an action hits this route, it will run from the console where the user is running Right Click Tools with the permissions of the user who is logged into the Recast Management Server.
- If you would like to use the proxy service account to run the action in your environment, you just need to grab the three lines on the left side of the Recast proxy route and put them directly under the Recast Agent route. That way it will try to use Recast Agent if connected and the proxy account if not. If you run the test action again, you will see that the proxy that runs the account is the way the action ran.
- Finally, check under Agent Gateways to make sure this is connected to the RMS. Next, we are going to install a Recast Agent, which connects to the RMS through the Agent Gateway. For now, I am going to install the agent on the RMS, but you can do this on any device in your homelab environment.
Recast Agent Installation
Double click on the installer.
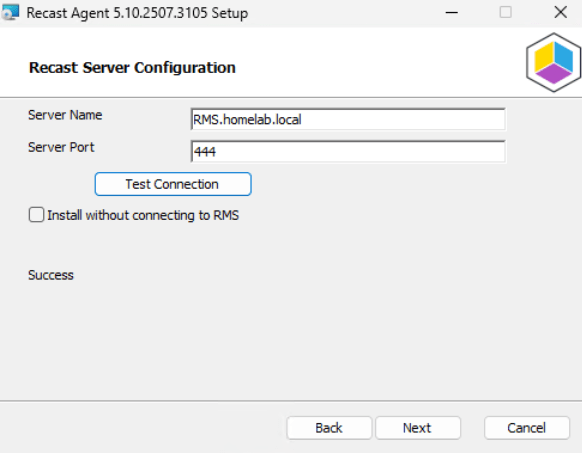
- It will ask for the server name. Enter the RMS name and port and click Test Connection.
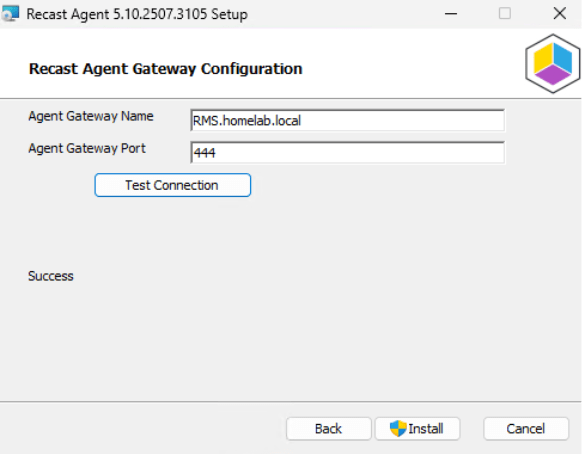
- The next window will ask for the Agent Gateway Name. In our scenario, this is the same as our RMS. If you install a separate agent gateway, here is where you would put that name. Click Install.
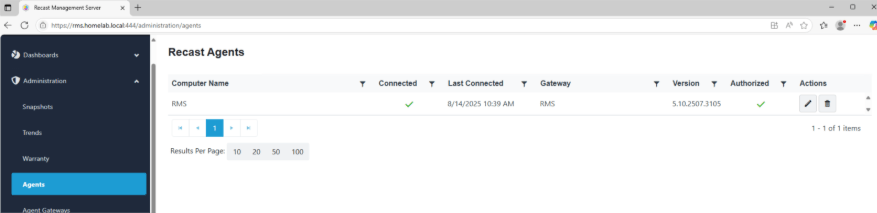
- When it is done, go to Agents in the Recast Management Server. You should see the computer you installed the agent on showing up as Connected.
Next, let’s take a little side quest and configure the Recast Browser Extension. This will enable you to run Right Click Tools actions against devices that are in Intune or directly from the Recast Management Server.
Next steps
Make your homelab more powerful. Download our free tools to help you automate, troubleshoot, and validate configurations in your test environment.
The Homelab Series
Step 1: Creating a Domain Controller with DNS
Step 2: Adding a Certificate Authority
Step 3: Setting up a Gateway VM to Be Used as a Virtual Router (Optional)
Step 4: Configuration Manager Server Prerequisites
Step 5: Settings for Active Directory and Group Policy
Step 6: Installing SQL For ConfigMgr
Step 8: ConfigMgr Basic Settings
Step 9: Configuration Manager Collections and Application Deployments
Step 10: Installing SQL Server Reporting Services
Step 11: Cloud Management Gateway (CMG) Overview
Step 12: Installing the Recast Management Server and Right Click Tools (Optional Step)
Step 13: Recast Management Server (RMS) Configuration (Optional Step)
Step 13.5: Installing and Using the Right Click Tools Browser Extension
Step 14: Installing Right Click Tools Insights – ConfigMgr Reporting
Step 15: Configuring Right Click Tools Patching
Step 16: Setting up Right Click Tools Privileged Access