


Office 365 Deployment Series with ConfigMgr
Post 5 – Office Updates and Automatic Deployment Rules (ADR)
First, let me start by sharing another blog. This is the best blog post I’ve read to better understand the update behavior when deploying office updates using ConfigMgr. [Microsoft Blog]
And this is the second-best thing I’ve read which goes into great detail. [SystemCenterDudes Blog].
How to Create an ADR
In this post, I’m going to do a simple “How-to” on creating an ADR and deploying it to your devices. I’m not going to go into the depth that those other 2 posts do.. because I’m not a huge fan of reinventing the wheel. I’ll have a little overlap, but will keep it simple.
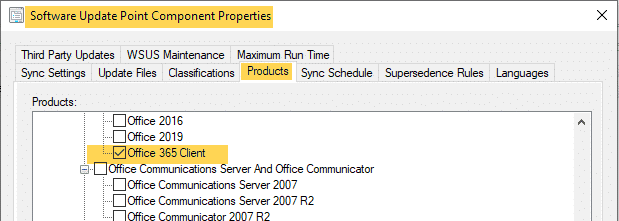
Software Update Point Component Properties
Administration > Site Configuration > Sites. Home tab, in the Settings group, click Configure Site Components, and then click Software Update Point. [MS Docs]
Ok, now that we have that done, the office 365 updates will start becoming available. Lets create the ADR (you might need to wait a bit for everything to sync).
Automatic Deployment Rule (ADR)
Ok, no one wants to manage patches, and ADRs make it all happen magically. Office is simple with Office 365 – there are only a few patches that will be available to your machines, so let’s take a look. [MS Docs – ADR]
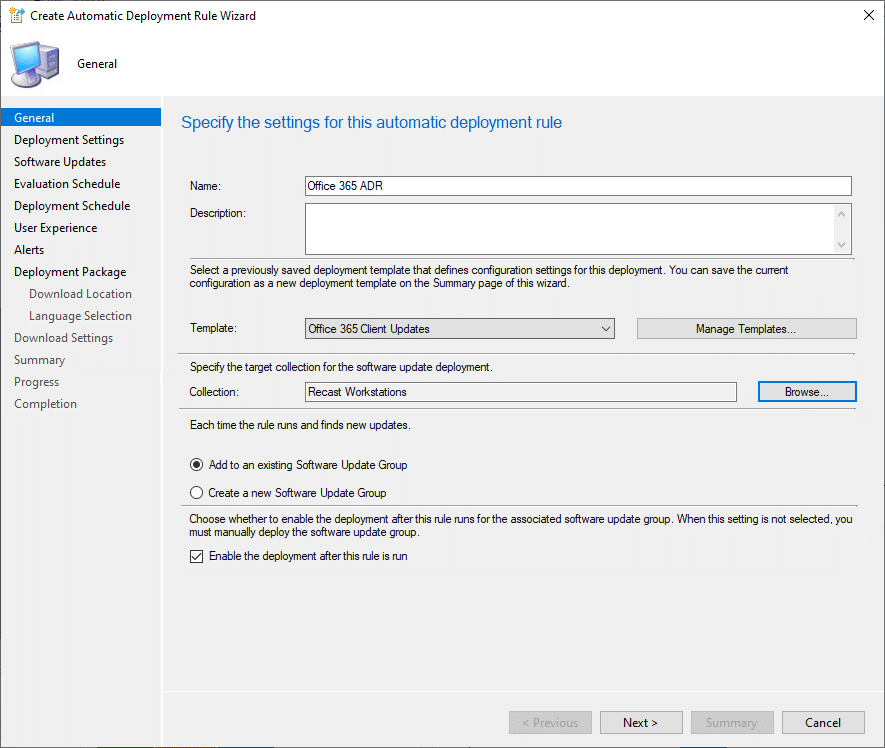
- Template: Office 365
- Collection: Recast Workstation. This collection contains ALL workstations.
- Typically most machines will have Office installed, so why create a query based collection to deploy to? There is no point. The updates will be available to all workstations and install on the ones that are applicable. No point in waiting cycles on collection evaluations. Unlike the old days, when Office and Windows had HUNDREDS of patches, there are only a few now, so it doesn’t hurt to make them all available and allow software evals to figure out what it needs. I go into more details about the Collections and deployments later.
- After you’ve created the ADR, you can add additional Deployments for your Test Collections. Set different Available & Required Times to meet your needs.
- Add to existing Software Update Group. I personally just like to keep my Software Update Groups clean. I have no requirements to create a new group each time.
- Enable the deployment after this rule is run. I personally am not worried about the updates going out on the schedule I’ve setup in the deployment. If you have additional “reviews” you require, you might not check that box.
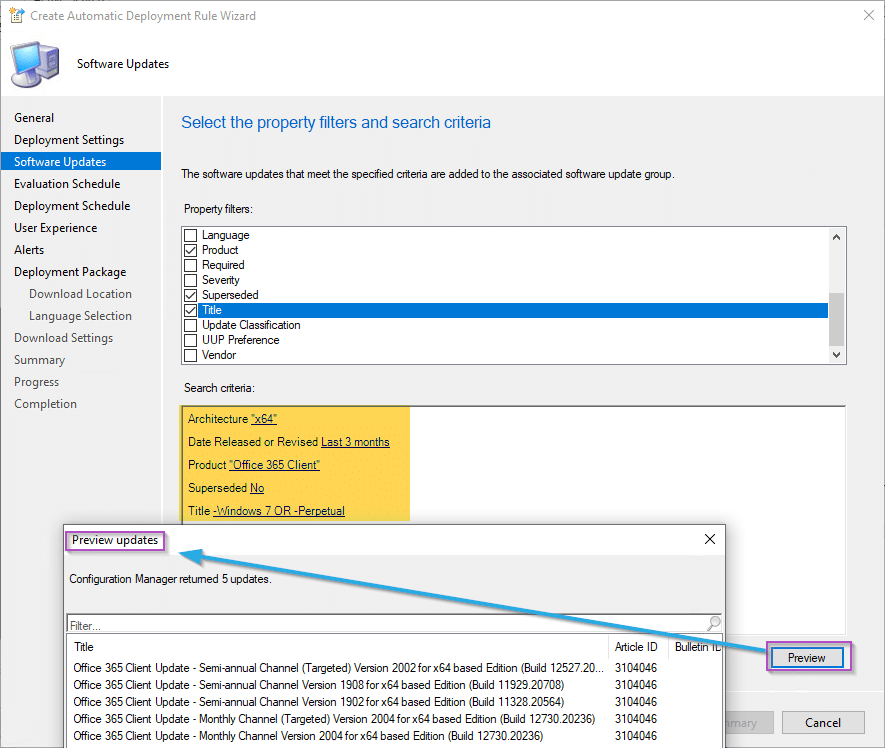
I then like to limit the updates I deploy down to this mix. If you have other flavors, you’ll need to change to accommodate. You can see I only have 5 updates to deal with, and I don’t mind if they are made available to all workstations, as it doesn’t bloat the policy like hundreds of updates used to previously.
- Arch = x64 – I don’t deploy and 32bit office
- Date released = Last 3 months. Covers my basis for SAC which doesn’t release very often
- Product = “Office 365 Client”
- Superseded = No
- Title = -Windows 7 & -Perpetual (This removes a few updates that don’t apply to my environment either)
Let’s take a look a the preview without those:

So while 24 still isn’t bad, by adding a couple more items to criteria to better match my environment, it really keeps things clean.

I pick the schedule to evaluate weekly on Wednesday night. Works good for me. I don’t want to tie office updates to OS updates. They are different products and I want them to patch at different times. I’d rather get office updates out to my users quicker, make them available, and let the users pick when to install via the ribbon in the app.

This is actually the default for the provided Office 365 template and it works great for me. Once again, this first deployment you might be setting up for your Test Collection, perhaps you want to set your deadline in 1 day to make sure your test groups is patched ASAP and can alert you of any issues before the other deployments you setup go out to the general public. I’ll go into this more a bit lower in the post.
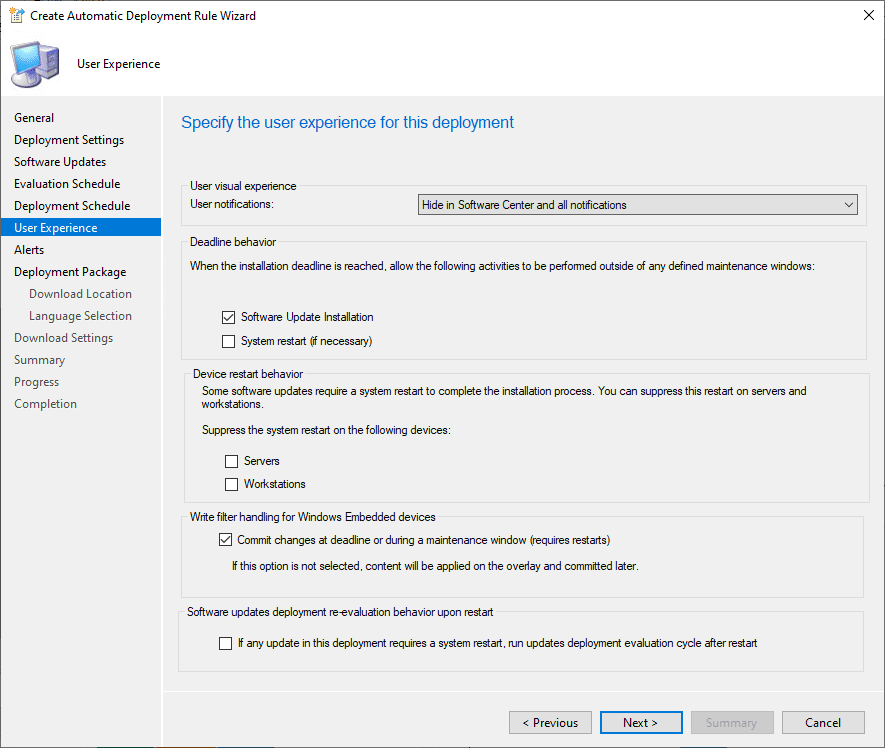
I’ve chosen to hide the updates in software center. Users can still update via the ribbon in the Office Application, which I feel provides a better experience.
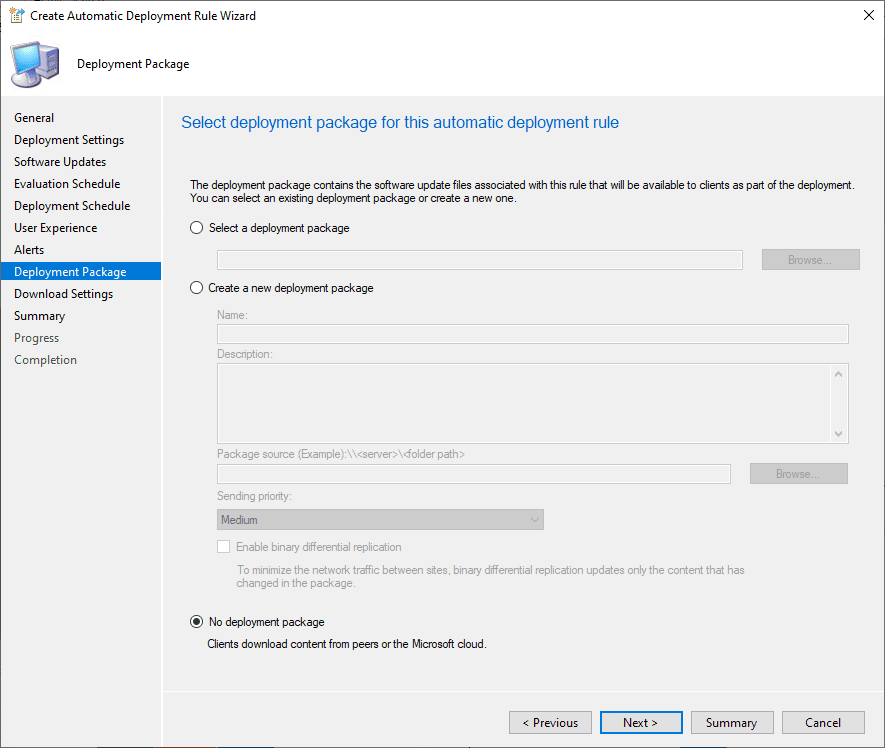
I’m setting this to “No deployment package” and allowing the machines to pull from the MS cloud. Make sure you’ve configured delivery optimization if you do this. Here at Recast Software, all of our users are working from home anyway, so it makes sense. In organizations where you need to control your source and data transmissions, you’ll probably have it set to a deployment package.
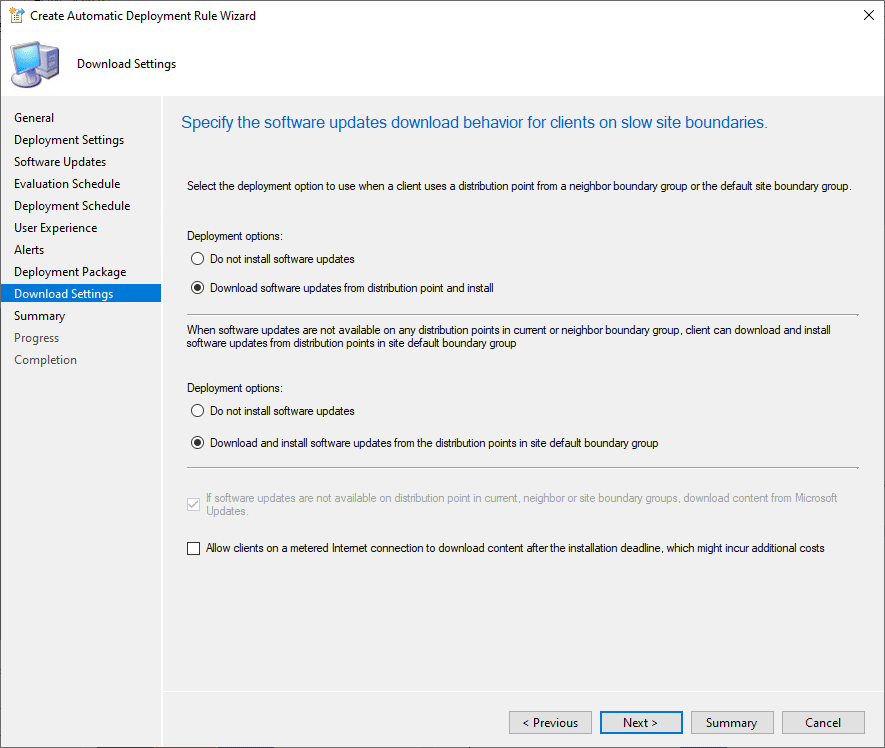
These are the defaults, then next, next, finish.
Deployment Details
For our environment, I’ve setup 3 Deployments on the ADR:
- 365 Patching Test Group 1 (Internal IT Test Group)
- Available ASAP, Deadline ASAP | Show in Software Center
- 365 Patching Test Group 2 (Line of Business Test Group)
- Available ASAP, Deadline +4 days | Hide in Software Center
- All Workstations (Everything, Generally available)
- Available +2 days, Deadline + 14 days | Hide in Software Center
The idea here is that the initial test group would already be upgraded before it’s made available for users. Users will slowly Opt-In over the next couple weeks before their deadline. So even if an issue isn’t caught before it’s made generally available, damage should be relatively light.


Software Update Group
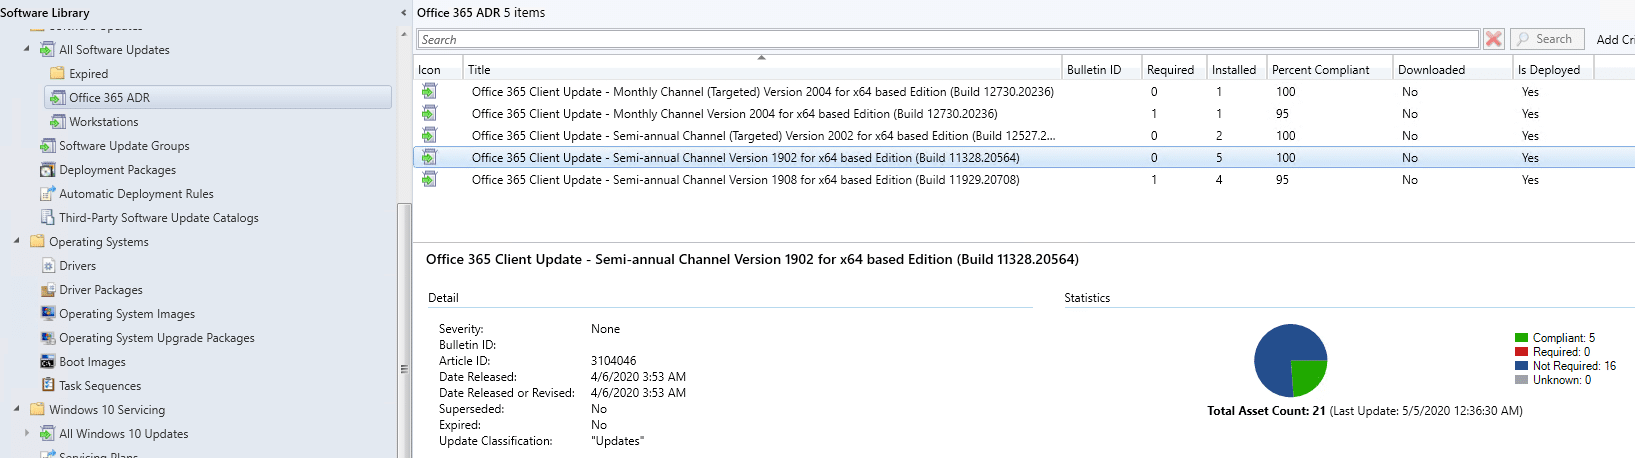
Here in the software update group created when the ADR Ran, you can see the 5 updates, so the preview function didn’t lie. Machines are getting patched!
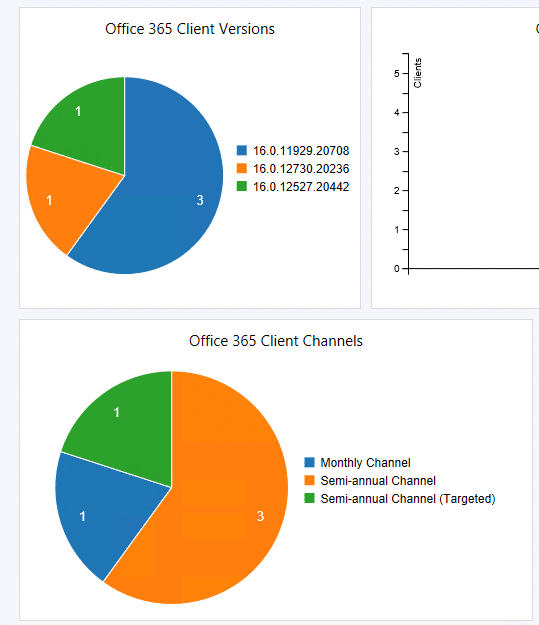
Office 365 Client Management Dashboard
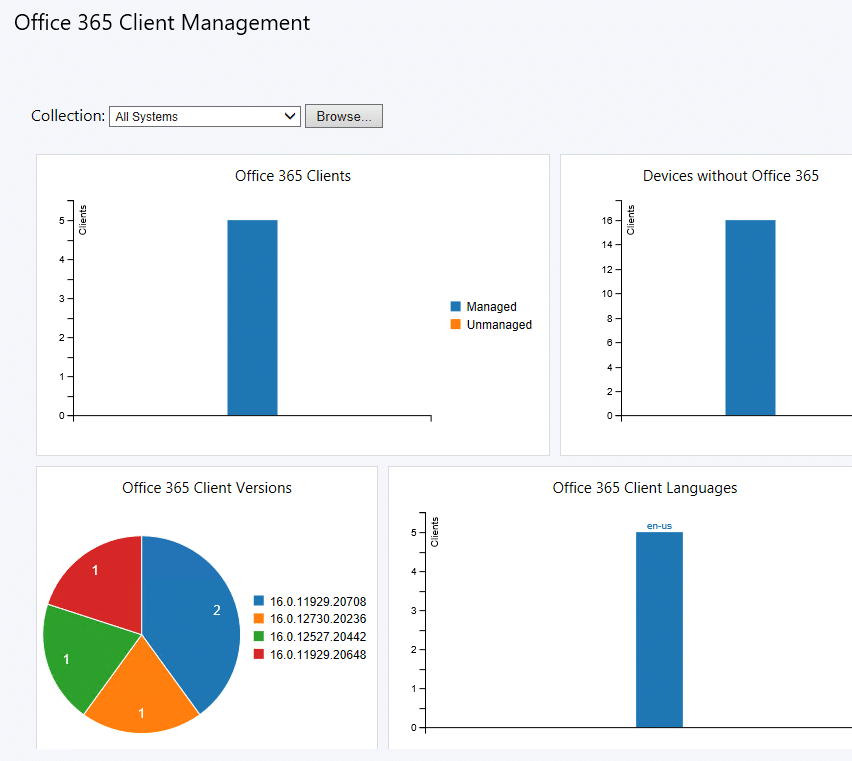
You can see the client versions. Let’s see if we can map the data and make better sense of it.
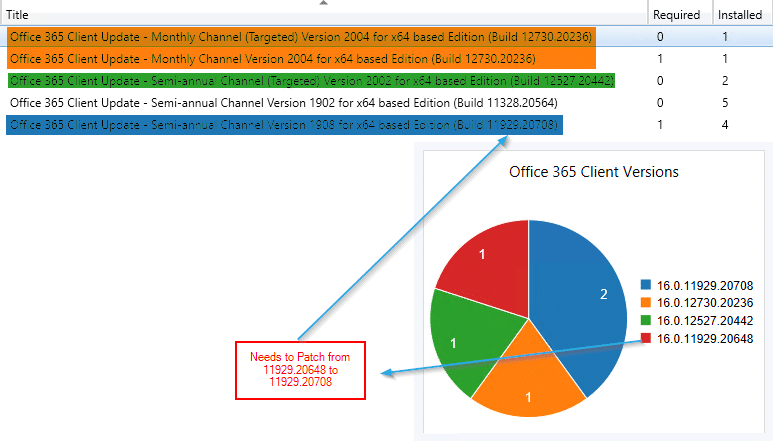
Ok, now you can see how we’re doing. We mapped that data from the Dashboard to the Update Group.
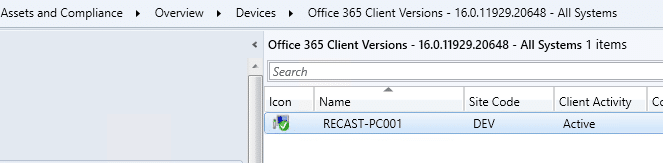
Lets figure out which machine needs that patch… by clicking on the “Red” slice, which is for the machine with older build, it shows me the computer.
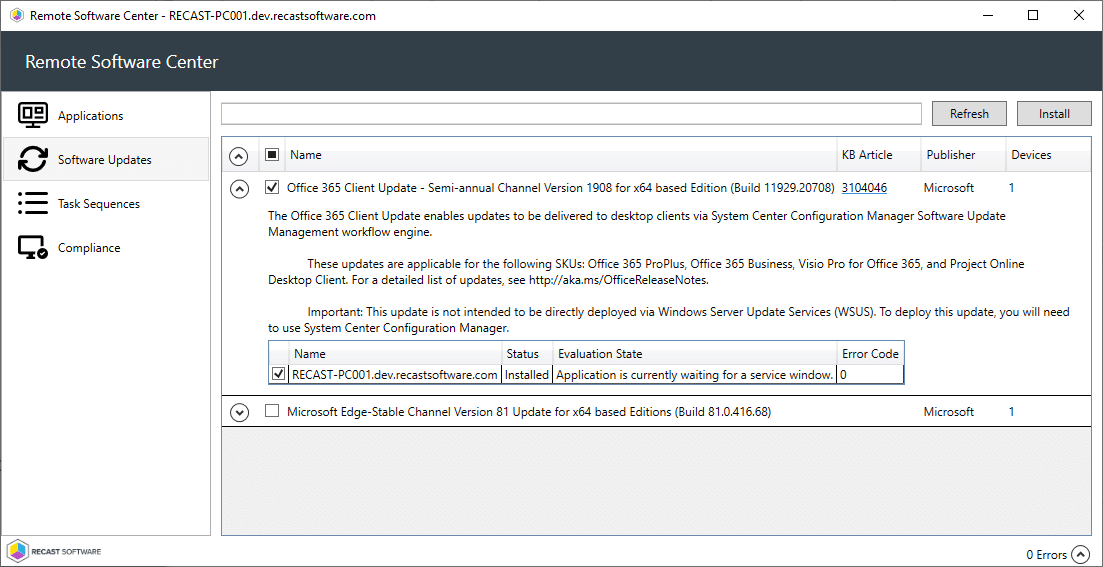
Then using Remote Software Center, I can see if the patch is available on that machine:
Let’s trigger an inventory on that and see if CM updates the status.
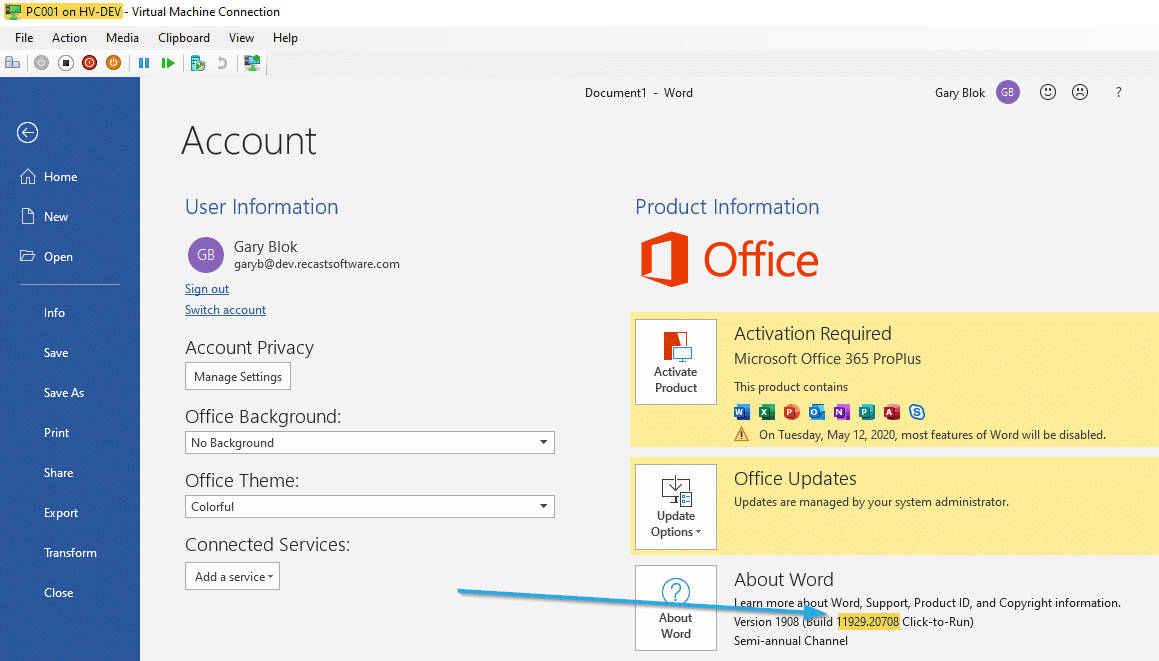
So we’ve confirmed it patched (thanks to our ADR). Now we just need the data to sync with the serve and update the dashboard . . . and within a couple minutes:
Conclusion
Alright, now we can see that all our systems are patched. We have 3 different build versions, which correspond to the different channels, and all are running the latest version! Yippy, we’re patched and secure. It’s time for the weekend.
Office 365 Deployment Series with ConfigMgr
- Office 365 Deployment Series with ConfigMgr – Intro & PreReqs
- Office 365 Deployment Series with ConfigMgr – Creating the Office Installer – Simple
- Office 365 Deployment Series with ConfigMgr – Creating the Office Installer – Advanced
- Office 365 Deployment Series with ConfigMgr – Deployment Methods
- Office 365 Deployment Series with ConfigMgr – Office Updates / ADR – You are Here
- Office 365 Deployment Series with ConfigMgr – Channel Info