


Creating a Deployment Process is straightforward with the new Application Manager integrated with Recast Management Server. While we’re focusing on deploying the Recast Agent here, the steps outlined below apply to any application in our 2,500+ application catalog, ensuring you can apply this process universally. Accompanied by clear screenshots for each step, this guide will help you execute the deployment smoothly and effectively.
Step by Step: Creating a Recast Agent Deployment Process in Application Manager
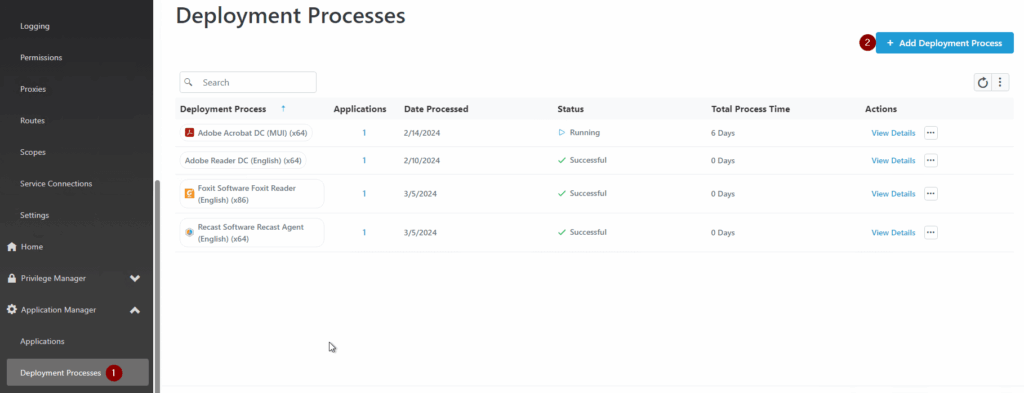
To start we will navigate to the Application Manager tab in the Recast Management Server.
From here:
- Click on Deployment Processes
- Click on the Add Deployment Process button
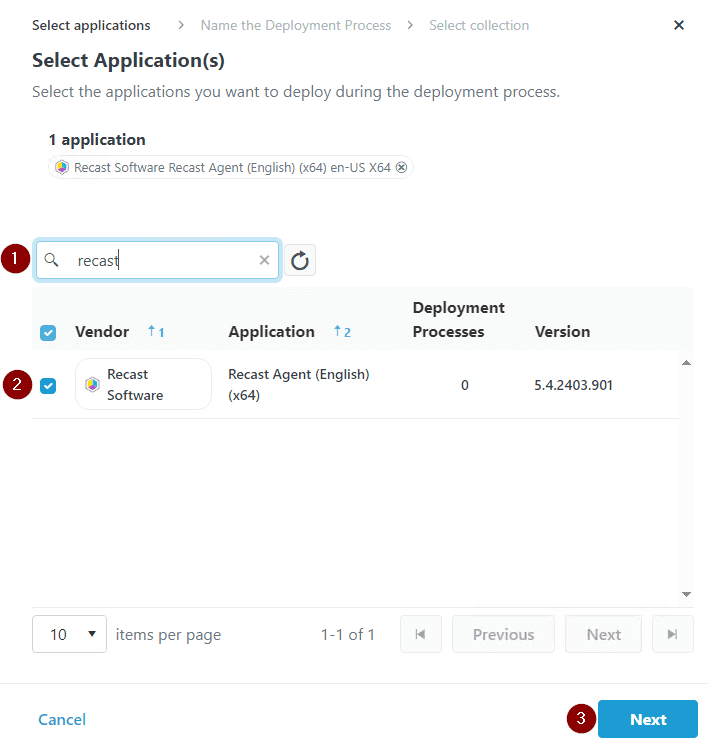
Here, we will select the application that we will be deploying. In this case, I chose the Recast Agent. You can scroll through the list to find the desired application or search for it.
- In the search field, type the name of the application
- Click on the check box to select the application
- Click Next
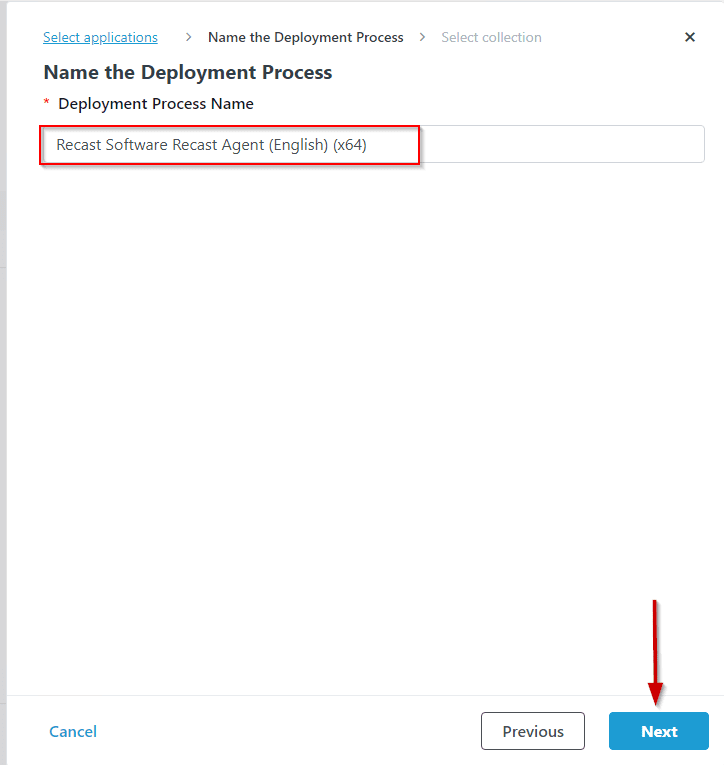
Here, you can change the name of the deployment or just leave the default name. In this case, I will use the default name and then click next.
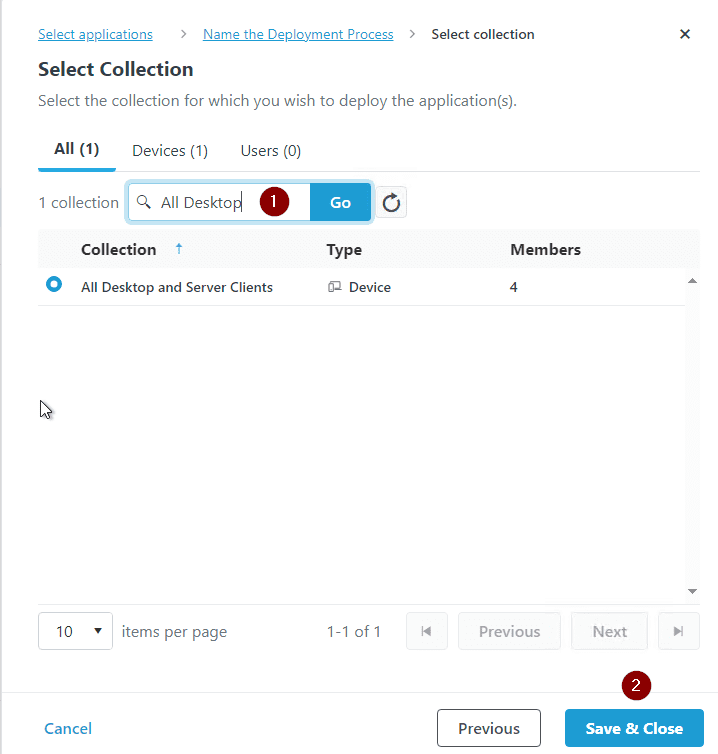
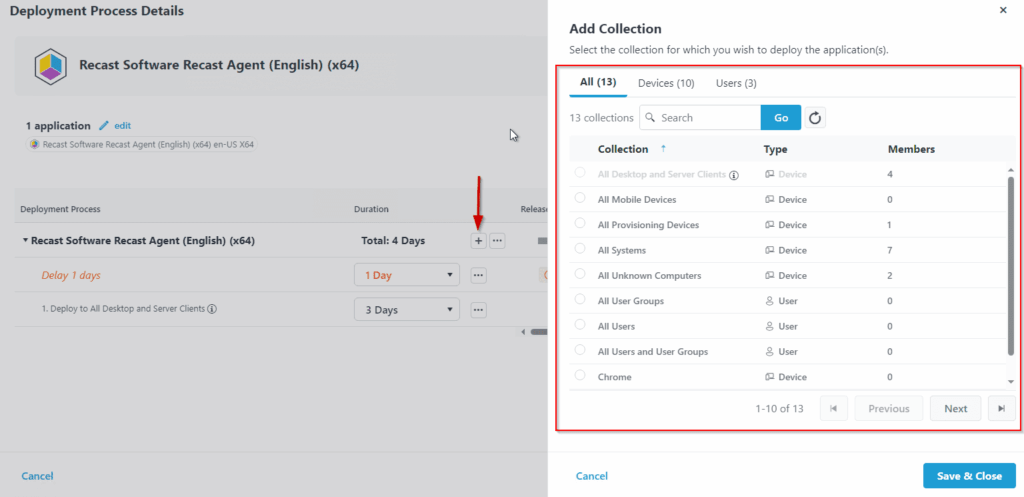
In this step, you will pick the desired target collection. You can search for the collection or pick it from a list, then click Save and Close.
**You will be able to select additional collections later**
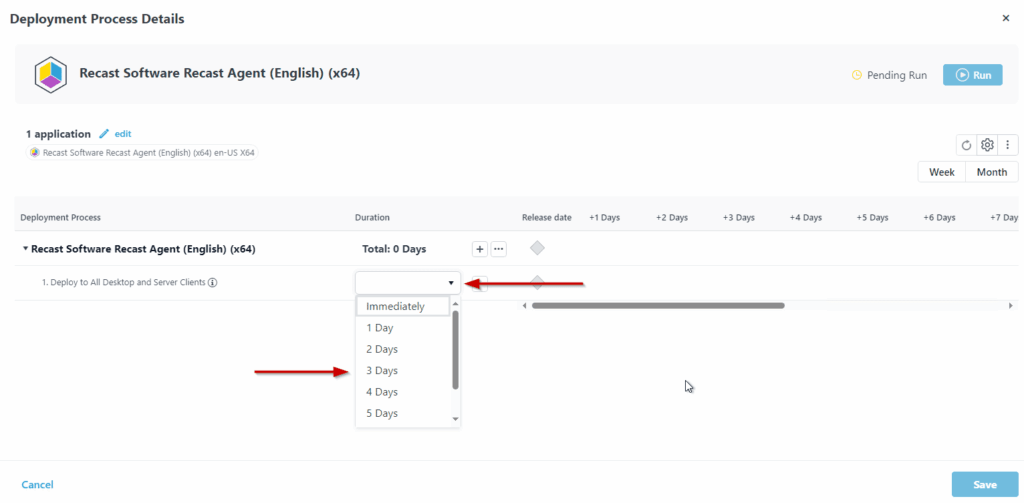
On this page, you can set the duration of your deployment, delays, and make additional Deployment Processes for the selected software targeting different collections.

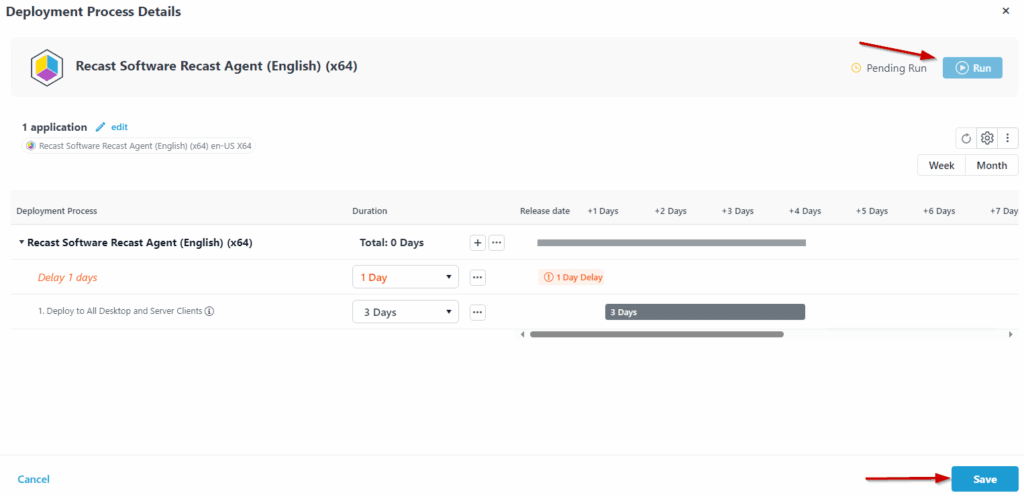
By clicking the Duration drop down, you can select when you want to deploy the application. In this case, I will select 3 days after the application is released.
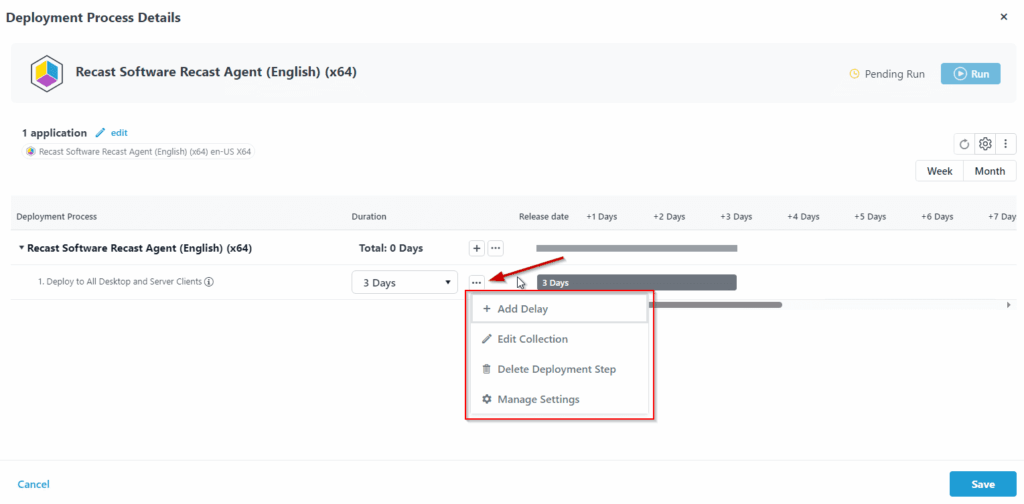
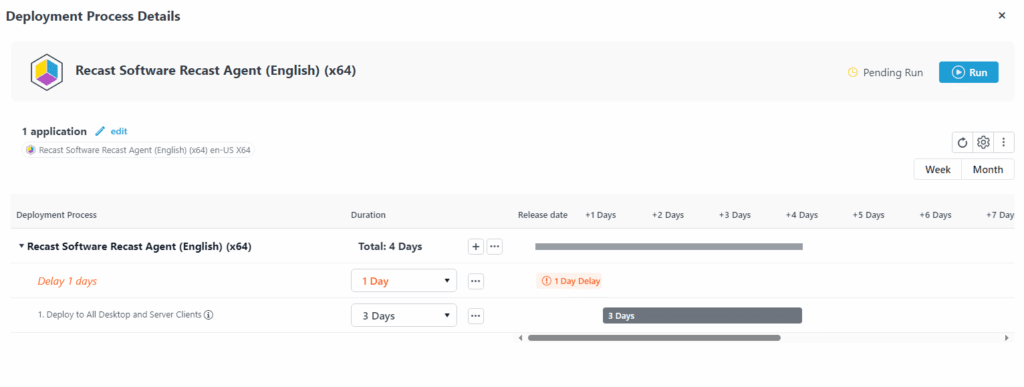
You can click on the three dots and Add Delay. In this example, I will add a delay of 1 Day.
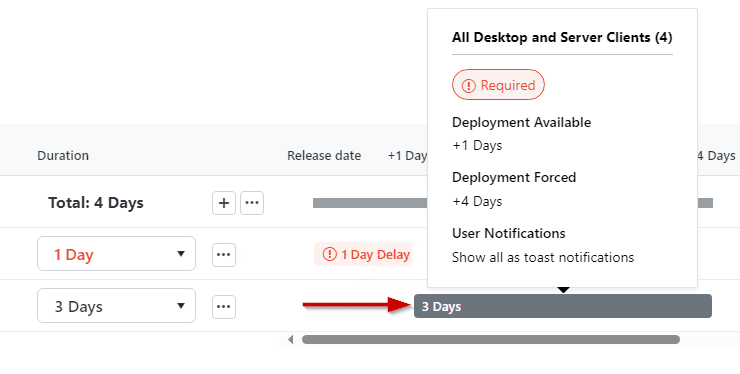
By hovering your mouse over the 3 days bar, you can see that the deployment will be available after 1 day and forced at 4 days.
After you’ve selected your desired schedule, click Save. You can now click Run or wait until it runs.
Lastly, by clicking the + button to the right of the duration, it will give you the option to target a different collection. After selecting the desired collection, the process will be the same.
Note:
- It is recommended that you have different collections to target different architectures, for example: separate collections for Chrome x86 vs x64.
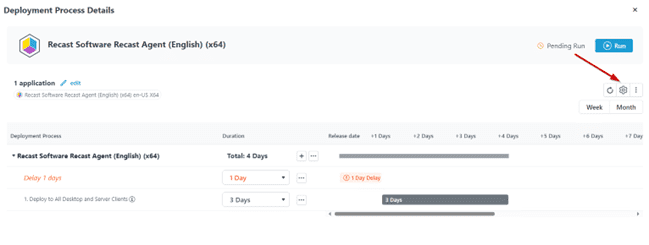
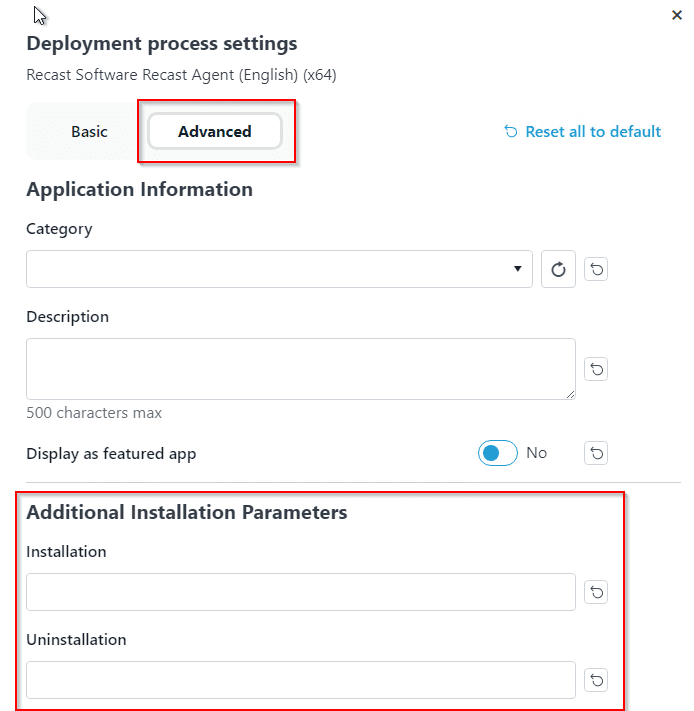
- You can add your own parameters and switches to the deployments by clicking on the gear in the top right of the Deployment process, then selecting the Advanced options.
Recast Agent Deployed via Application Manager
In wrapping up, the process outlined for deploying the Recast Agent within Application Manager demonstrates the streamlined and adaptable approach to enhancing app and patch management. This process is broadly applicable across the app catalog.
