


As cybersecurity threats expand, effective patch management is becoming essential for protecting organizations. The challenge lies in deploying updates promptly and with quality, without throwing a wrench into everyday business operations. Microsoft’s Intune offers a solution, providing administrators with a set of tools to help streamline the OS patching process.
What Patching Options are Available through Intune?
Intune offers two solutions for managing Microsoft updates. One feature is the use of “update rings.” Update rings in Intune allow administrators to define groups of devices and set distinct update policies for each. This approach ensures that updates can be rolled out in a controlled and staged manner, testing their impact on smaller groups before a wider release.
Creating an Update Ring
To create an update ring in Intune:
- Navigate to the Intune Portal
- Create a New Profile: Go to the “Devices” section, and under “Policy” select “Update rings for Windows 10 and later.” Choose to create a new profile.
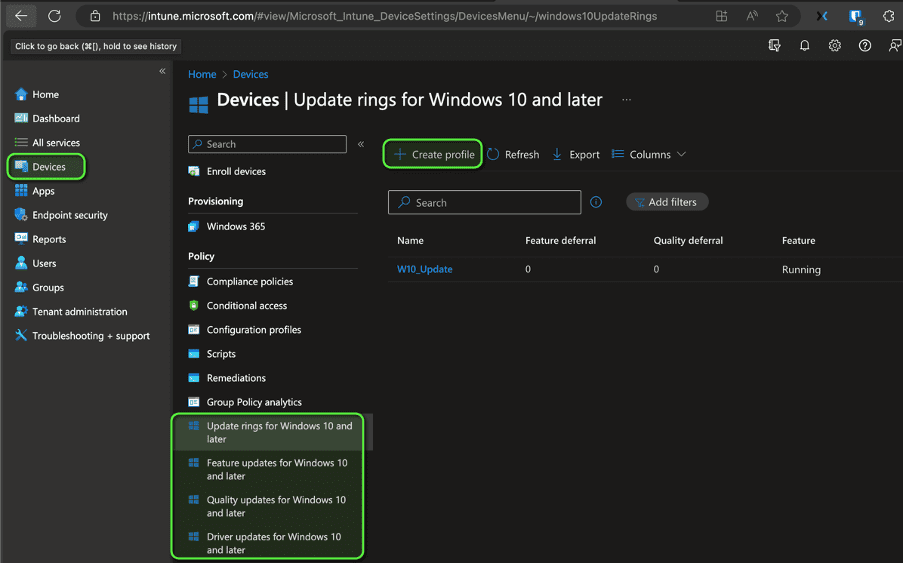
- Enter a name for your update ring. Ideally, use a name that clarifies the state, like PrePilot, Pilot, Ring1 and so on.
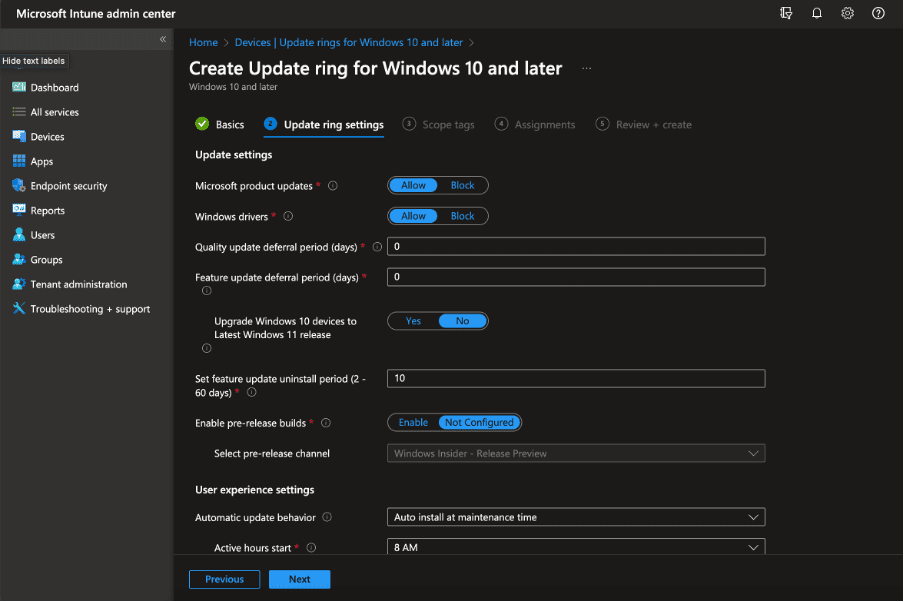
- Configure Settings: Define the specifics of your update ring. These configurations are very individual depending on your company preferences.
- Assign this update profile to a specific group of devices. This can be based on department, device type, or usage patterns.
- Monitor and Adjust: After deployment, continuously monitor the updates’ performance and tweak the settings if necessary.
What is Windows Autopatch?
Windows Autopatch is a service that further streamlines the OS update process. It shifts the responsibility of update management from the IT department to Microsoft. Essentially, it automates the deployment of updates to ensure devices are always up to date with the latest features and security patches. Windows Autopatch also comes with enhanced reporting capabilities.
Configuring Windows Autopatch
To configure Windows Autopatch:
Enrollment: Ensure your devices are enrolled in Windows Autopatch. This requires that the devices are registered with Entra ID and enrolled in Intune:
- Configure Tenant Settings: Navigate to Tenant administration -> Windows Autopatch -> Tenant enrollment and check if you are ready to enroll your devices. If you have a “Not ready” state you can check via View details what’s the reason for this.
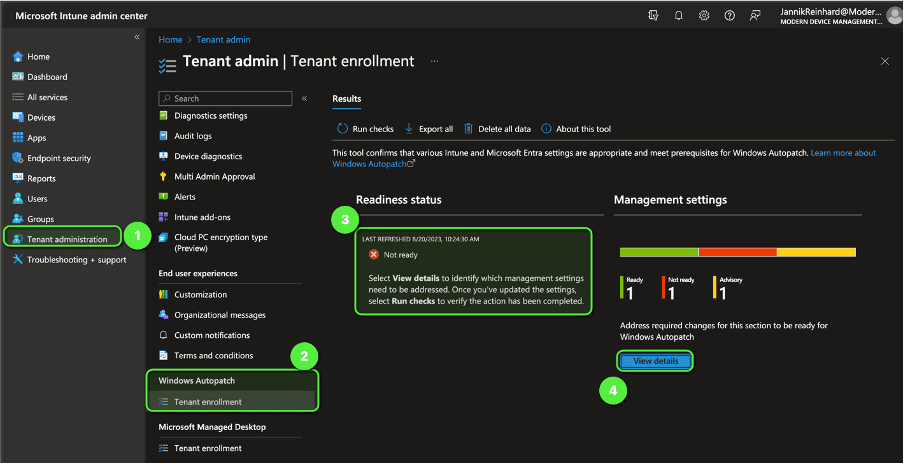
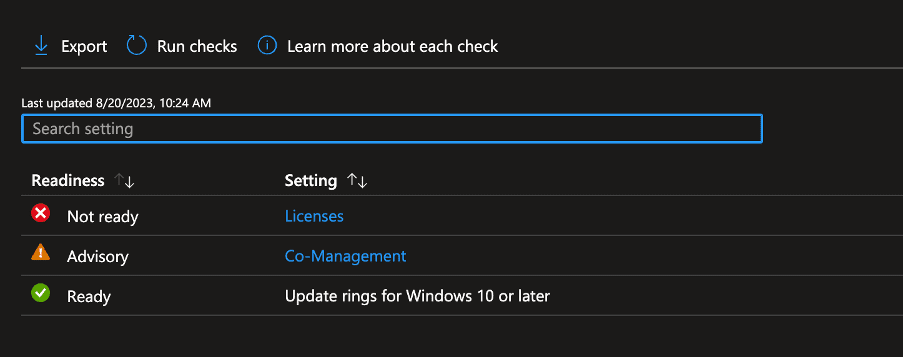
- In this case the license is missing. Once resolved you can run a recheck and you will find an enroll button. Click “Enroll.”
- You have to grant permissions to Microsoft to manage your update settings. You must also add contact details so that Microsoft knows who they can contact in case of an error.
- After this you can select which devices should be enrolled into Windows Autopatch and you can add them into a patch group:
- Automatic: Let Microsoft Managed Desktop automatically assign the group
- Test: Devices for testing purposes
- First: Early adopters (PrePilot)
- Fast: Pilot user
- Broad: All other devices
- Monitor Deployment: Microsoft will handle most of the process, but staying informed is crucial for addressing any potential issues promptly.
Effective Windows Patching via Intune
Effective patch management is a critical component of modern IT administration, particularly in safeguarding against cybersecurity threats. Intune’s update rings and Windows Autopatch effectively manage this process for operating systems (OS) and OS-native applications. By leveraging these features, administrators can ensure their systems are secure, up-to-date, and well-functioning with minimal disruption to the organization.
Learn more about third-party application management and patching, an important addition to fully securing your environment and application stack.
Recast: The Intune Companion
Microsoft offers powerful tools for IT admins through the Intune Suite, and Recast is the ideal companion to help organizations maximize those capabilities. Recast builds on what Microsoft provides by delivering additional options for enhanced security and advanced device and application management.
There are scenarios where IT teams need expanded functionality, such as managing custom applications, handling third-party app patching on servers, or applying highly specific update requirements. Recast complements Intune by handling these specialized tasks, working alongside the Microsoft ecosystem to streamline operations.
We’re excited about where Microsoft is headed and how Intune continues to empower IT admins. Recast is proud to stand alongside Intune as a companion solution, helping teams do even more with the tools they already rely on.
If you don’t already have our free Right Click Tools for Intune, you can download them here.
