


Greetings, fellow Intune and Mac admins! Welcome to our guide on configuring PPPC profiles within Intune for MacOS devices. MacOS is known for its strict security measures, which, while ensuring safety, can restrict basic functionalities without local admin rights. Lacking local admin rights restricts users from basic tasks, such as enabling screen sharing or allowing remote control through applications like Zoom or Teams. Ever wondered how to mass-enable screen sharing, remote control (Accessibility), or full disk access for approved applications through Intune? If you answered yes, then you are in luck. In this guide, we’ll show you how to configure Privacy Preference Policy Control (PPPC) permissions within Intune.
Understanding PPPC Profiles
Privacy Preferences Policy Control (PPPC) profiles allow administrators to manage privacy access controls for macOS 10.14 and later. These profiles are crucial for granting or denying access to sensitive user data and hardware resources for apps and system services. By pre-configuring these settings, organizations can ensure compliance with privacy policies and streamline the user experience by reducing the number of permission prompts.
Step 1: Identify Your Requirements
Begin by determining your application’s permission requirements. For example, Zoom requires “Screen Record” for sharing screens and “Accessibility” permission for letting other people control your screen. Similarly, some applications like an Antivirus or DLP tool may require “Full Disk” access.
Step 2: Creating and Deploying PPPC Profile within Intune
Navigate to intune.microsoft.com and log in with your administrator credentials.
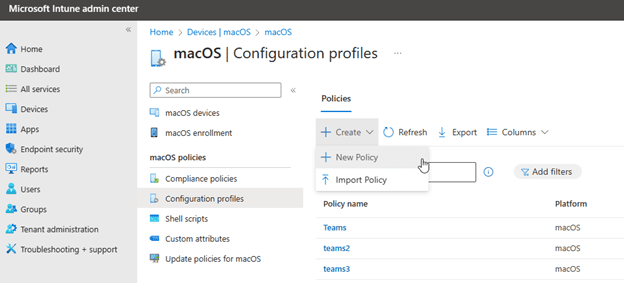
Once logged in, go to “Devices” > “macOS” > “Configuration profiles” > “Create” > “New Policy.”
“macOS” should already be selected for the Platform. Choose “Settings Catalog” for the “Profile type”. Hit the “Create” button at the bottom of the page.
Give your profile a name, write a description, and hit next.

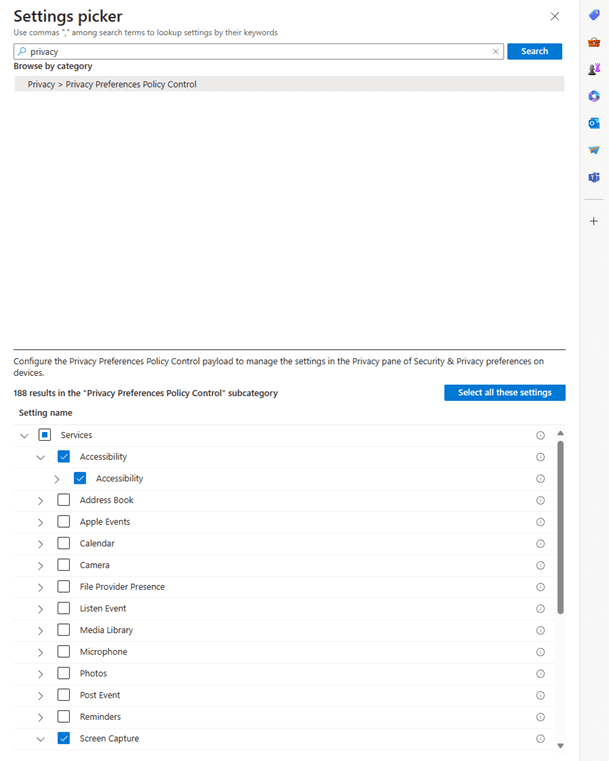
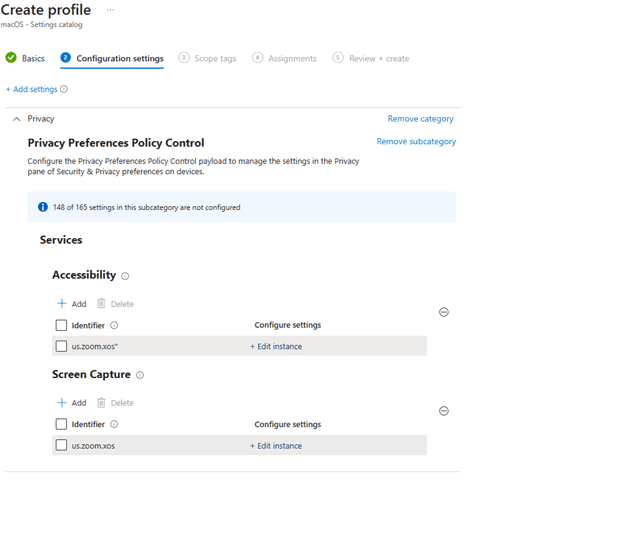
In the “Configuration settings” section, click on the “Add Settings” button. You will see the “Settings picker” section on the right side of the page. Search and pick “Privacy Preference Policy Control”. Now pick the permissions that you need to set. In the example below, we are picking “Accessibility” and “Screen Capture.”
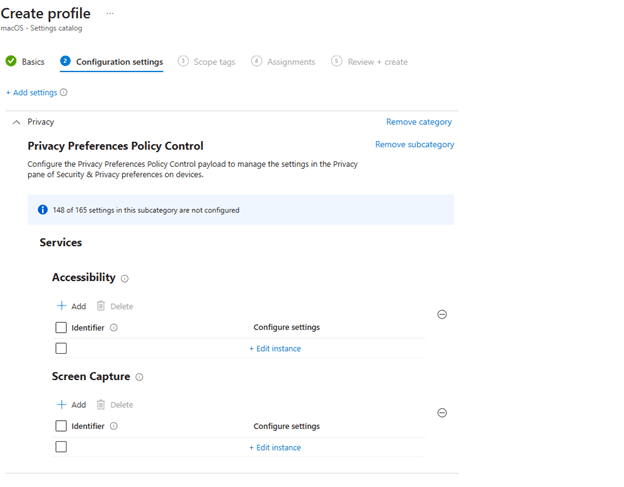
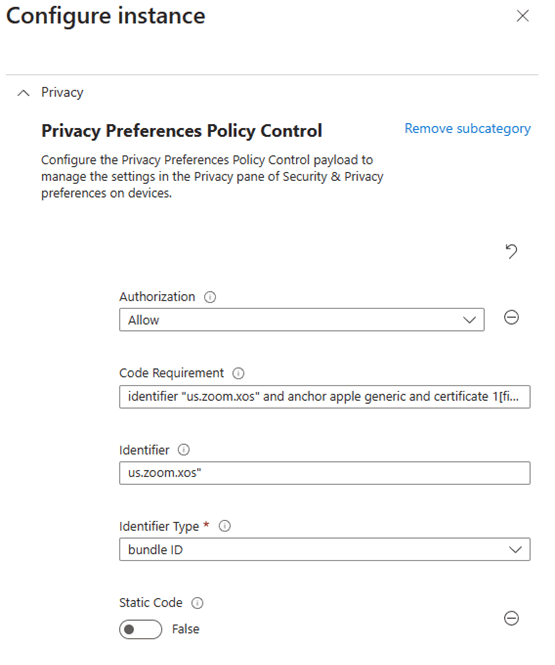
New settings will appear on the left side. Now we need to provide the “Identifier”, “Code Requirement”, and authorization info. Simply hit the “Edit Instance” button to get started.
Important Notes
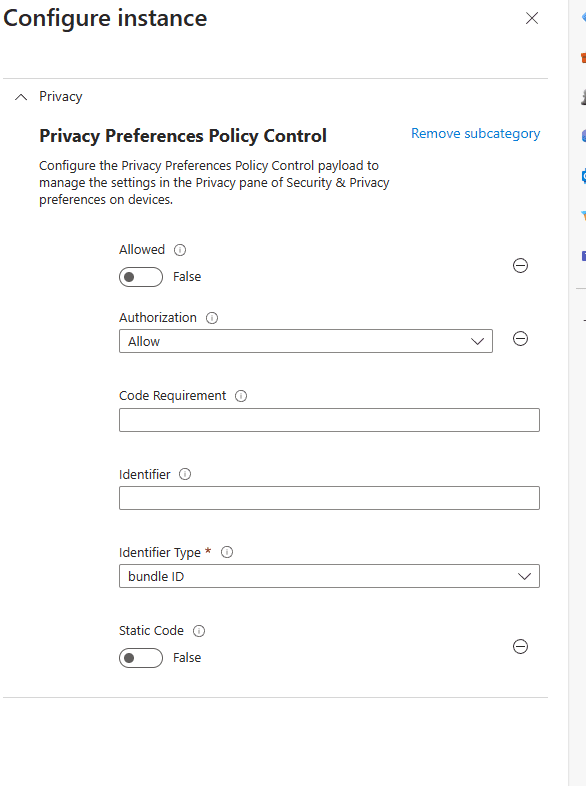
- In the ‘Configure Instance’ section, you can select either an ‘Allowed’ key or an ‘Authorization’ key. Hit the “-” button next to the key to remove one or the other.
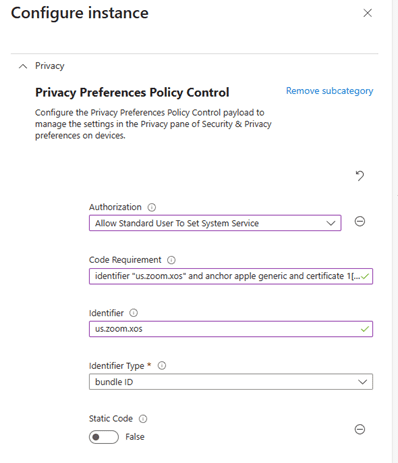
- I would recommend using the “Authorization” key only for all permissions. Also note that for screen share/record and microphone permissions, Apple doesn’t let sysadmins preset “Allow” these permissions due to privacy reasons. So, the “Allow” option will not work. Hence, the only option to be used for these permissions is “Allow Standard User to Set System Service”. This will still show users the authorization prompt, but a standard user will now have access to enable the permissions. For “Accessibility” or “Full Disk Access” we can still use “Allow”.
To retrieve the “Code Requirement” and “Identifier”, install the application on a test Mac. Open “Terminal” and run the following command. Replace “Zoom.us.app” with the name of your app.
codesign -dr- /Applications/Zoom.us.app For “Microsoft Teams classic” it will look like this:
codesign -dr- /Applications/Microsoft Teams Classic.app Note: In MacOS terminal, spaces are represented by backslash so “Microsoft Teams Classic.app” will be represented as “Microsoft Teams Classic.app”
You will see the output as below. Copy everything after “designated =>”. This string is your code requirement. You will notice that identifier is also mentioned in the code requirement.

For example, using Zoom as our application:
Identifier = “us.zoom.xos”
Code Requirement = “identifier “us.zoom.xos” and anchor apple generic and certificate 1[field.1.2.840.113635.100.6.2.6] /* exists */ and certificate leaf[field.1.2.840.113635.100.6.1.13] /* exists */ and certificate leaf[subject.OU] = BJ4HAAB9B3”
Paste the code requirement and Identified information and hit save. Do the same thing for “Screen Capture” instance.
Finally, click ‘Next’ twice, add your MacOS device group to the assignments, click ‘Next’ again, and then click ‘Create.’
Step 3: Monitoring and Testing
Now that we have deployed the profile to devices, you will notice that the next time devices check in to Intune, our endpoint will have a new profile added in the “Profiles” section within “System Settings.”
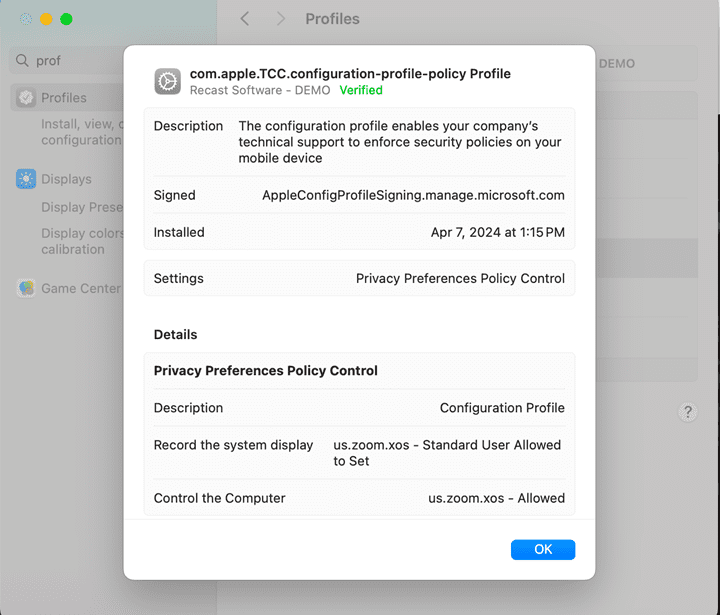
Note: If you go to System Settings > Privacy and Security > Accessibility on the Mac, you will notice that there is no entry for Zoom even though we had this permission enabled via Intune. Note that this is by design and is not a cause for concern. Standard users will still be able permit remote control via Zoom. You would notice similar behavior if you enabled “Full Disk access.”
However, for “Screen Record/share” permission, we do see an entry for Zoom. The reason is because we used the option “Allow Standard user to set system service”, which prompts user to see prompt and allow the permission. Hence it shows up in the “System Settings” > Privacy and Security > Screen Record section.
Optimizing MacOS Security and Productivity with PPPC Profiles within Intune
Creating custom PPPC profiles in Intune for macOS devices is a powerful way to manage application permissions efficiently. By following the steps outlined above, you can ensure that your macOS devices are both secure and user-friendly, with minimal interruptions to productivity.
This process can be adapted and expanded based on your organization’s specific needs and the evolving landscape of macOS security and privacy features. This guide was built on MacOS Ventura version 14.4.1. The steps outlined may change in future versions. Always keep abreast of the latest developments from both Apple and Microsoft to refine and enhance your privacy controls.
Remember, this guide offers a foundation for PPPC profile creation, but specific configurations will vary based on your organization’s applications and resources. Always test your profiles in a controlled environment before widespread deployment to ensure they perform as expected.