


In this guide, we will learn how to manually register devices with Windows Autopilot, a critical process for situations where automatic registration does not meet specific needs or when greater control over device enrollment is required. Whether you’re running a pilot program to evaluate Autopilot’s capabilities within your Intune-managed environment, or you seek a deeper understanding of how Windows Autopilot can be leveraged for precise device management, this tutorial is tailored for you.
If you collaborate with your OEM providers, they can assist you in importing the hardware hash of the devices into your Intune tenant by providing the required information.
Note: For this example, we are going to assume that you have a Windows virtual machine or Windows device available to collect its hardware hash for import into the Microsoft Intune Admin Center.
Prerequisites
- An active Microsoft Intune subscription
- Enabled Windows automatic enrollment in Intune
- Microsoft Entra ID P1 or P2 subscription
Step-by-Step: Manually Generating Hardware Hash for Windows Autopilot Registration
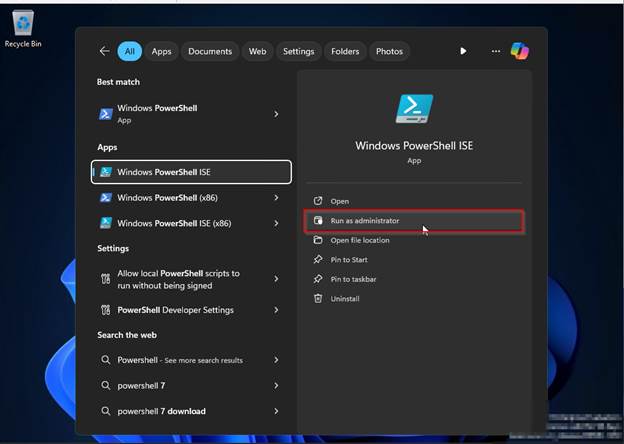
Go to your device > search for Windows PowerShell ISE > Run as administrator
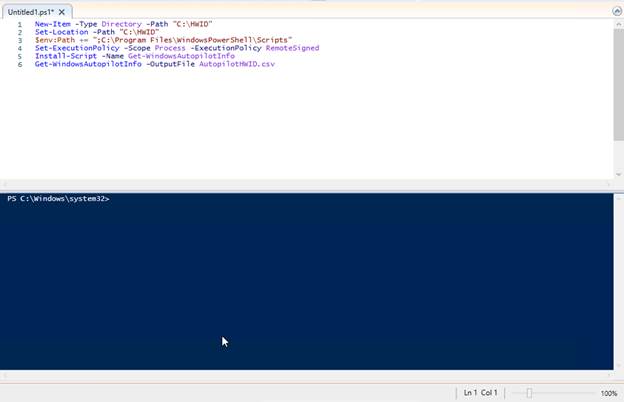
Run the following command in PowerShell to collect the device’s hardware hash, a unique identifier required for registering with Autopilot:
[Net.ServicePointManager]::SecurityProtocol = [Net.SecurityProtocolType]::Tls12

New-Item -Type Directory -Path "C:HWID"

Set-Location -Path "C:HWID"

$env:Path += ";C:ProgramFilesWindowsPowerShellScripts"

Set-ExecutionPolicy -Scope Process -ExecutionPolicy RemoteSigned

Install-Script -Name Get-WindowsAutopilotInfo

Get-WindowsAutopilotInfo -OutputFile AutopilotHWID.csv
Note: The Hardware hash will be located at C:HWID
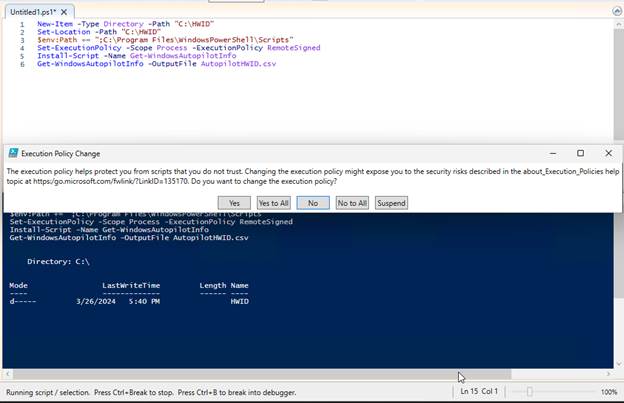
When running the command, you’ll be prompted with an alert about an execution policy change—it’s a security feature to help prevent malicious code from running on your system. Please accept at your own risk. In this case, I will select Yes to All.
When running the command, let’s double check that we do indeed have the necessary .csv file with the appropriate information.
Go to File Explorer and go to the C:HWID path (or wherever you pointed it to).
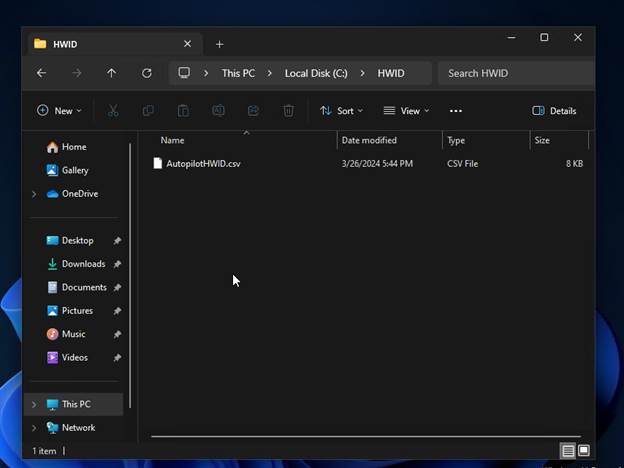
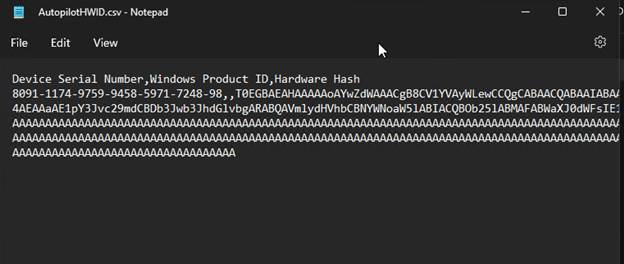
We can see that the AutopilotHWID.csv file itself does have the information we need, such as the Device Serial Number, Windows Product ID, and Hardware Hash. We will import this information into the Microsoft Intune admin center.
Importing Your Device’s Hardware Hash into Microsoft Intune Admin Center
Let’s go ahead and add that .csv file inside of Microsoft Intune admin center to add those Windows Autopilot devices.
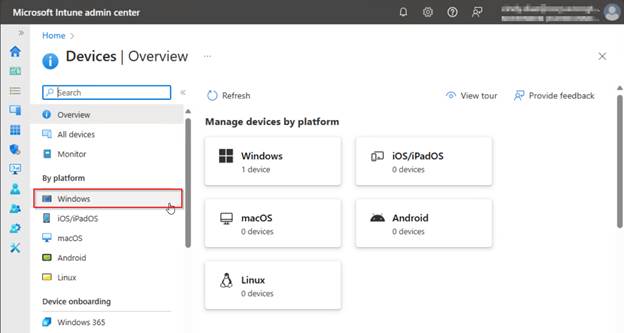
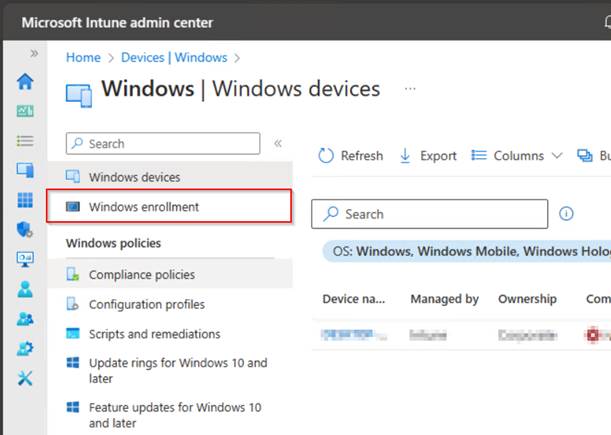
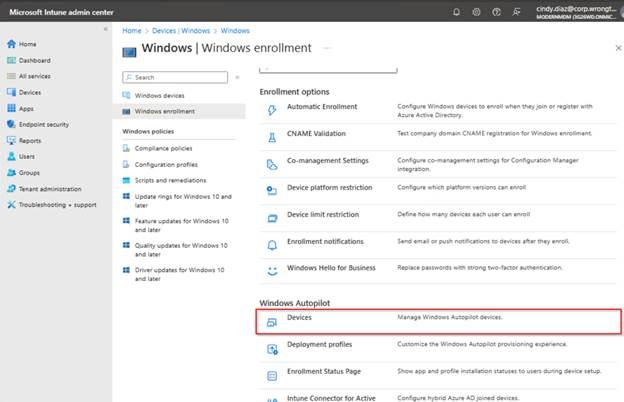
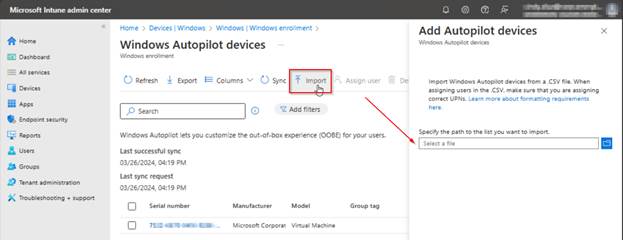
Go to Microsoft Intune admin center > select Devices > Windows > Windows enrollment > Devices (under Windows Autopilot Deployment Program)

Click on ‘Import’ to be prompted to select the .csv file we have at the ready. Navigate to the file’s location, select ‘AutopilotHWID.csv’, and click ‘Open’.
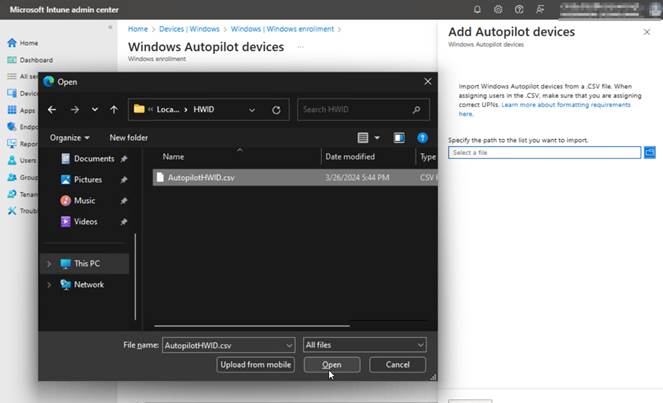
After clicking on the Select a file option, your File Explorer will be prompted. Head to the .csv file that you created. In this case, it is located under C:HWID. Click on the AutopilotHWID.csv and select Open.
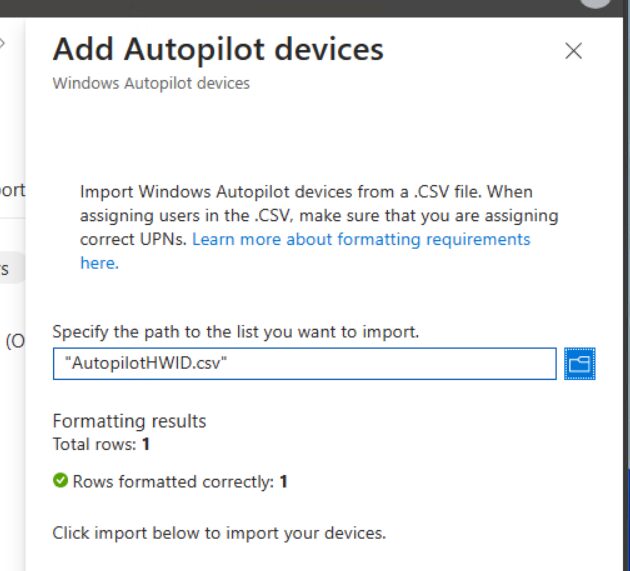
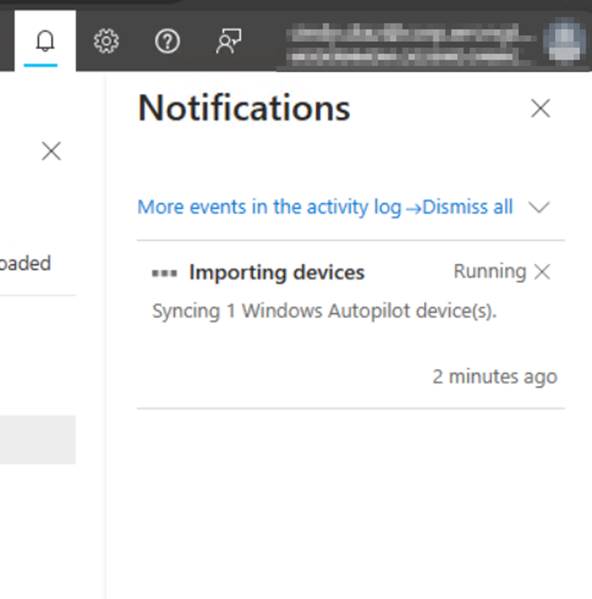
Intune confirms that our row formatting is set up correctly to allow us to import the devices. Go ahead and click on Import. You can see in the top right of the screen that Microsoft Intune is importing the devices.
Finalizing Device Registration: What to Do After Importing to Windows Autopilot
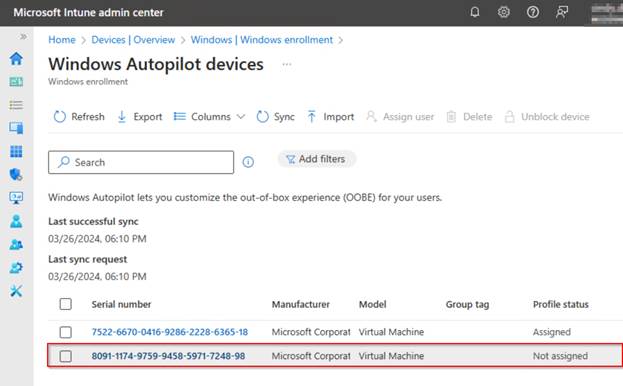
Let’s confirm that the device is inside of Windows Autopilot devices. Within the same Windows Autopilot devices screen used to import the .csv file, check for the imported devices. If you go to the top of the .csv file, see that the first device’s serial number was 8091-1174-9759-9458-5971-7248-98.
Confirmed: 8091-1174-9759-9458-5971-7248-98 is now imported.
However, there is no profile assigned to it. Check out this blog to learn how to set up devices with a profile. For this post, I have set that up myself.
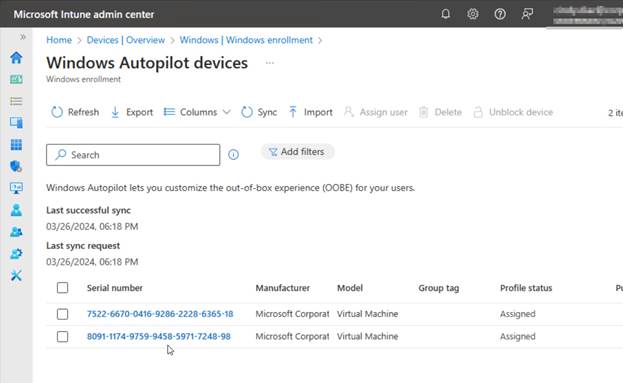
I had an Autopilot profile assigned to my device and I can now see that the device is ready to rock and roll.
Streamlining Your IT Management with Manual Windows Autopilot Registration
In summary, mastering the manual registration process for Windows Autopilot devices equips you with the flexibility to tailor device enrollment to your organization’s specific needs, ensuring a smooth integration into the Microsoft Intune environment. By following the steps outlined in this guide, you have laid the groundwork for enhanced device management.
Check out this YouTube video for a step-by-step video tutorial of this process: