


The documentation below is a step-by-step guide for enabling and managing Windows LAPS in Entra ID (formerly Azure Active Directory). The following guide is the second part of a two-part series on how to configure Windows LAPS. The first post in the series, How to Configure Windows Laps in Active Directory (on-prem), can be found here.
This guide covers setting up LAPS with Entra ID (Azure AD). It’s important to note that the features of Windows LAPS vary if you are using the Active Directory Version or the Entra ID (Azure Active Directory) version. More information about features and architecture can be found here: https://learn.microsoft.com/en-us/windows-server/identity/laps/laps-concepts
Table of Contents
- Prerequisites
- Setting up Windows LAPS in the Entra ID portal
- Creating LAPS policy in Intune
- Verifying Success
Prerequisites for Windows LAPS
The prerequisites for Windows LAPS are pretty basic. At a minimum, you need:
- Entra ID (Azure Active Directory Free)
- Intune Plan 1 (basic plan)
- Workstation Requirements: Must be updated to at least the April 2023 Update
- Windows 11 Professional, Education, or Enterprise
- Windows 10 Professional, Education, or Enterprise
Setting up Windows LAPS
1. Log On to Entra ID
2. Navigate to Devices

3. Inside devices open Device Settings

4. Turn on the Enable Azure AD Local Administrator Password Solution (LAPS)
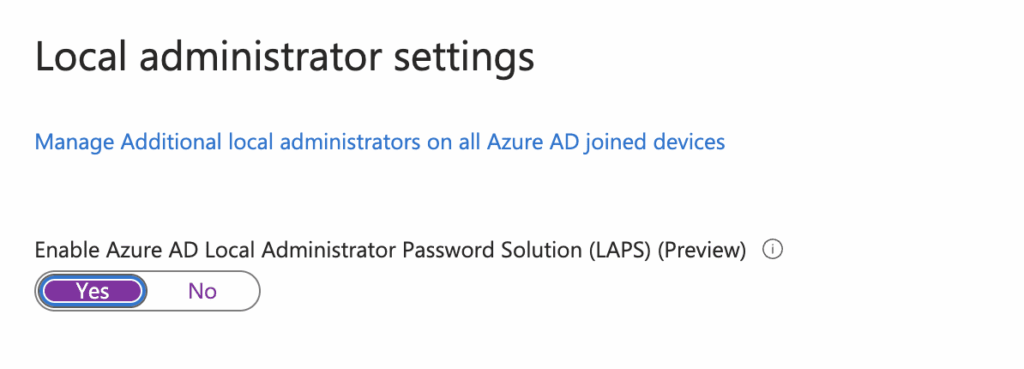
5. Click Save to save the changes

Create LAPS Policy in Intune
1. Log into the Microsoft Intune admin center
2. Open “Endpoint Security”

3. Open Account Protection
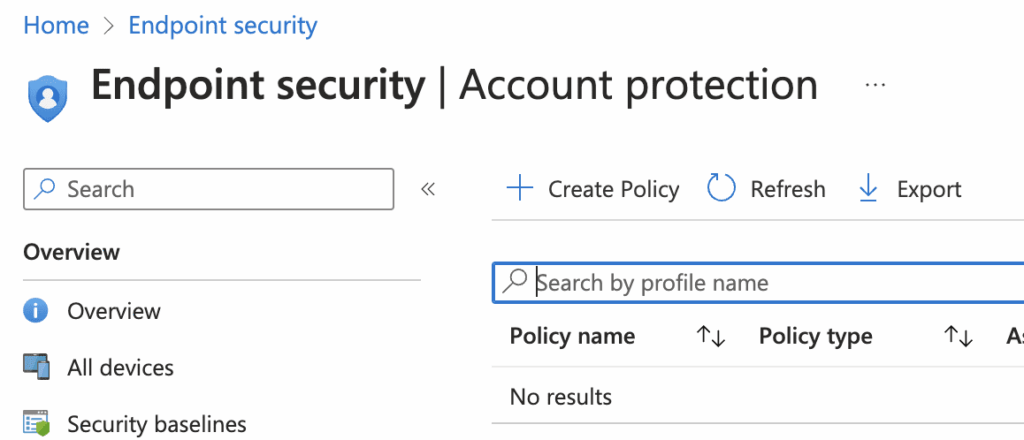
4. Click Create Policy
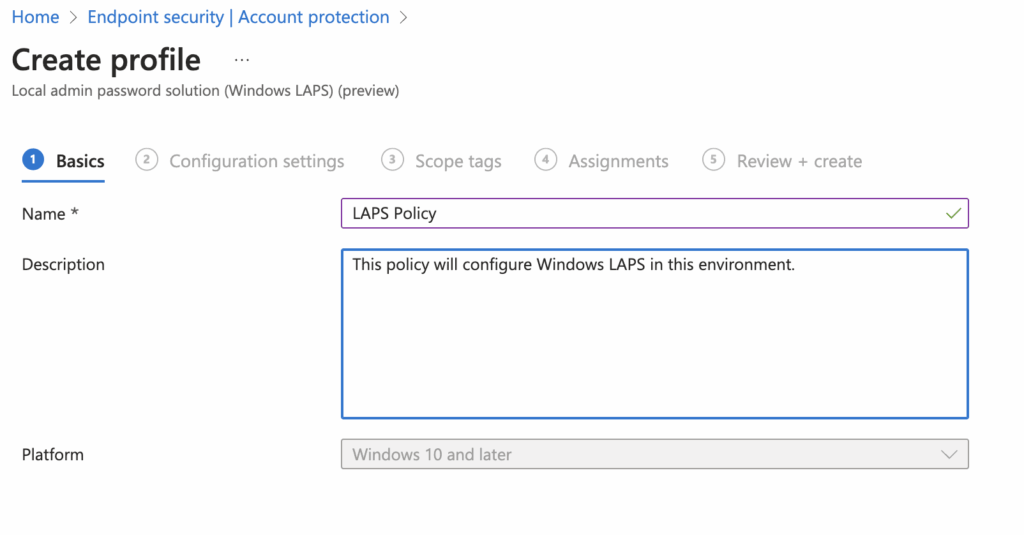
- Select Platform Windows 10 and Later
- Select Profile as Local Admin Password Solution (Windows LAPS)
- Click Create at the bottom of the window

5. The Basics tab will open. Give the policy a Name and Description and then click Next at the bottom of the window.
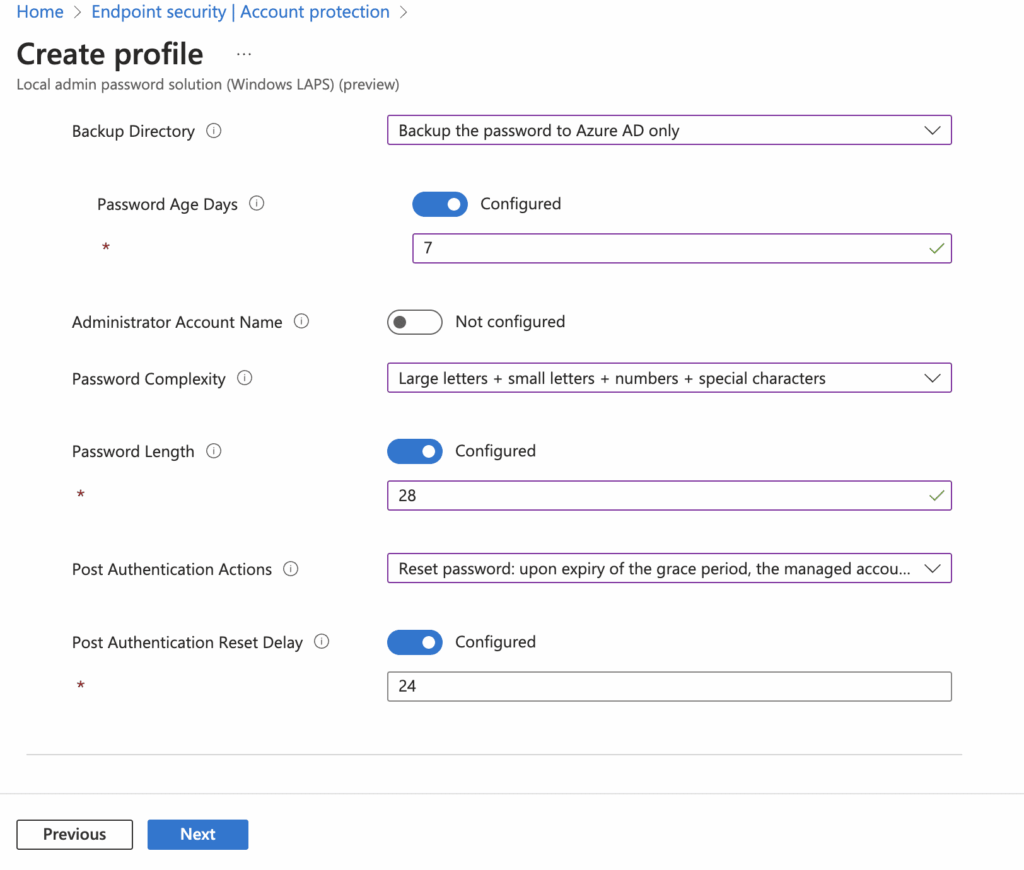
6. Set the LAPS settings and when completed click next
- Backup Directory
- Disabled (not backed up)
- Backup the password to Azure AD only
- Backup the password to Active Directory only
- Not Configured
- Password Age Days
- The minimum for Entra ID is 7 days, for Active Directory (AD) it is 1 day
- The default setting is 30 days
- Maximum password days Azure AD minimum is 7 AD is 1, default is 30 days
- The minimum for Entra ID is 7 days, for Active Directory (AD) it is 1 day
- Administrator Account Name
- Specify a different name if you are using a different account, otherwise it will default to the Administrator account
- Password Complexity
- Large Letter
- Large Letters + Small Letter
- Large Letters + Small Letters + Numbers
- Large Letters + Small Letters + Numbers + Special Characters
- Password Length
- Length from 8-64 characters, default is 14
- Post Authentication Actions – what to do after the grace period expires
- Reset Password
- Reset the password and logoff the managed account
- Reset the password and reboot
- Not configured
- Post Authentication Reset Delay
- Set time in hours to reset after the password has been accessed
7. Select Scope Tags and click Next to move forward

8. Select Assignments (Groups of devices or users, or you can select all devices or all users)
- If you select users, each device a user logs into will be part of the policy
- If you want to deploy policy to specific devices, you should have them in a group that you add here

Verifying Success
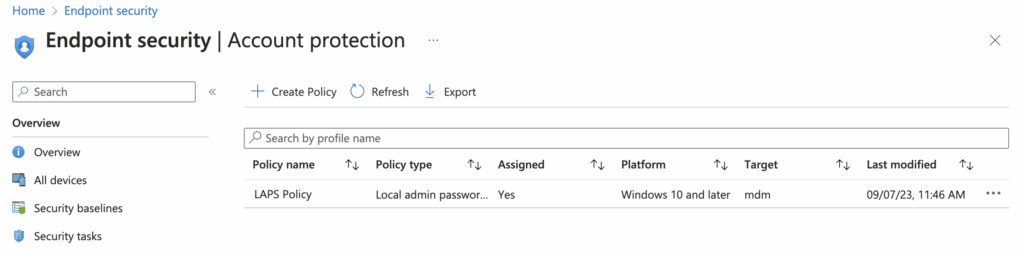
1. Review + Create – review your settings and click create to create the policy. You will see your new policy under Endpoint Security | Account Protection.
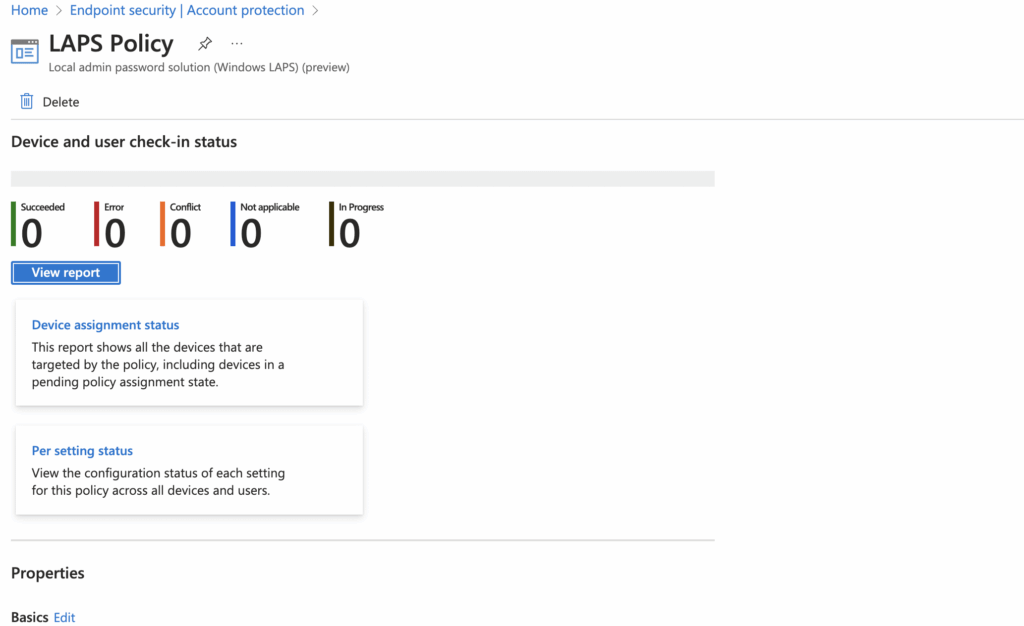
2. Click on it to find the device and user check in status
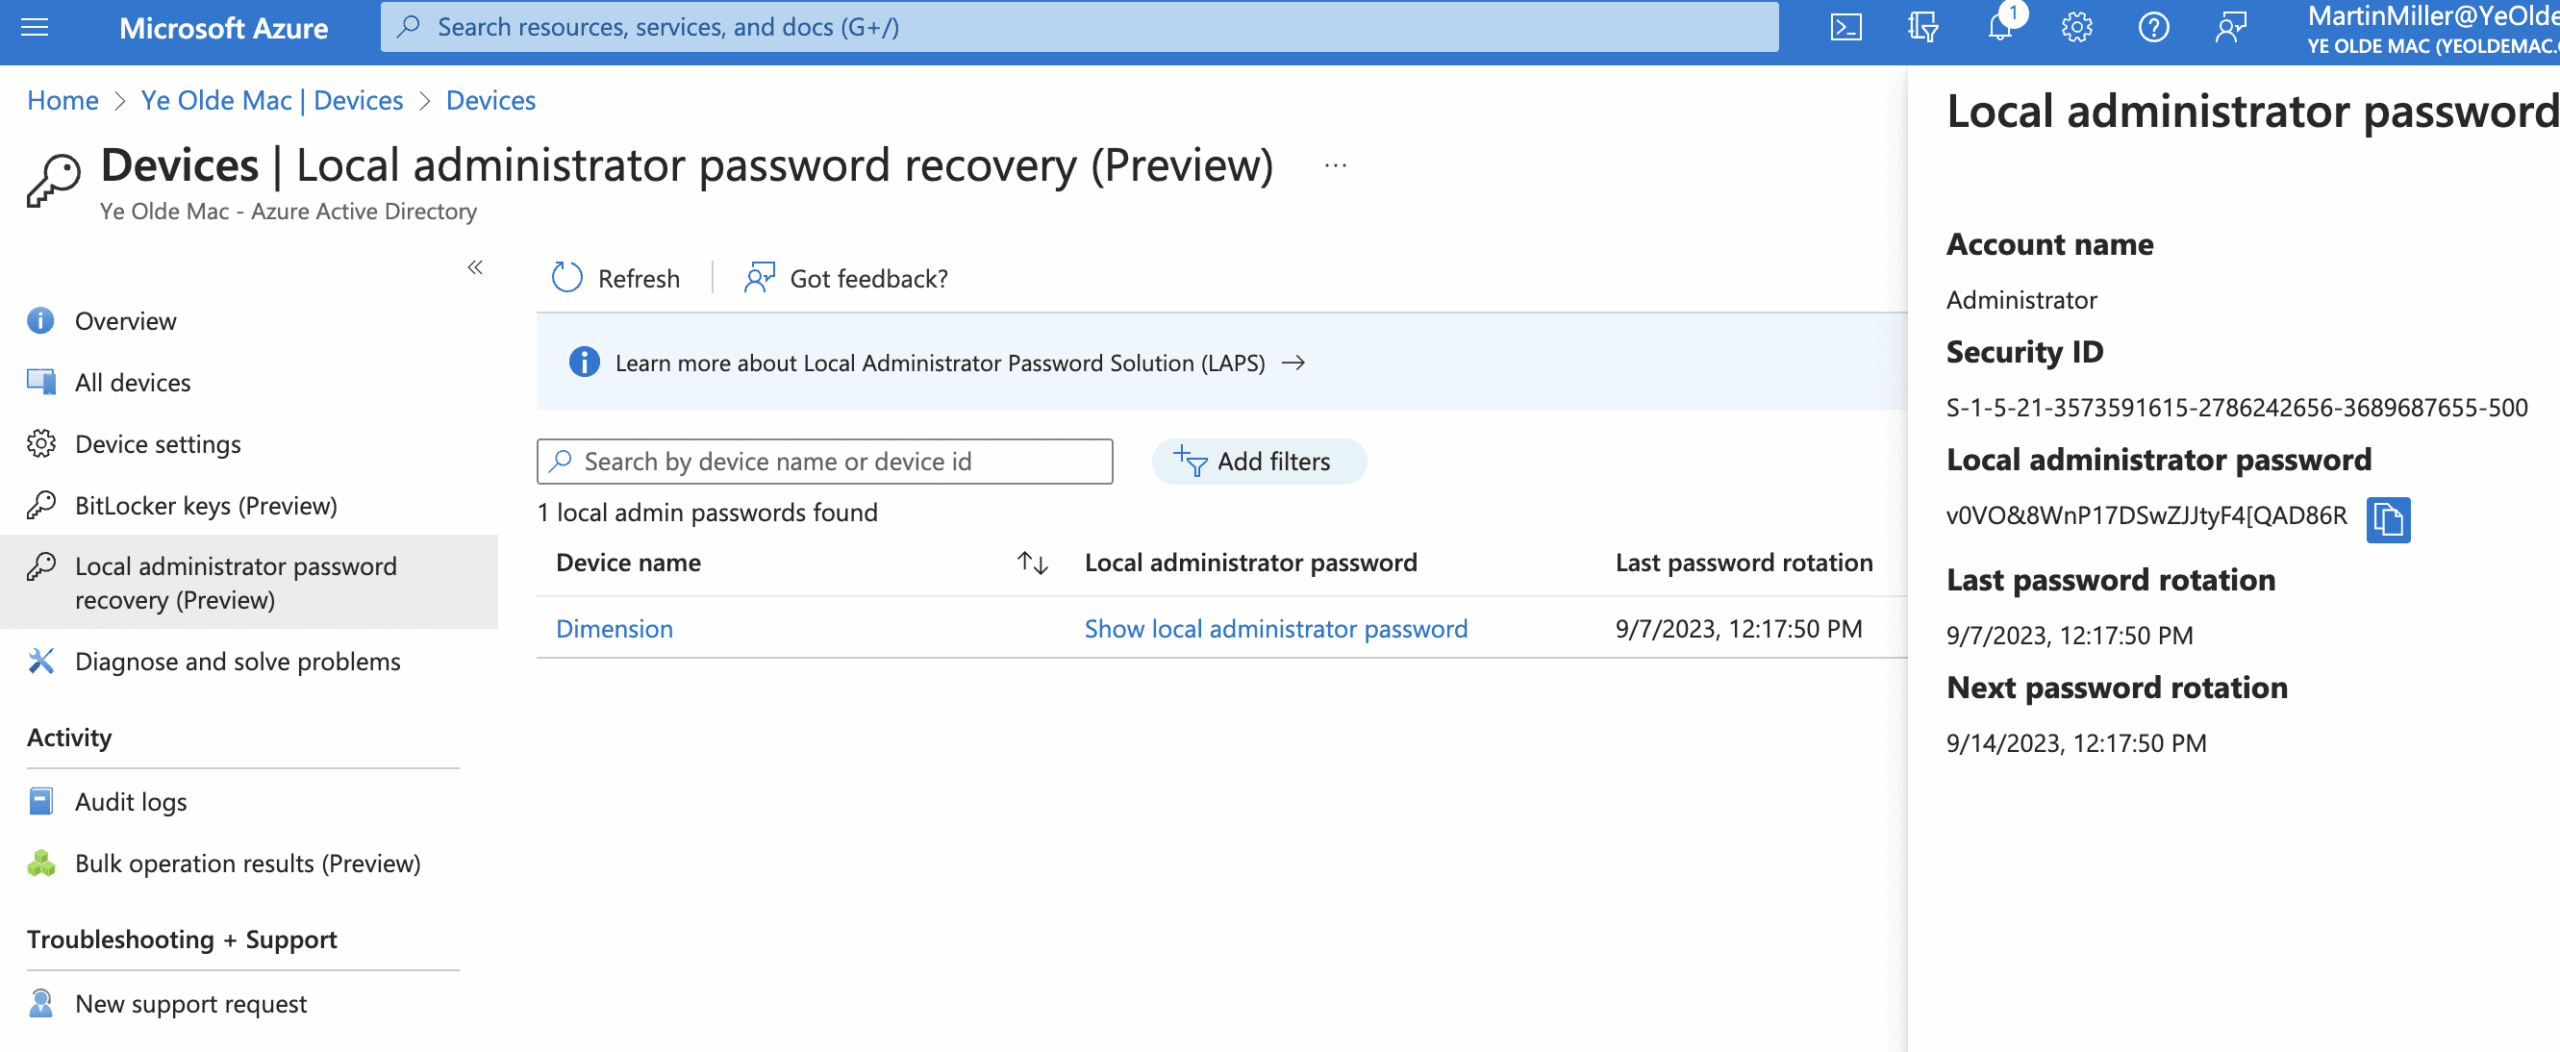
3. The LAPS password can be found in Microsoft Entra ID under: Devices -> Local Administrator Password Recovery
A Final Note: How to Enable Windows LAPS in Entra ID (Azure Active Directory)
I trust this step-by-step guide has cleared the path for a smooth Windows LAPS setup in your Entra ID environment. You’re now better equipped to secure local admin passwords and manage them efficiently.
Stay tuned for our upcoming content that dives deeper into advanced features, troubleshooting, and best practices. Have any questions or ran into issues? Don’t hesitate to reach out. Your security is our priority.