ConfigMgr
How to Install a ConfigMgr Reporting Services Point
Topics: ConfigMgr
After writing posts about, How to Install SQL Server 2017 and How to Install SQL Server Reporting Services 2017, I was surprised to learn that I hadn’t written one about how to install a reporting point for Configuration Manager current branch. This, therefore, is the final blog post in my three-part series about how I installed SQL Server 2017 and then setup the ConfigMgr reporting services point with SSRS 2017 in my lab.
These are the steps at a high-level:
- First, add the site server computer account as the local administrator on the SSRS server.
- Second, add the site server computer account as a SQL Server administrator within SQL Server.
- Third, add the ConfigMgr reporting services point to the site server.
- Lastly, validate that the reporting point is working.
Background
As you probably already know, Enhansoft, where I’m the Chief Architect, specializes in using ConfigMgr to collect extra inventory details about computer warranties, computer monitors, local administrator group names, etc. Once these details are all inventoried and returned to ConfigMgr, our customers need to see them in easy-to-read reports. After the reports are created, we test all of them on each version of SQL Server.
Since I needed to setup SQL Server Reporting Services (SSRS) 2017 a second time (for a new reporting services point in my lab), I decided to put together a blog post series about how to install SQL Server 2017 and SSRS 2017, and then how to add the SSRS site as a reporting point in ConfigMgr current branch.
Prerequisites
The following items are required before you can start installing the ConfigMgr reporting services point.
- SQL Server 2017 is installed.
- SSRS 2017 is installed and configured. You can learn how to install SSRS here.
- The SSRS connection account is created. Read the following section for more details.
- ConfigMgr current branch is setup.
SSRS Connection Account
Before we begin with the ConfigMgr install reporting services point, I want to say a few words about the SSRS connection account. When you create this account in AD, grant it NO extra permissions within the domain. Please don’t make it a domain admin. All it needs is regular, low rights. Don’t even think about making it a local administrator on SQL Server or the SSRS server. Why am I saying this? ConfigMgr takes care of granting the permissions it needs within SQL Server and SSRS.
Adding the Site Server Computer Account as the Local Administrator
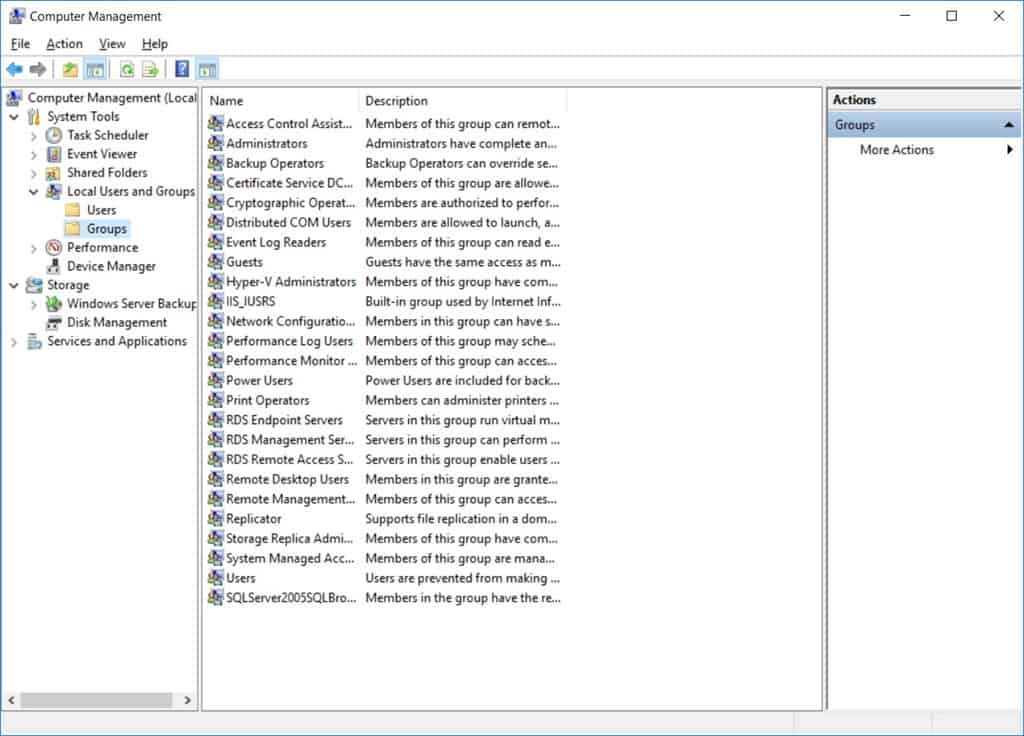
On the SSRS server, start by opening up Computer Management. Expand Local Users and Groups and then Groups. In the center panel, double-click on the Administrators group.
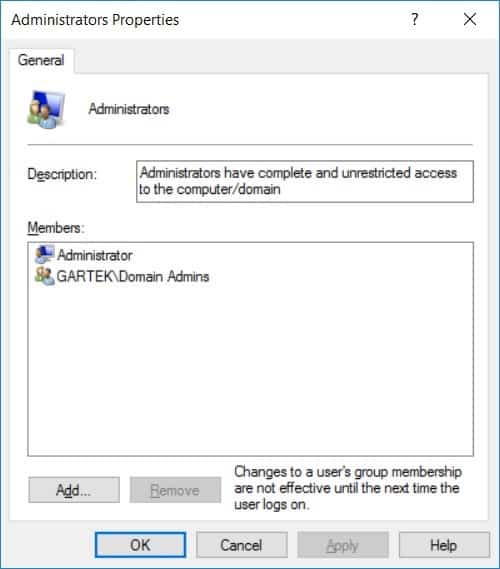
Click Add…
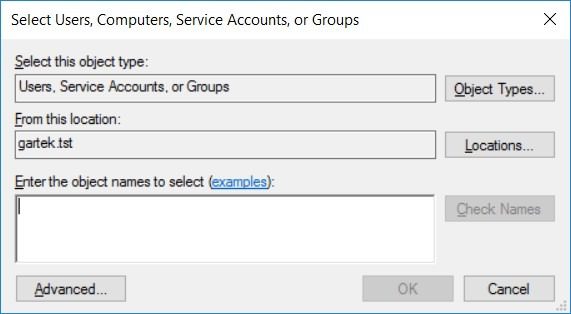
Click Object Types…
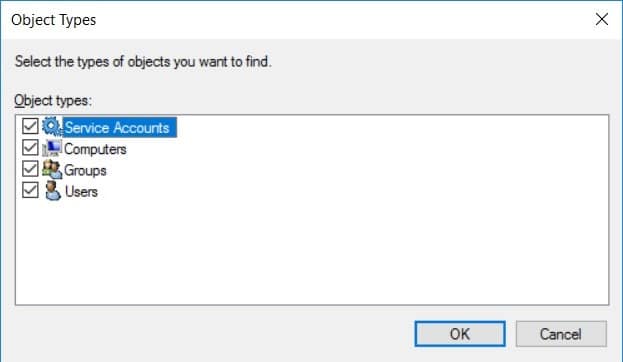
Select Computers and click OK.
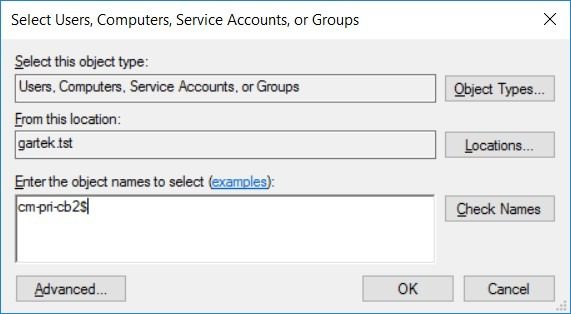
Type the site server’s name with a dollar sign $ at the end of it and then click Check Names.
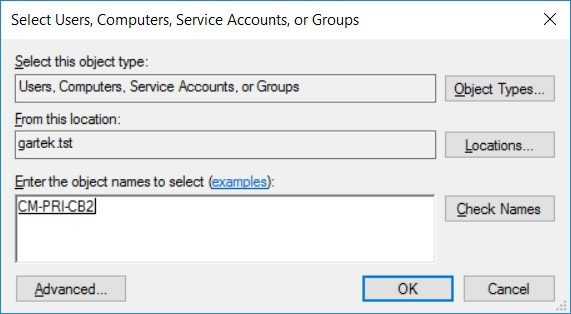
In the above screenshot, you can see that the text of the site server’s name is now in uppercase letters, and it is underlined. This indicates that the computer account was found, and everything is good in order to proceed to the next step. Click OK.
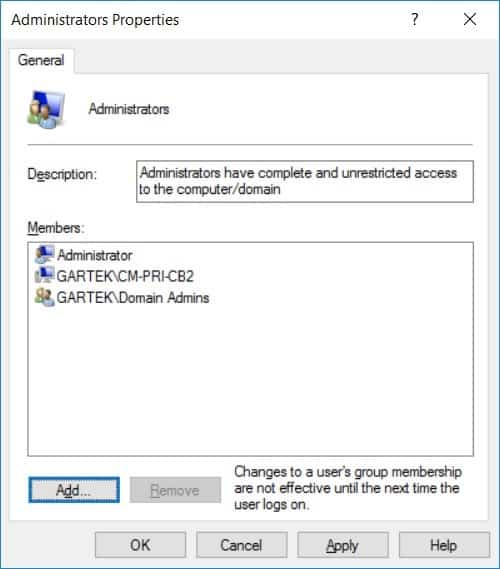
Click OK and then close the Computer Management window.
Add the Site Server Computer Account as a SQL Server Administrator within SQL Server
Since I cover these steps in my blog post, How to Create a SQL Server Computer Account Login, I won’t repeat them here. Please note: this step must be completed before installing the ConfigMgr SQL reporting services point.
Installing the ConfigMgr Reporting Services Point
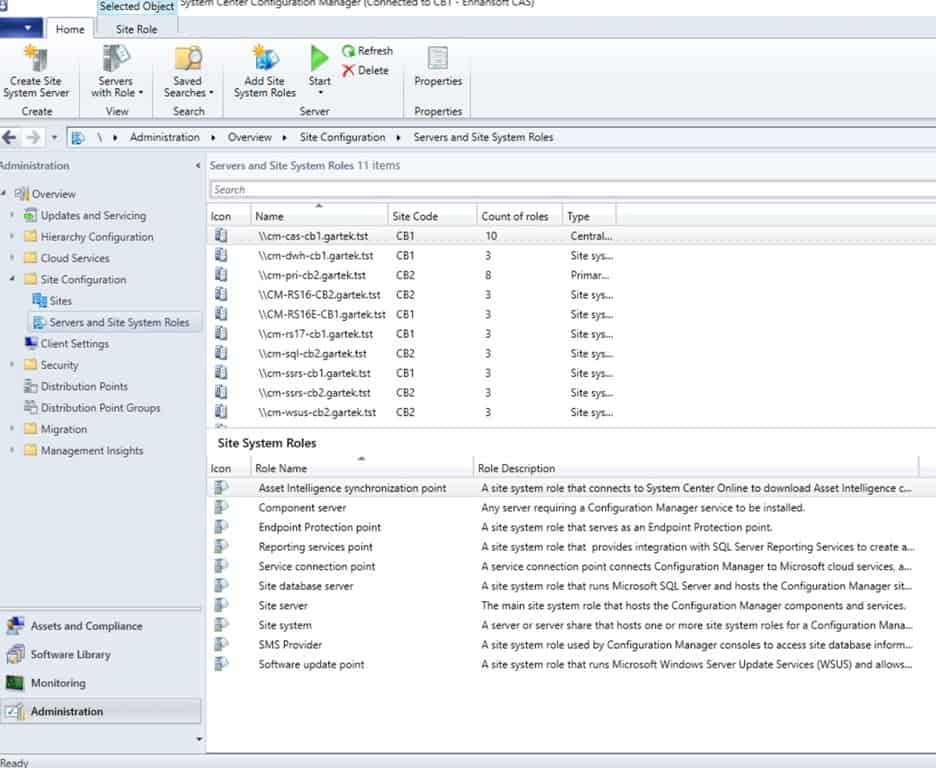
Open your ConfigMgr console, select the Administration workspace, expand the nodes Site Configuration and then Servers and Site System Roles. On the Home tab, select Create Site System Server.
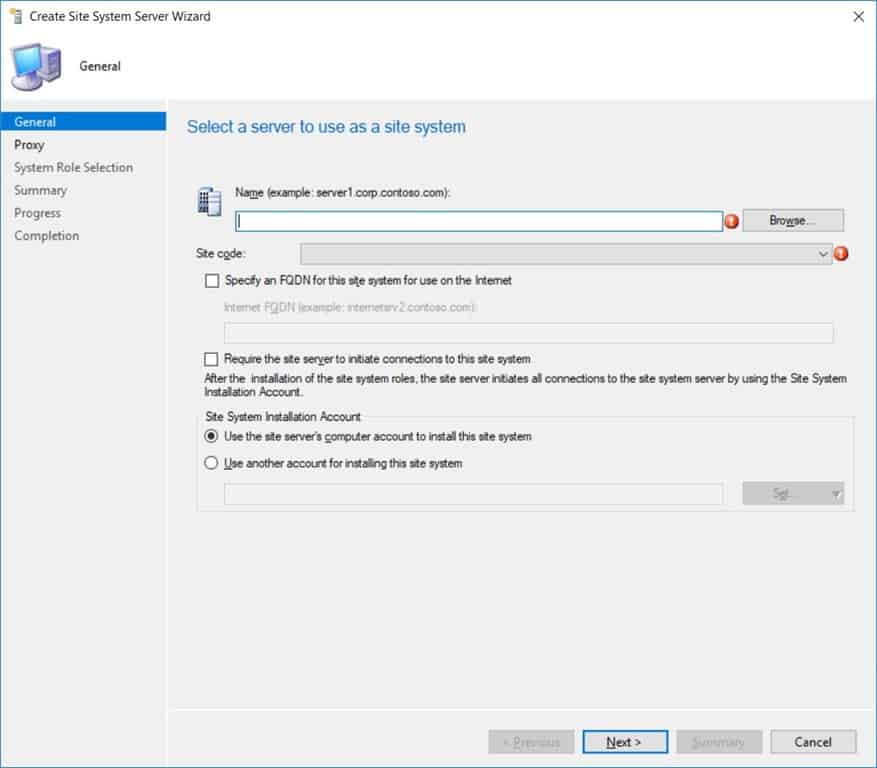
Click Browse…
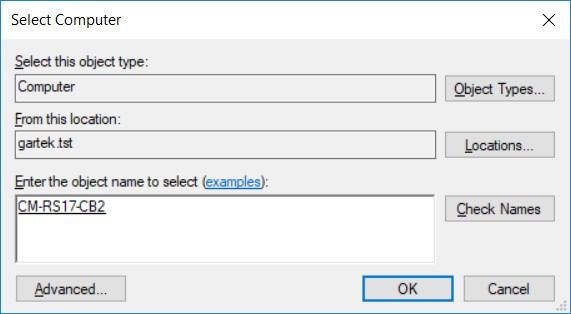
Enter the server’s name and then click on the Check Names button. Once the server’s name is underlined and in uppercase (similar to the one in the screenshot above), you will know that everything is good to go. Click OK.
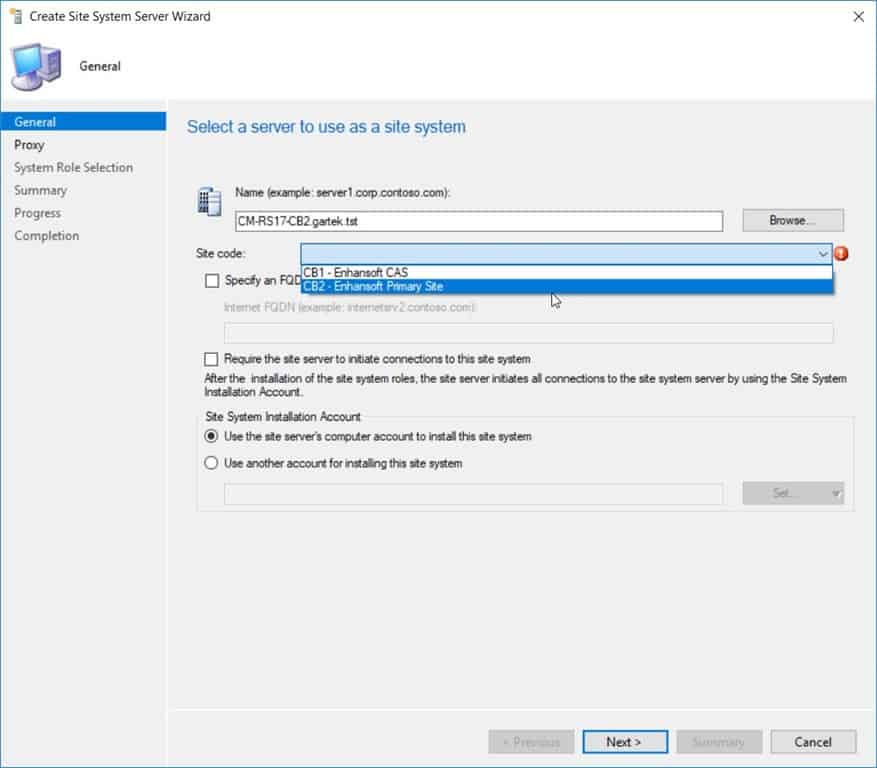
Select your site code.
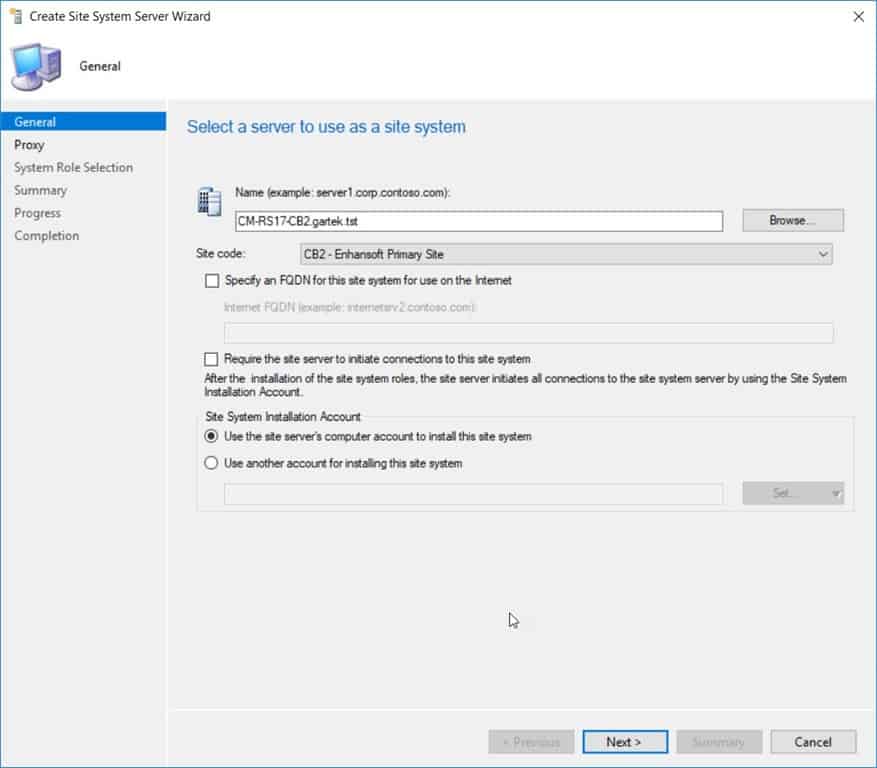
Click Next.
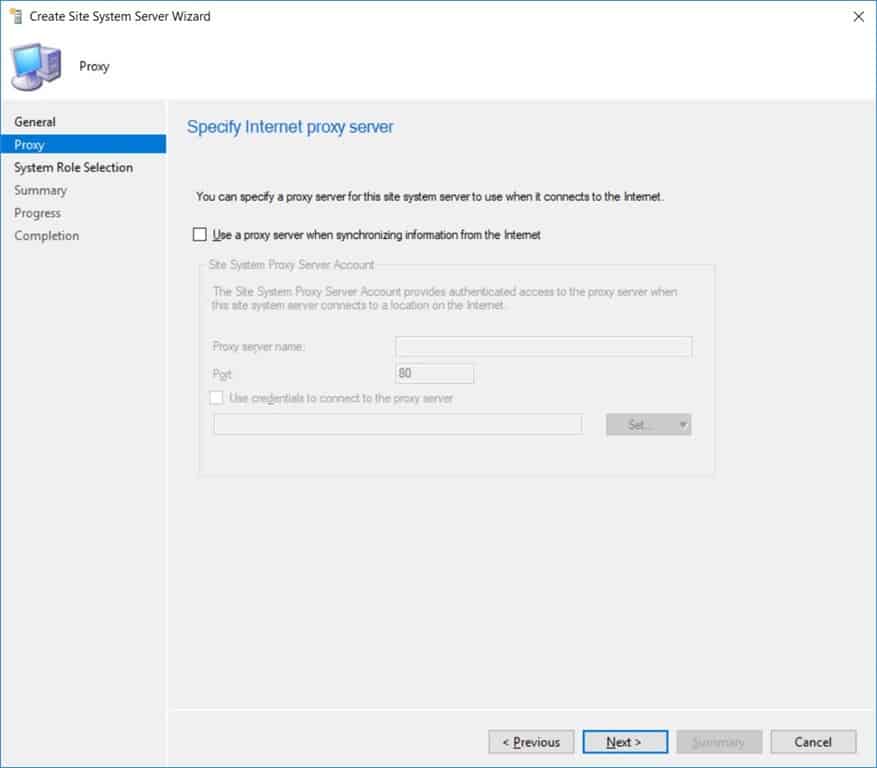
Click Next.
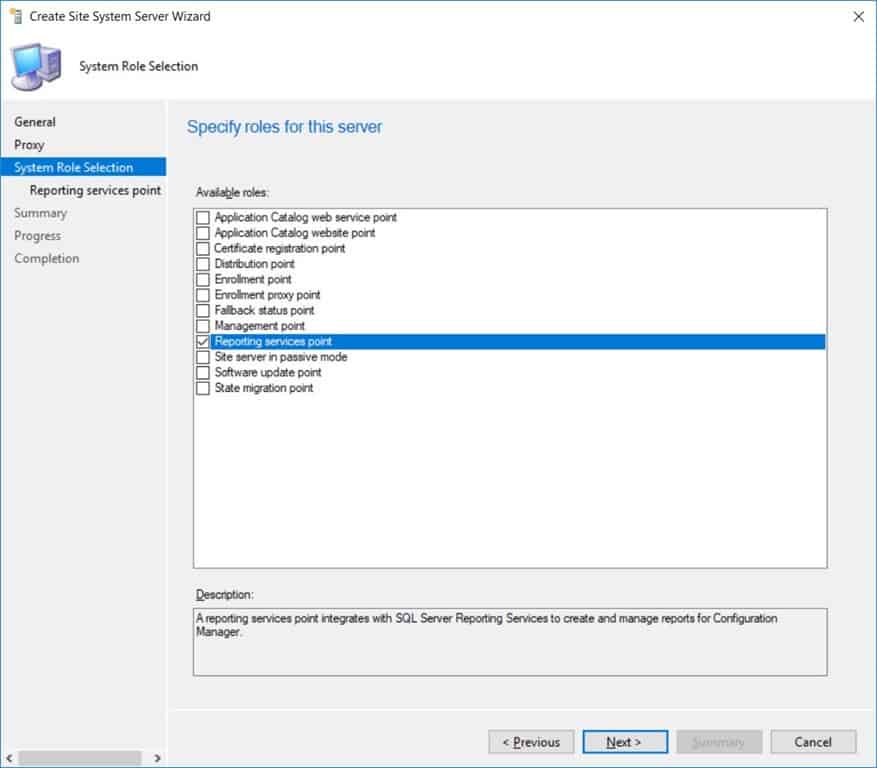
Select Reporting services point and then click Next.
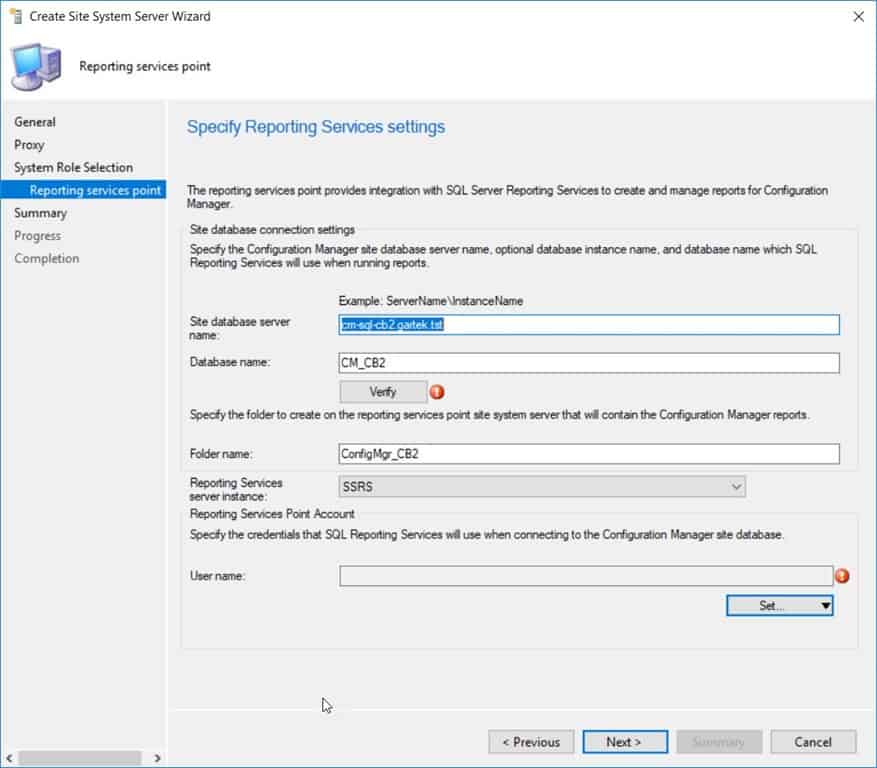
Click Verify.
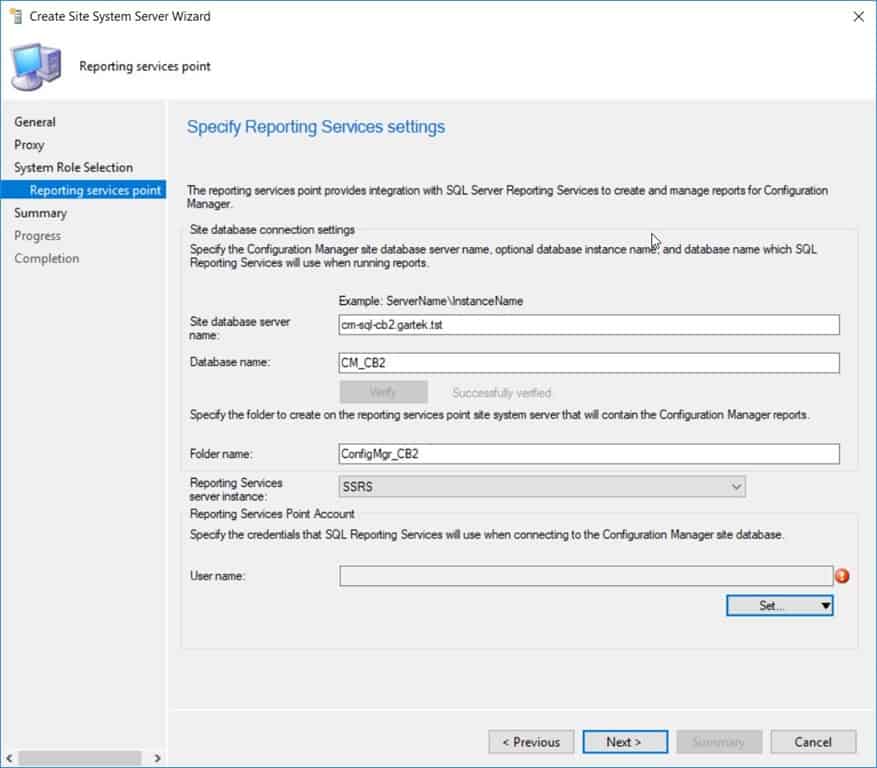
Your Reporting Services server instance should be automatically selected for you.
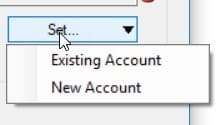
Click Set… and then New Account.
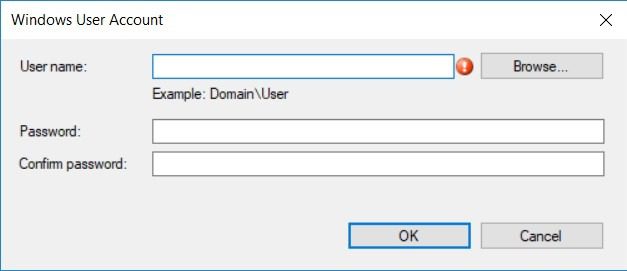
Click Browse…
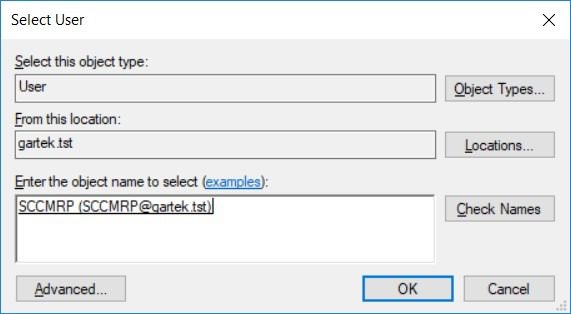
Enter the reporting services point account name and then click on the Check Names button. Once the account is underlined and in uppercase (similar to the example in the screenshot above), click OK.
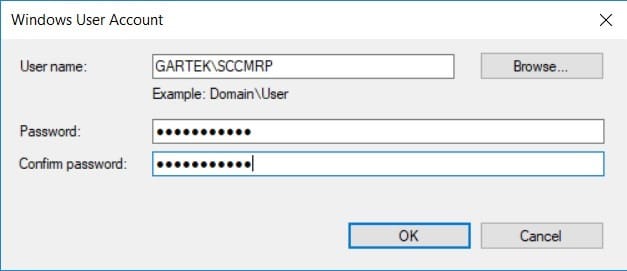
Enter and confirm the password, then click OK.
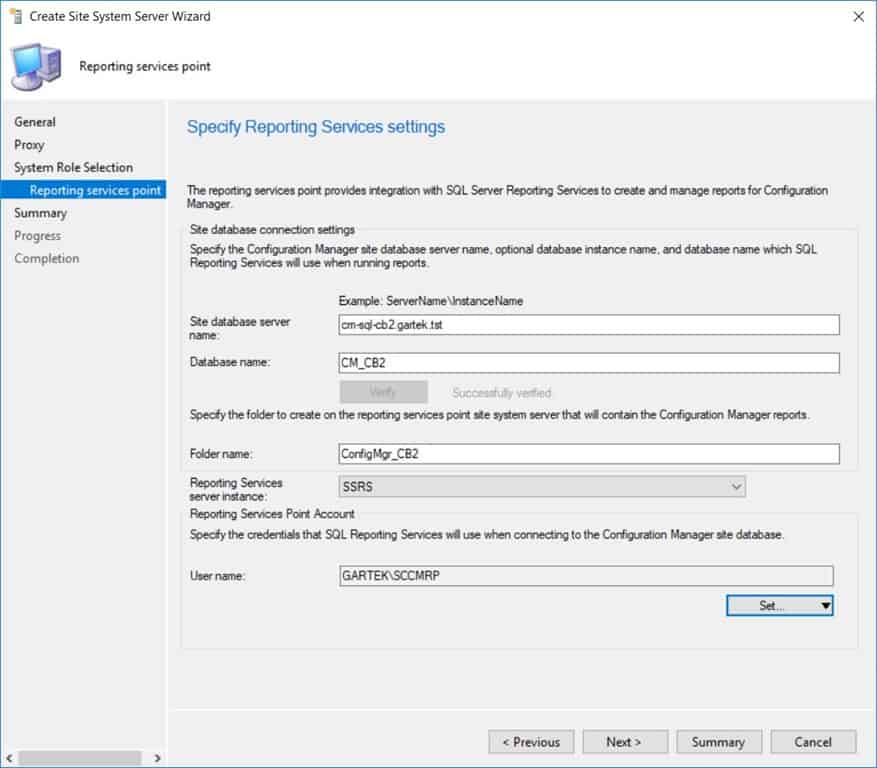
Click on the Summary node.
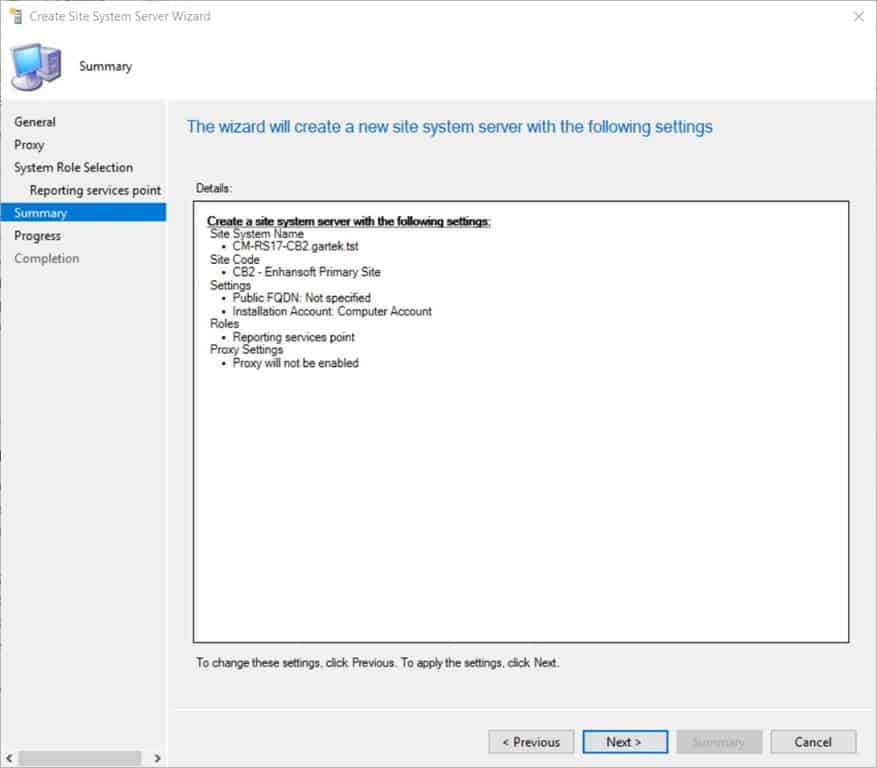
Click Next.
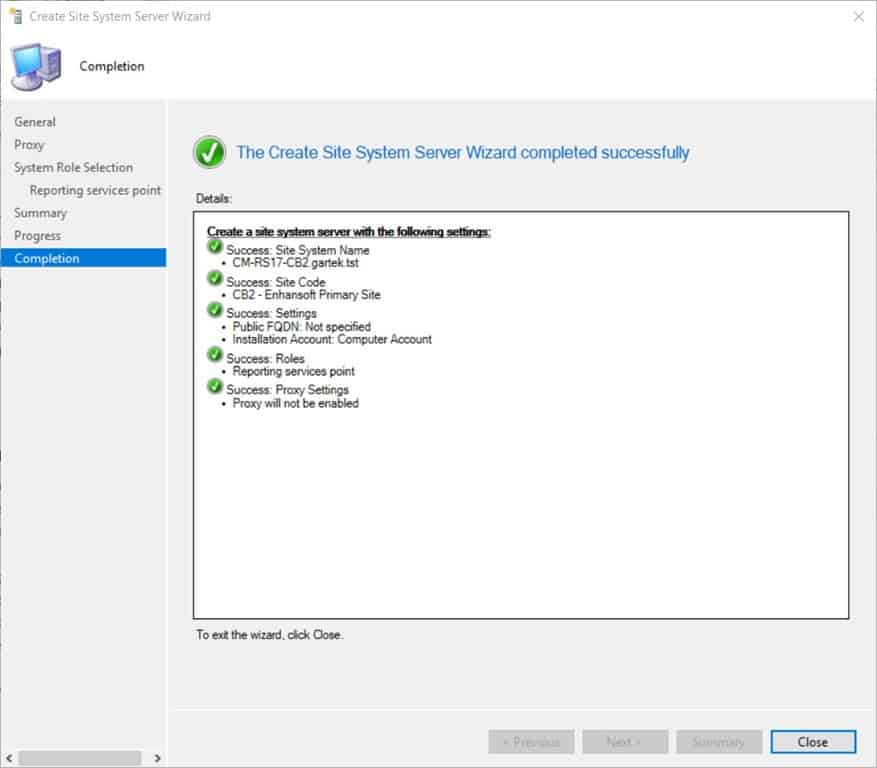
Click Close. With that last step completed, the ConfigMgr reporting services point is installed. I recommend waiting around 15-30 minutes before checking that everything is setup correctly.
Validating the ConfigMgr Reporting Services Point
With the installation of the reporting service point complete, it’s time to see if we can connect to the report server and see reports in our defined folder. By running tests, we can see if the Reporting Services can access the ConfigMgr site database and retrieve the returned data.
There are two main tests you should perform in order to validate that the SCCM reporting services point is working properly. All you are going to do is test the URL (http:///reports) in two different locations by following the exact same steps. The details about each test are listed below.
Test 1
This test confirms that the ConfigMgr reporting services point can access the reporting site from the SSRS server itself.
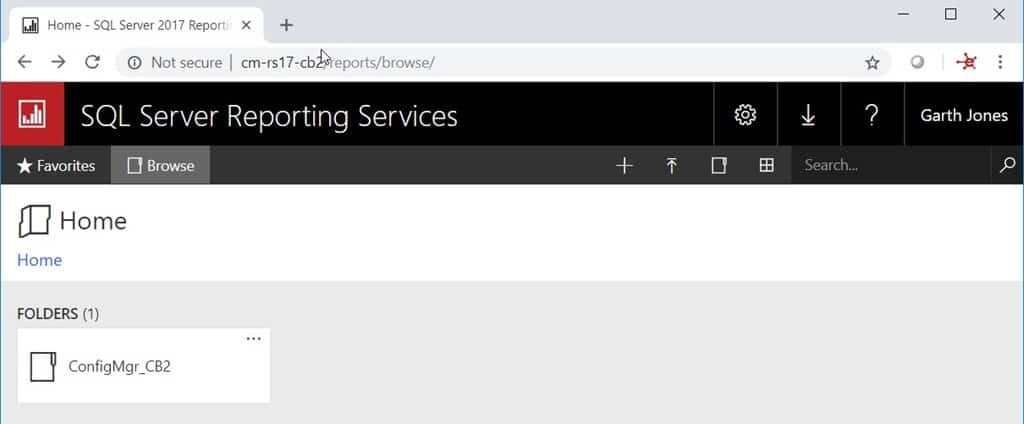
First, on the SSRS server, browse to http://<servername>/reports. This should always work and, if it is successful, you should see a similar web page as the one shown above.
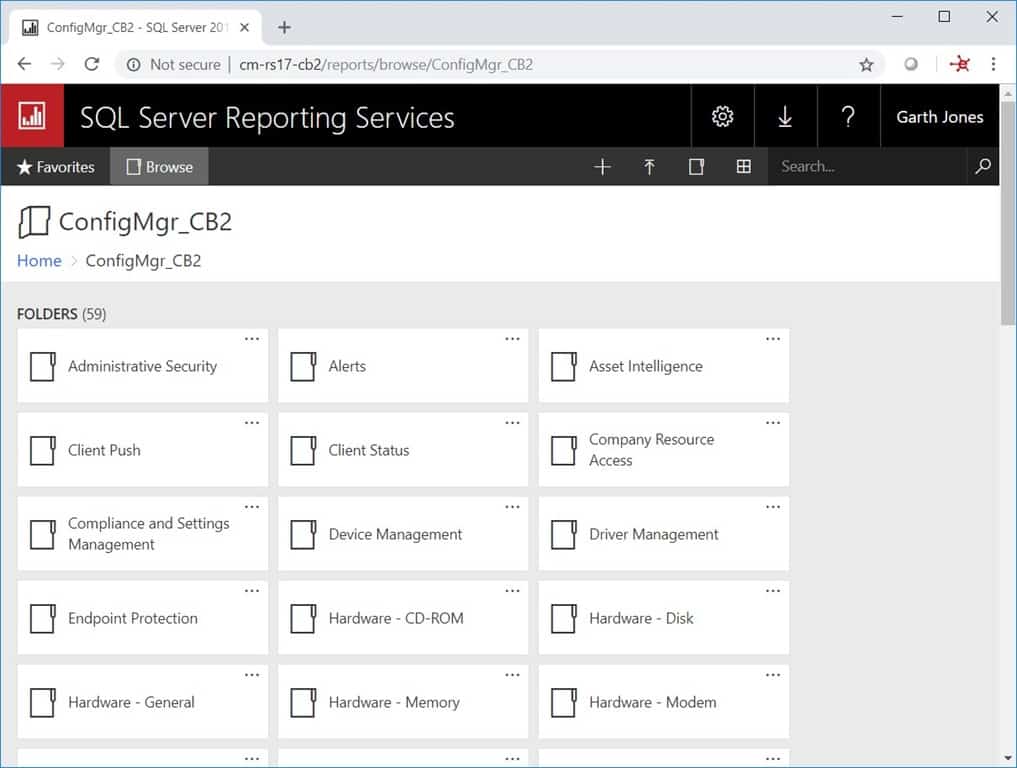
Next, drill down on the ConfigMgr_<yoursitecode> link. You should, again, see a webpage that’s similar to the one above.
Finally, select a report and run it. In the worst-case scenario, the report shows no results, but it confirms that it is a functioning report.
Test 2
This test proves that any remote computer (from the SSRS server) can access the reporting site. Once again, you are going to perform the same steps as you did in Test 1, and the results of each step will look exactly like the screenshots shown in the first test.
On a computer that is remote to the SSRS server, browse to http://<servername>/reports. If all the firewall ports are setup correctly, this test will work perfectly.
Next, drill down on the ConfigMgr_<yoursitecode> link. Again, you should see a webpage that’s similar to the one in Test 1.
Finally, select a report and run it. Ideally, it’s the same report you selected in the first test, so you should see the exact same results.
Now that you validated the ConfigMgr reporting services point, you can hand out the link to anyone who needs to view reports within ConfigMgr. They will now have access to paginated report files on a responsive website browser layout.
If you have any questions about how to install the ConfigMgr reporting services point, please feel free to contact me at @GarthMJ.
Additional ConfigMgr Resources
Learn more about how to better use ConfigMgr.
Overview
Inventory
Reporting
- How Can I Install Report Builder?
- Dynamic Images to SSRS Report for SCCM
- Editing SCCM Reports with Report Builder
- Fixing the SCCM Reporting Services Point
Scripting
Security/Permissions
Software
External Integration


