


This post covers how to set up Windows Autopilot using Intune. According to Microsoft, Windows Autopilot is a suite of technologies that sets up and pre-configures new devices, making them ready for productive use. It is a method for IT administrators to set up new computers quickly and easily. This is done with assistance from hardware vendors, which streamlines the process. It allows users to receive their devices and administrators to manage them, without the need for IT admins to install custom images, drivers, etc.
Introduction to Windows Autopilot with Microsoft Intune
We will cover the essentials for implementing Autopilot, useful in both corporate and personal lab settings. Autopilot is a time-saver, eliminating the wait time for devices to get custom-imaged by instead using the OEM-provided image. It ensures devices are tenant-registered and properly set up, facilitating immediate use upon receipt. While Autopilot is effective, always test and have contingencies for occasional issues, like vendor errors registering devices in wrong tenants or shipping delays. Despite these rare setbacks, Autopilot enhances efficiency and the user experience.
Let’s get started.
Prerequisites for Using Windows Autopilot with Microsoft Intune
Windows 11 General Availability Channel Required
- Windows 11 Pro
- Windows 11 Pro Education
- Windows 11 Pro for Workstations
- Windows 11 Enterprise
- Windows 11 Education
Windows 10 General Availability Channel Required
- Windows 10 Pro
- Windows 10 Pro Education
- Windows 10 Pro for Workstations
- Windows 10 Enterprise
- Windows 10 Education
- Not Supported Windows 10 LTSC/LTSB
HoloLens
- Windows Holographic, Version 2004 or later.
Licensing Requirements
- Microsoft 365 Business Premium
- Microsoft 365 F1 or F3
- Microsoft 365 Academic A1, A3 or A5
- Microsoft 365 Enterprise E3 or E5
- Enterprise Mobility + Security E3 or E5
- Intune for Education
- Microsoft Entra ID P1 or P2 and Microsoft Intune
Configuration Requirements
- Configure Microsoft Entra automatic enrollment
- Configure Microsoft Entra custom branding
With the required Windows and Licensing Requirements in place, let’s tackle our configuration requirements to help with the set up.
Configuring Microsoft Entra for Windows Autopilot with Microsoft Intune
Go to Microsoft Entra ID > Mobility (MDM and WIP) > Microsoft Intune
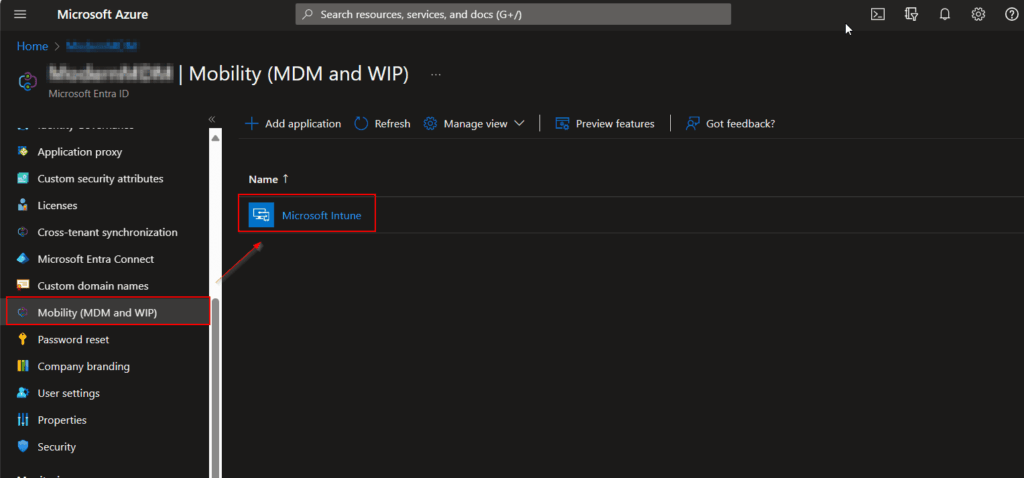
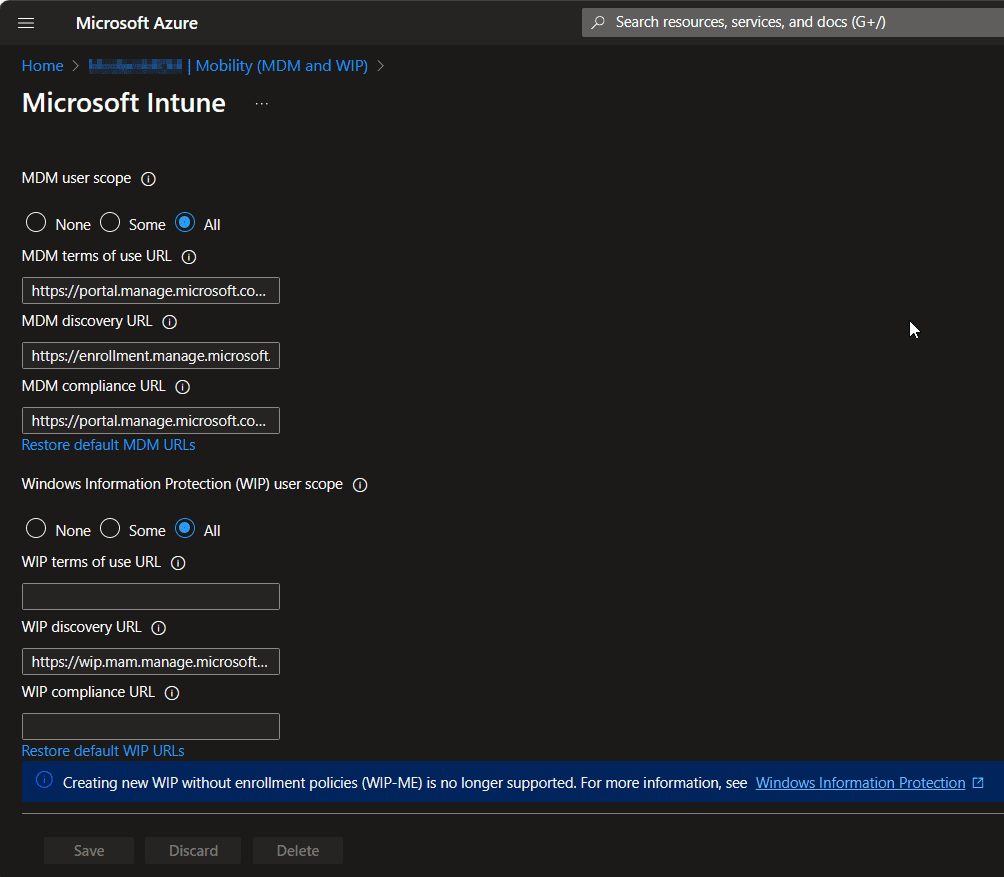
After clicking on Microsoft Intune, we can then set up the MDM user scope. In my case, I will be pointing this to All and keeping the default URLs, but if you want to test, you can select Some and chose a pilot group. By selecting All, all users can automatically enroll their windows devices for management with Microsoft Intune. Select Save when done.
Set Up Entra Custom Branding
Next, let’s set up our company branding, which will help with displaying your organization specific login page, which helps smooth the process for your users.
Go to Microsoft Entra ID > Company Branding > Edit under Default sign-in experience.

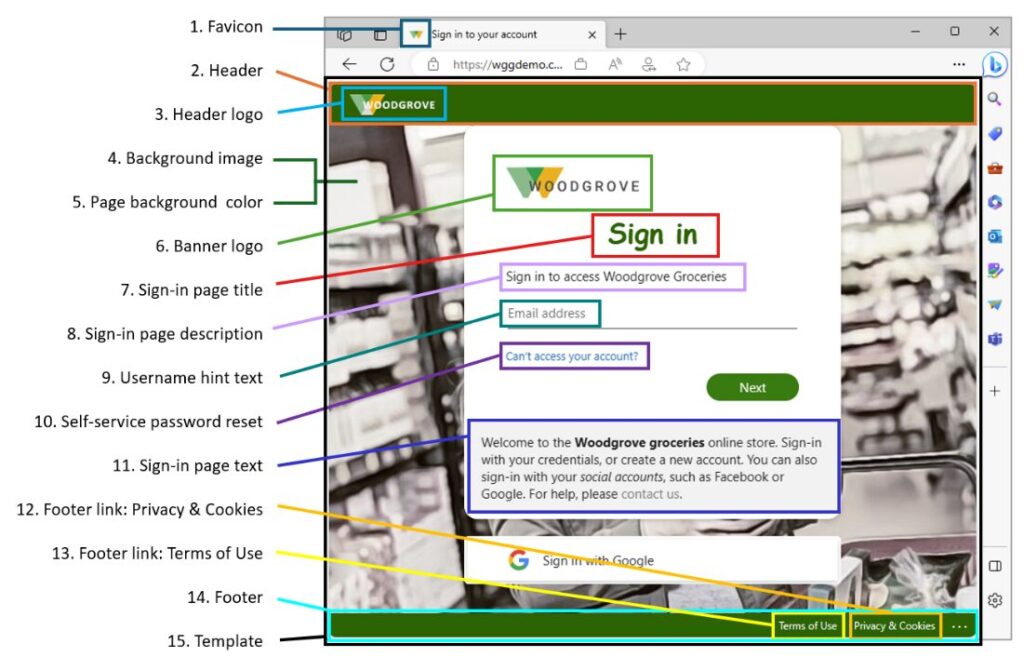
Here is a photo from Microsoft to reference when customizing your branding.
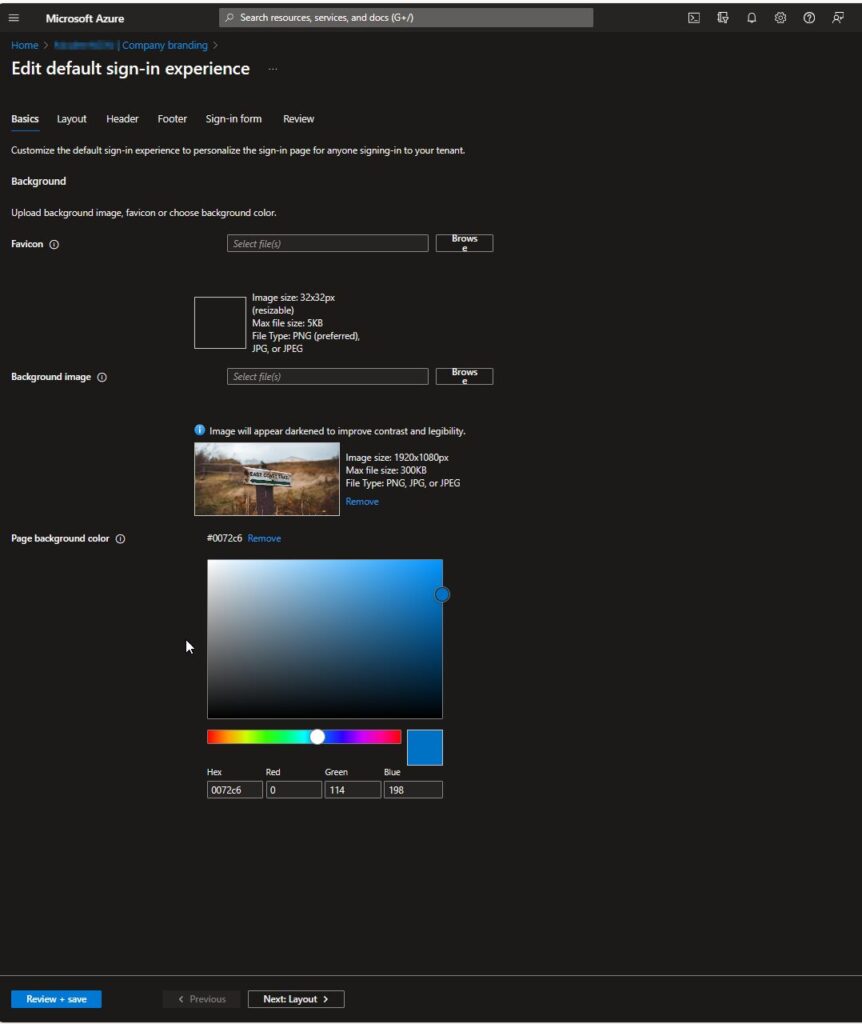
We will then land on the Edit default sign-in experience page.
Here we find Basics.
- Favicon: Select PNG or JPG of your logo that appears in the web browser tab.
- Background Image: Select PNG or JPG to display image on your sign-in page.
- Page background color: Color you choose will be used in case of a slow connection.
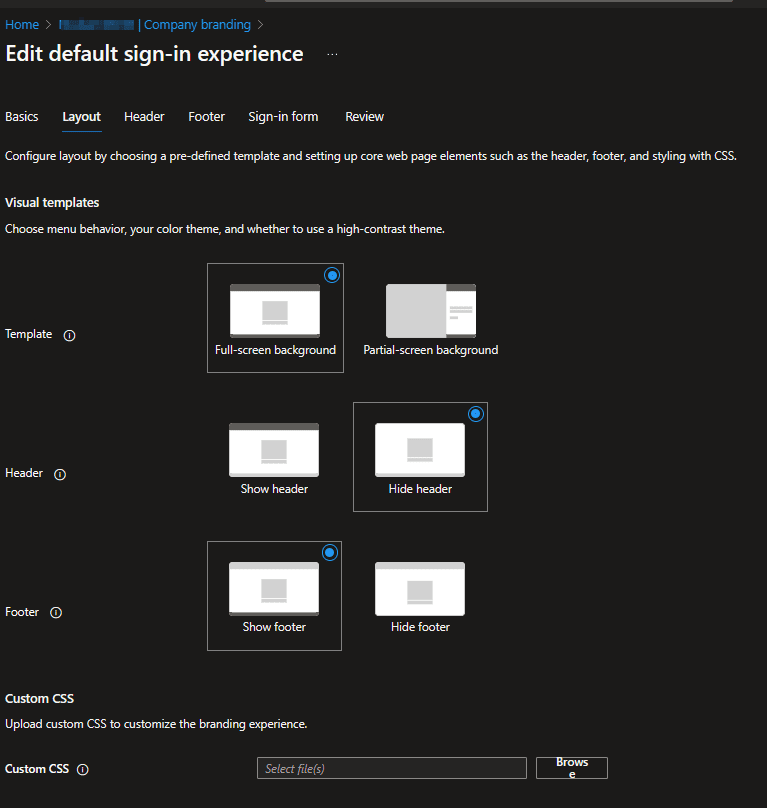
In the Layout page, this determines the placement of web page elements on the sign in page.
- Template: Full-screen background or Partial-screen background
- Header: Show header or Hide header
- Footer: Show footer or Hide footer
- Custom CSS: Allows to select CSS file to customize branding experience.
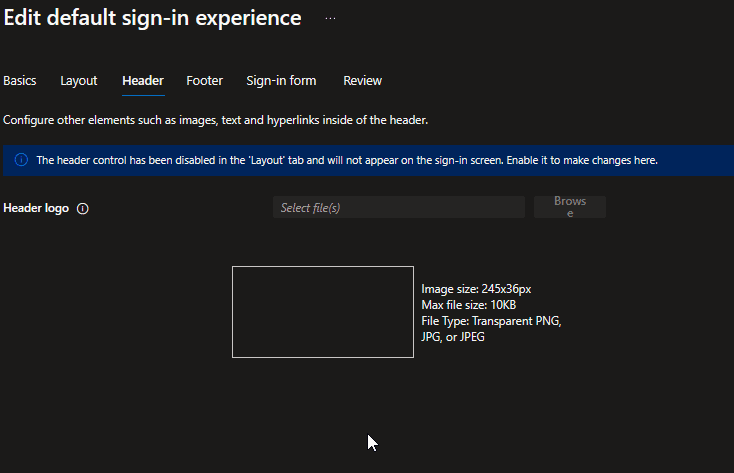
Header page: this will appear across the top of the sign-in page.
If the header in the previous layout page is set to Hide header, you will not be able to make any changes.
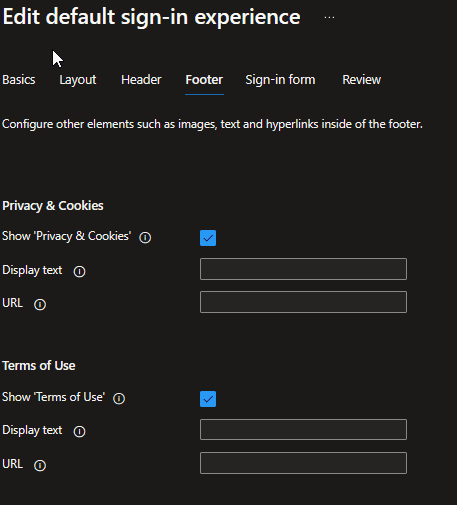
At the bottom of the sign-in page, you can add the following information to your Footer.
- Privacy & Cookies
- Terms of Use
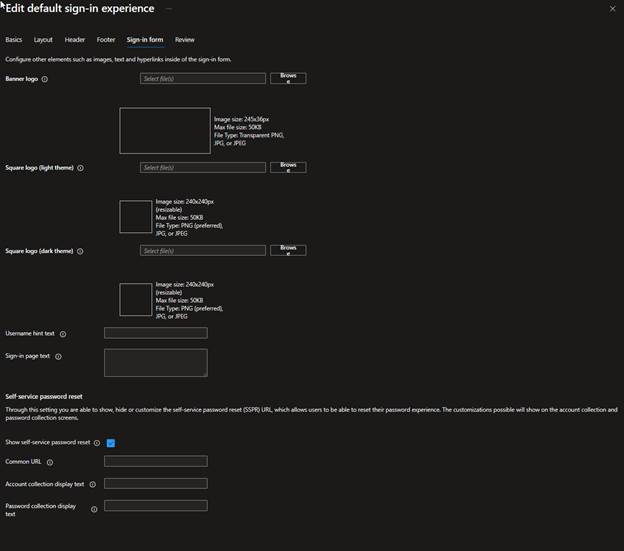
In the next page, we land on the Sign-in form, where users provider their credentials and gain access to organization resources.
Lastly, Review the settings. Verify all changes are accurate and select Save when done.
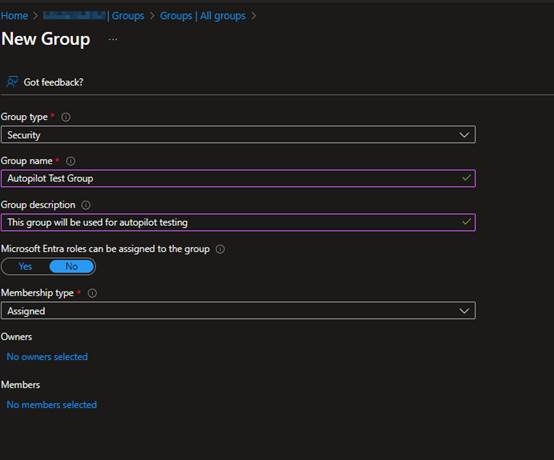
Create Autopilot Test Group
First, Create a Device Group that will be used when targeting autopilot profiles, enrollment status pages, and other assignments like applications, etc. This will also help us test with a small set of devices so we can track and monitor changes more easily.
Go to Microsoft Entra ID > Groups > New group > Create a group with your preferred information and add the device you will want to use for autopilot testing.
Create Windows Autopilot Deployment Profile
These profiles allow you to configure the out-of-box experience (OOBE) for end users during device setup. These profiles determine deployment modes, user account types, language settings, and more.
Go to Microsoft Intune > Devices > Enrollment > Deployment Profiles
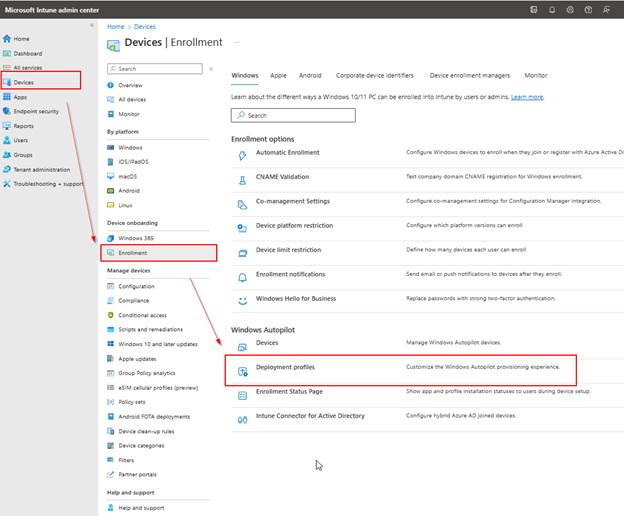
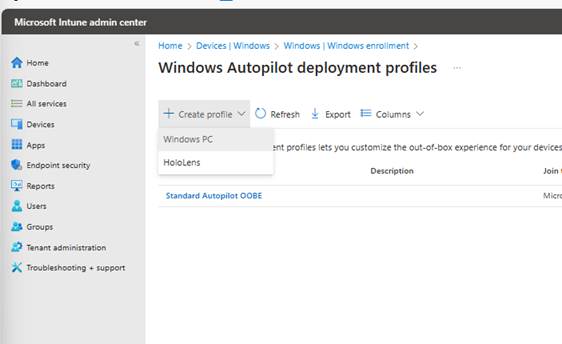
If you do not have one already, select + Create Profile > Windows PC to set up a deployment profile.
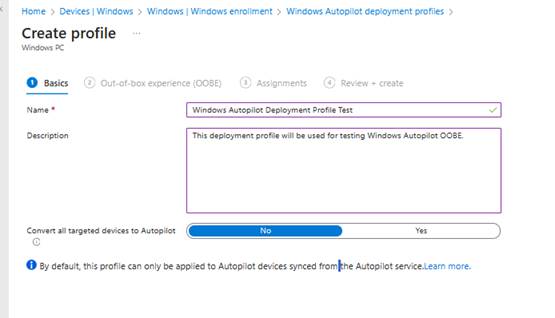
In the Basic page you can add Name and Description and then select if you want to convert all targeted devices to Autopilot. Select Next.
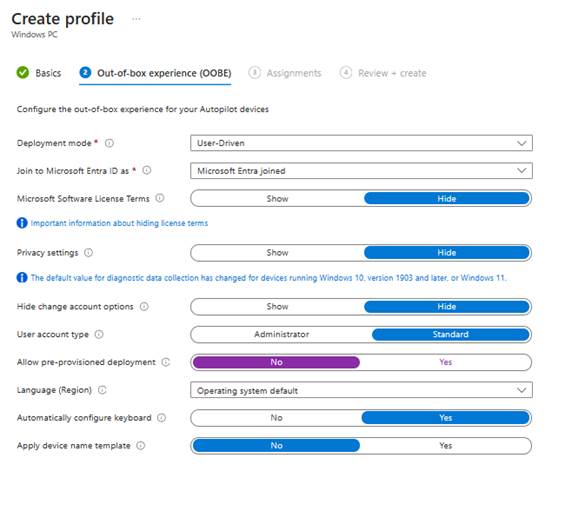
Now we land on the Out-of-box experience (OOBE). These settings look good overall, but let’s look at a few important settings.
- Join to Microsoft Entra ID as Microsoft Entra joined or Microsoft Entra hybrid joined. This is straightforward, but you do have either option. In my case, I want to have this device fully managed by Intune as it’s the only device management platform. Where if you are using other platforms, you want to select Microsoft Entra hybrid.
- User account type: This setting will be used to indicate whether users are administrators or standard users on the device.
- Language (Region): This selection will indicate the language and region that will be used for the device.
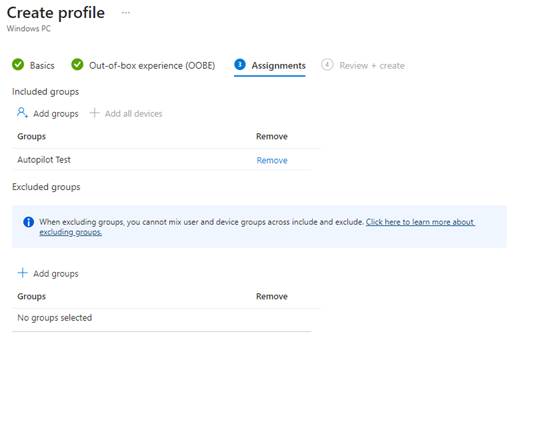
After setting up your Out-of-box-experience (OOBE), you can choose assignments on who will receive this deployment profile.
Review + Create your deployment profile after you have confirmed these are the correct settings for your deployment.
Setting Up the Enrollment Status Page for a Smooth Deployment
Let’s next create an enrollment status page. This will show app and profile installation status to our users during their device setup.
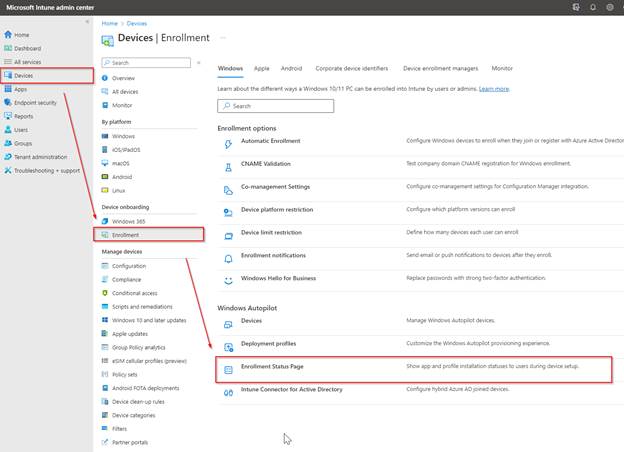
Go to Microsoft Intune > Devices > Enrollment > Enrollment Status Page
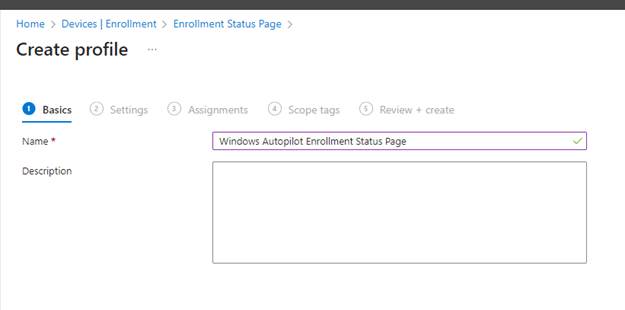
Click on +Create to set up a new enrollment status page then click Next. Go ahead and fill out a name and description.
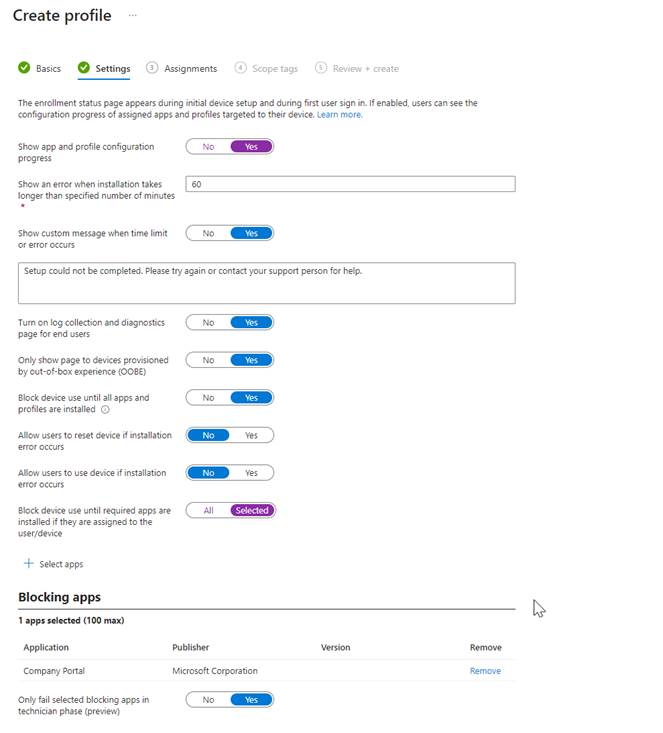
If you would like to make changes to what appears during the configuration progress, lide the radio button in Show app and profile configuration progress to Yes.
We have a few different options available to use, so let’s uncover some of these to learn what they do.
- Show an error when installation takes longer than specified number of minutes: Here, we can set a time limit to alert the user of an error; in our case, it is set to 60 minutes.
- Show custom message when time limit or error occurs: We can enable a ‘Yes’ or ‘No’ option to display a message to our end users when a time limit or error occurs. This can be helpful, providing end users with guidance on what to do next.
- Turn on log collection and diagnostics page for end users: Enabling log collection and a diagnostics page for end users enhances troubleshooting capabilities, allowing them to provide diagnostic information to administrators for issue resolution.
- Only show page to devices provisioned by out-of-box-experience (OOBE): This setting is used to stop or allow enrollment status page from showing up to all new users who sign into device. If No is selected the out-of-box experience is shown to every new user who signs in to device for first time. If ‘Yes’ is selected, the enrollment status page is shown only during the initial phase and not shown to subsequent users who sign in to the device.
- Block device use until all profiles are installed: You have two options first one being No, where users can leave the Enrollment Status page before Intune is done setting up device. If Yes is selected, users can’t leave until Intune is done setting up device.
- Allow users to reset device if installation error occurs: If set to Yes users can reset devices when installation fails, if ‘No,’ users are not given the option to reset the device.
- Allow users to use device if installation error occurs: If ‘Yes’ is selected, users can skip the ESP when installation fails. If ‘No’ is selected, users cannot skip the ESP if the installation fails.
- Block device use until these required apps are installed if they are assigned to the user/device: In the picture below, I selected Company Portal app as a required app to install during ESP before users can use the device. If you have All Selected, all assigned apps must be installed before the user can use device.
NOTE: The more apps you select, the longer your provision phase increases.
- Only fail selected blocking apps in technician phase: this setting is used during pre-prevision phase to control how required apps are prioritized. If you select No, an attempt is made to install non-blocking apps, if blocking apps fail the deployment fails. If you select Yes, an attempt is made to install all required apps. If non-blocking apps fail, the ESP ignores these failures, allowing the process to continue.
Once done, select Next > In Assignments select the group you want to receive the profile.
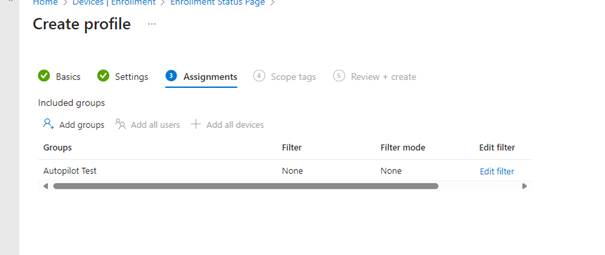
Review and create your profile once you have confirmed your selections.
Testing Your Windows Autopilot Deployment with Microsoft Intune
Now that we have the custom branding, autopilot deployment profiles, and enrollment status page, let’s test this Windows autopilot deployment out.
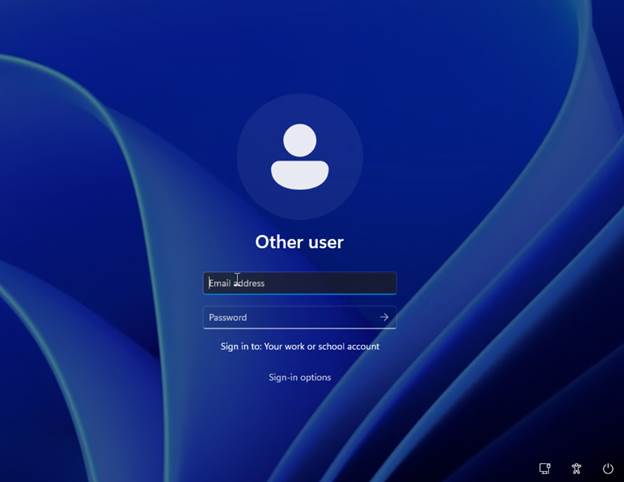
Here we have a virtual machine that was in the autopilot group.
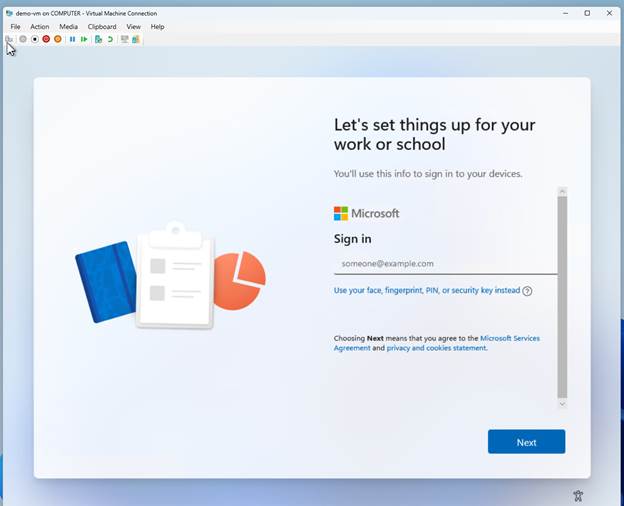
I went ahead and added my credentials to login.
During your setup, you’ll be directed to login with the Entra ID credentials you used earlier to login to the device.
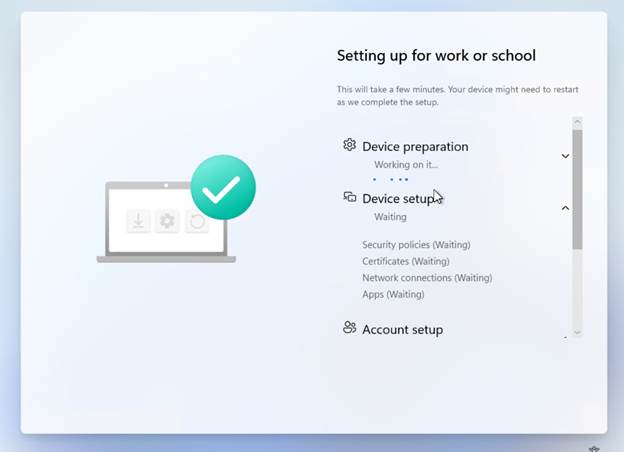
You’ll then be redirected back to the enrollment status page, where you’ll see things wrapping up.
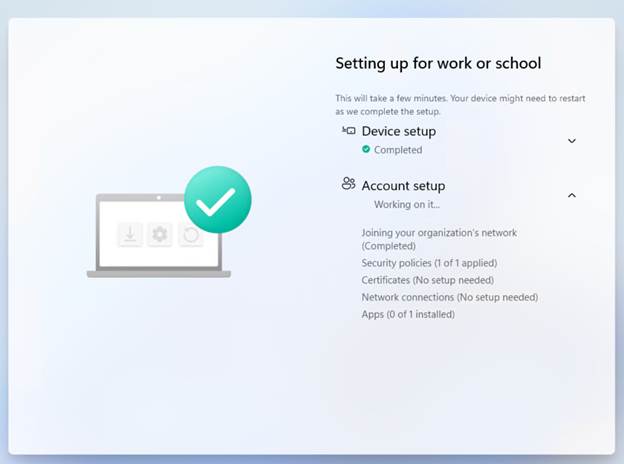
Reminder: When we set company portal to be a required app install during the autopilot process, we can see (above) that one application is scheduled to be installed during the process.
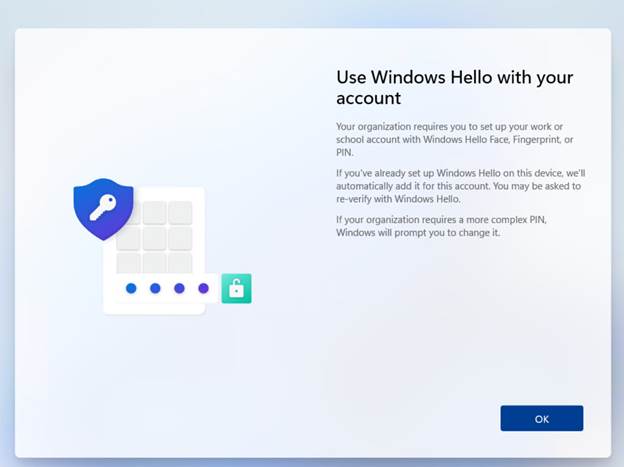
Once your setup is complete and you have Windows Hello setup in your environment, users will be directed to set it up.
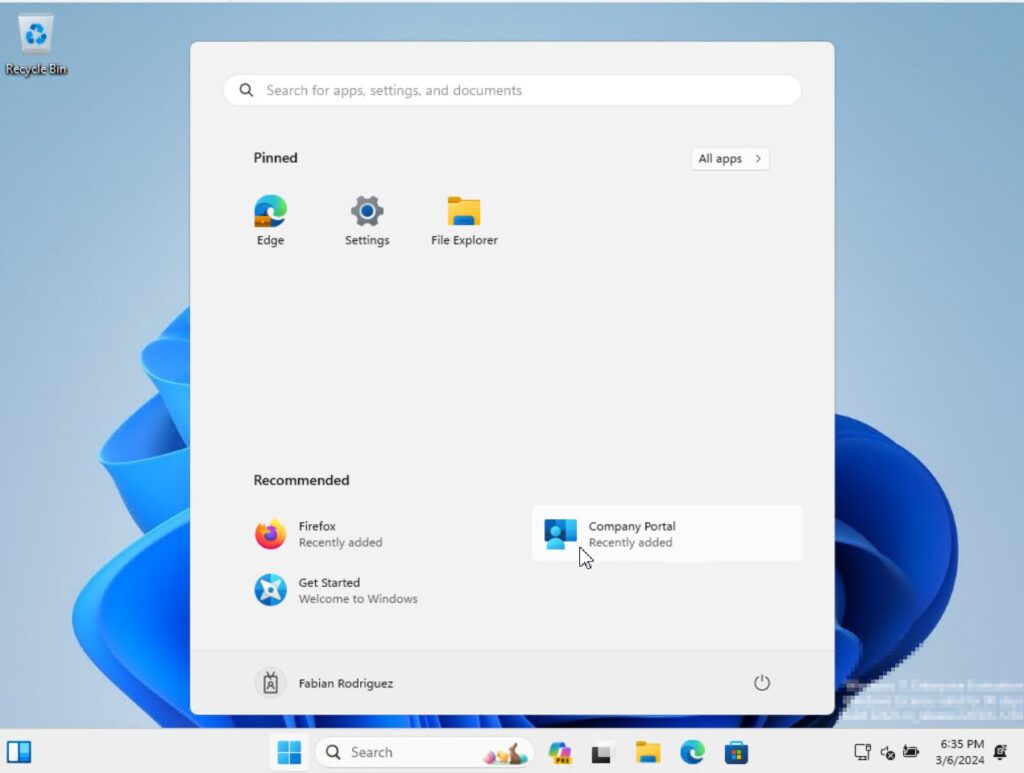
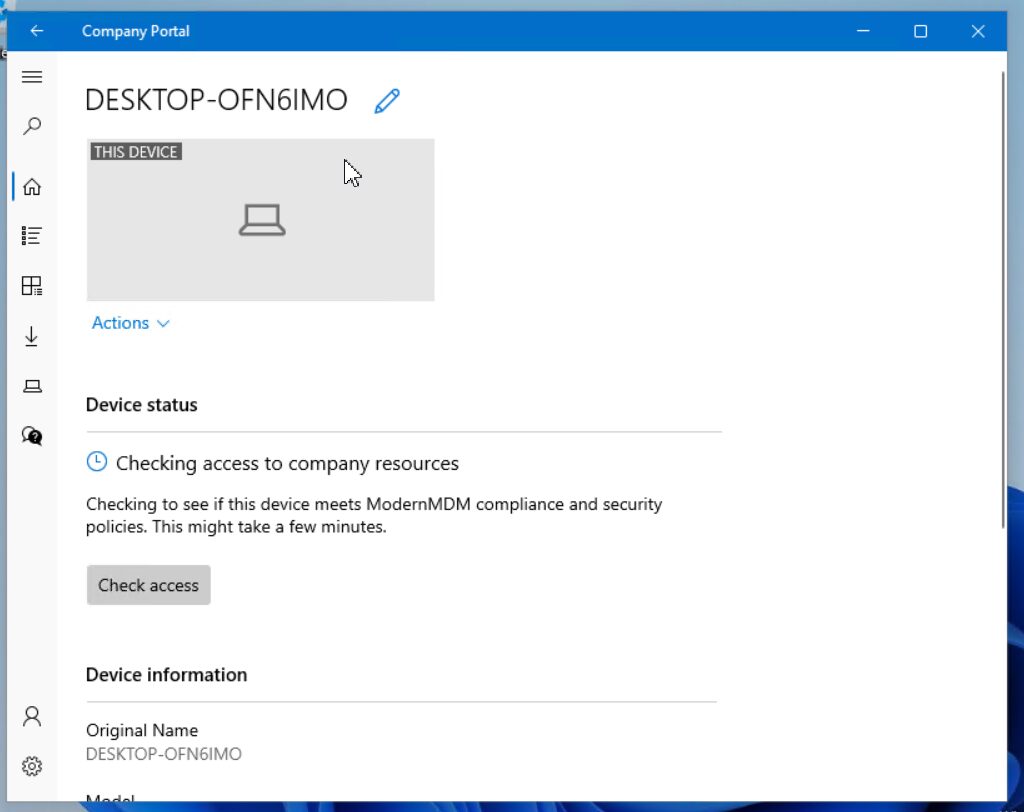
We can now see that our device is ready and we have the Company Portal application installed.
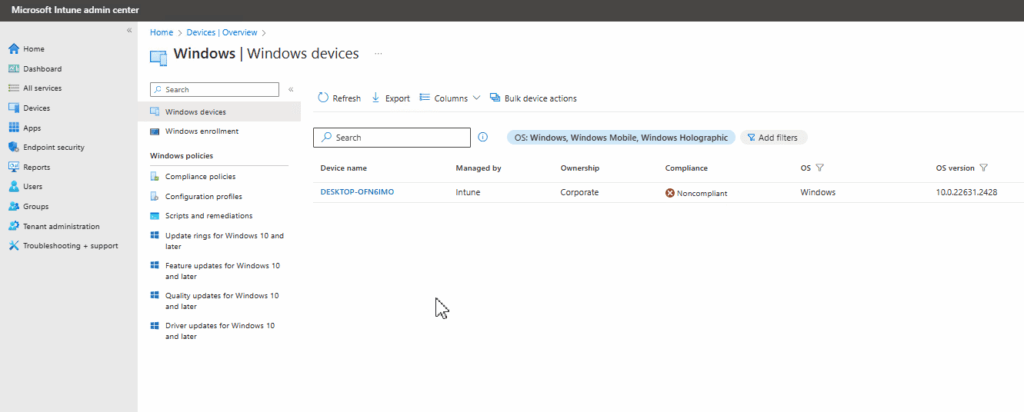
Now let’s verify this device is managed by Intune. The device name is DESKTOP-OFN6IMO
After checking in Intune, I can see that the device is indeed managed by Intune.
Benefits of Integrating Windows Autopilot with Microsoft Intune
In conclusion, setting up Windows Autopilot with Microsoft Intune streamlines the process of getting devices ready for use. This guide has demonstrated an efficient way to prepare and manage devices, emphasizing the need for careful testing. By applying these steps, IT teams can significantly improve setup efficiency and user satisfaction, showcasing the value of integrating advanced technologies in IT management.