


Initially, the challenge was straightforward: develop a script capable of identifying and uninstalling all versions of a given application from a computer. The solution, however, was not as simple. After considerable research and development, we crafted a PowerShell script that met these needs, but the process didn’t end there.
Feedback and real-world application have driven us to update this script further. Now, it not only uninstalls applications with greater precision—regardless of whether they are .EXE or .MSI files—but also integrates seamlessly with Microsoft Configuration Manager (ConfigMgr), allowing for immediate hardware inventory updates post-uninstallation.
A Tribute to Collaboration
A colleague, Jason Sandys, had previously tackled this challenge himself with VBScript. His work underscores the collaborative spirit within the IT community and the ongoing dialogue between VBScript and PowerShell. Jason’s script, which also prompts a hardware inventory cycle, serves as a testament to the collaborative spirit and diverse approaches available for managing IT tasks.
The Current Script to Uninstall Applications
Our current script includes the following capabilities:
- Comprehensive Inventory Management: Incorporates both delta and full hardware inventory options post-application uninstallation, ensuring your system’s inventory is always current.
- Enhanced Compatibility: Previous versions were limited to MSI files. The updated script extends its capabilities to EXE files, broadening its application scope.
- Efficient Application Detection and Uninstallation: Automatically detects and uninstalls all versions of a targeted application, leveraging both x86 and x64 registry keys for thorough removal.
- Detailed Logging: Maintains a comprehensive log of all actions for auditing and troubleshooting purposes.
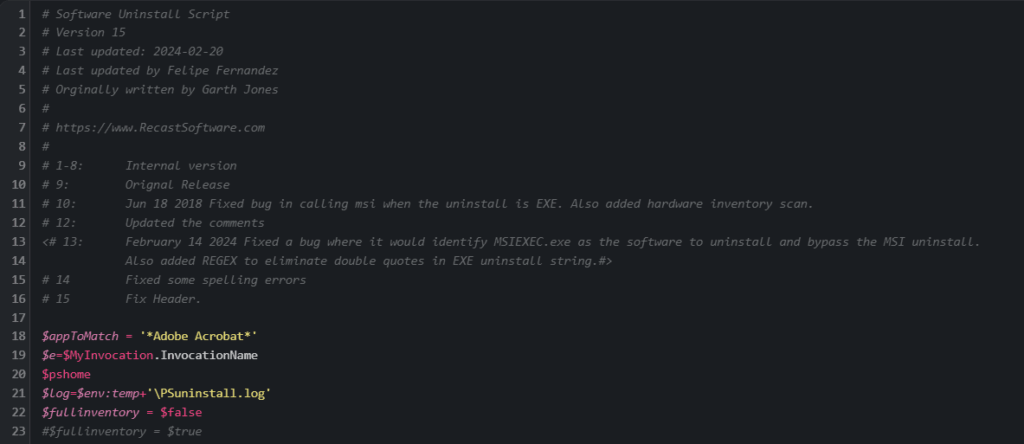
Below is the beginning of the script, but download the full script here.
Force a Full SCCM Hardware Inventory
By default, a delta hardware inventory cycle will start as one of the last steps within the script. There is nothing more that you need to do. However, we suggest forcing a full inventory when uninstalling applications. Then all you need to do is change the $fullinventory = $false value to $true. This will force a full SCCM hardware inventory to occur.
Deploying the PowerShell Script with ConfigMgr
Here is how you deploy this application management script:
- Customize the Script: Edit the script to specify the application(s) you wish to uninstall. Utilize wildcards (*) for broader matching criteria.
- Set Inventory Preferences: Decide whether to trigger a delta or full hardware inventory post-uninstallation and adjust the script accordingly.
- Prepare for Deployment: Create a package in SCCM, setting the command line to execute the PowerShell script with appropriate execution policies. It should look similar to the following:
- powershell.exe -ExecutionPolicy bypass -file Uninstallv10.ps1
- Deploy: As with any SCCM program, deploy your package to the targeted systems for automated application management.
Using the Uninstall Application Script
You can see in the screenshot below that several copies of MIR were installed on this test computer last year.

Our program is set to silently deploy in the background. Nothing to see from an end-user’s perspective!
If you would like to verify that the PowerShell script is running, look at the Task Manager. You’ll have to be quick! The script only takes a few seconds to a few minutes to run depending on the number of ARP it must remove.
As an aside, you can also see that the script ran within the Execmgr.log on your test computer.

You can see from the screenshot above that after a few minutes all the Monitor Information Reporting ARP entries were removed.
Remember that the hardware inventory cycle (delta or full) will start soon after all applications are uninstalled. It only takes a few seconds to run (~60 seconds).
Reboot Computers
In some cases, you might want to reboot the computers after the hardware inventory is submitted to SCCM. In our case, we added a Sleep command to the PowerShell script for 75-seconds before rebooting. If your hardware inventory takes longer, simply adjust the time accordingly.
Here are the commands we used:
Start-sleep – seconds 75
restart-computer –force
The Impact of Streamlined Application Management
Utilizing this script not only simplifies the uninstallation process but also enhances your IT environment’s security and efficiency by ensuring only necessary applications are installed and accurately reflected in your hardware inventory. This approach to application management aligns with best practices in IT security, ensuring systems are not burdened with outdated or unnecessary applications that could pose security risks.
Final Thoughts
The journey from the initial script to its current form illustrates the power of feedback, collaboration, and continuous learning in IT operations. As we move forward, embracing these advanced tools and techniques will be key in navigating the complexities of modern IT environments, ensuring we remain at the forefront of efficiency, security, and operational excellence.
