


Have you ever been given the heavy task of keeping your organization’s services running with “uptime” nearly perfect? 100% uptime, 100% of the time? Well, you are not in the minority.
Regardless of the business you may be in, limiting downtime is always a high priority. One common solution to tackle this challenge is to set up as many mission-critical applications in a High Availability (HA) configuration as possible. Or even if you just want to spread the network usage across your infrastructure, using a load balancer can come in handy. Some organizations might have the ability to purchase the hardware and software needed from a vendor such as Kemp LoadMaster or even NetScaler, but what if your organization doesn’t have the bandwidth or the funding for it?
For Recast Software, a perfect example of this would be the Recast Agent Gateway. Recast Agent Gateway is designed to be a secure communication point between a Recast Management Server (RMS) and the Recast Agents. In a perfect world, we would want to ensure that is always running so the Agents are always able to communicate with the Gateway, then back to RMS. The recommended requirements are 20k agents per gateway. In larger environments with more endpoints than that, it would make sense to setup separate gateways. But with the help of a load balancer, the tedious process of assigning agents to their respective gateways could be avoided and a single cluster identifier can be used instead.
In this series of posts, we aim to show how to set up a network load balancer and then how to utilize that load balancer with our Recast Agent Gateways.
What is Microsoft’s Network Load Balancing?
Microsoft offers a Network Load Balancing feature in Windows Server OS, where you can manage two or more servers as a single virtual cluster. This allows for applications to be installed and set up in a way that will ensure the optimum amount of availability, if set up correctly.
For example, you could set up a server in one of your data centers and then the other in a different data center. You could have network traffic flow to a primary server, and then to a secondary one when certain conditions are met. Or you could even share the network load between the two. With this setup, if one server were to go down, those mission-critical applications would still be online and available.
Set Up Microsoft Network Load Balancing
For demo purposes, let’s set up two new servers in Hyper V. As for minimum requirements, it depends on what these are going to be used for – Microsoft doesn’t have a ton of hardware or software requirements just for feature use. So, I recommend relying on whatever you are going to be balancing to be the deciding factor for resources.
For this demo, I’ll give the Windows Server 2019 some basic resources. Once those are configured, add Network Load Balancing using:
- The Add Roles and Features Wizard in Server Manager
- Or by using an elevated PowerShell prompt:
Install-WindowsFeature NLB -IncludeManagementTools No restart is needed after installation.
Next, open Server Manager > click Tools > then click Network Load Balancing Manager.
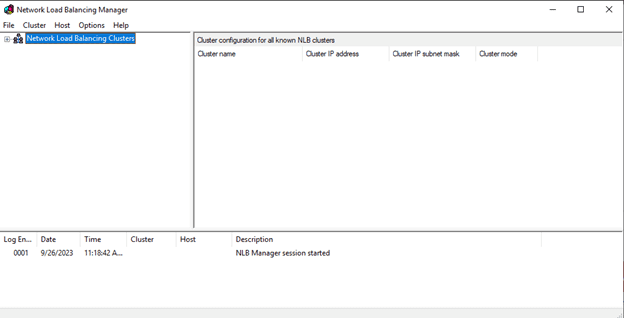
Once the Network Load Balancing Manager loads, add a new cluster by right clicking on Network Load Balancing Clusters in the list > select New Cluster.
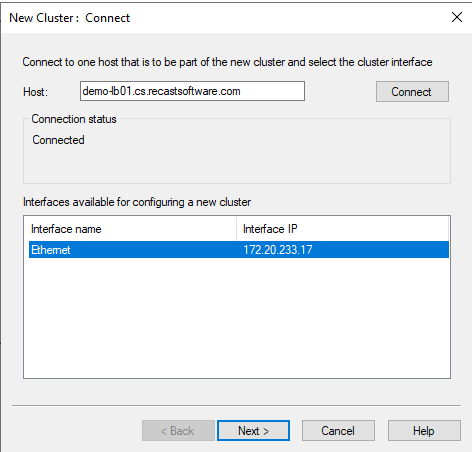
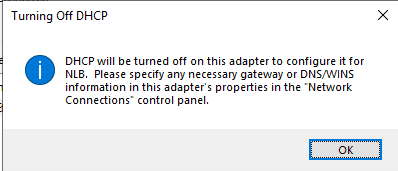
From here, add the first new server host name just created, Demo-LB01.cs.www.recastsoftware.com. Once you hit Connect, the status will show connected if there are no issues. The list will then be populated with available NICs. Choose the proper interface and click next. You are then greeted by the warning that DHCP will be disabled for this adapter. Click OK to continue.
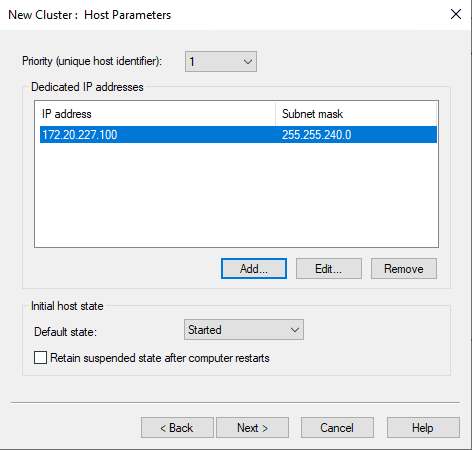
Set the IP address of the first host and make changes to the Initial host state if needed. At the top, also set the Priority. This defines which is the Primary or Secondary and so forth.
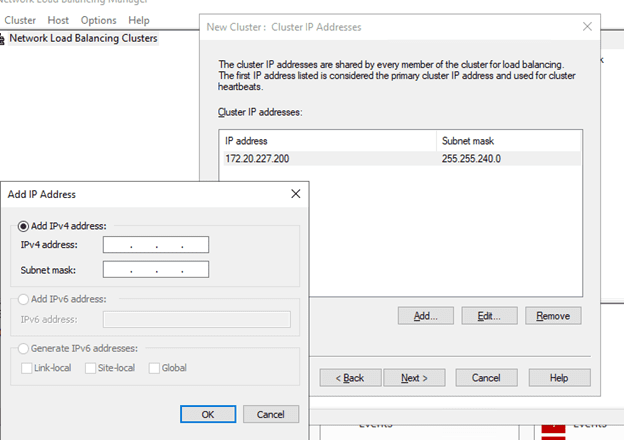
On the next screen, create the Cluster IP. This will be the IP you are forwarding all traffic to. Then the load balancer will decide which of the hosts the traffic will flow through.
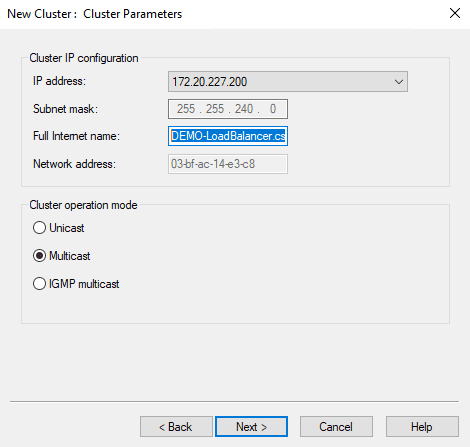
On the next page (New Cluster : Cluster Parameters window), set the Cluster Parameters. Enter the Full Internet Name textbox, DEMO-LoadBalancer.cs.recastsoftare.com, and also set the operation mode to Multicast. This is going to be the FQDN you have created for the Cluster IP. If the naming makes sense and is unique, it doesn’t really matter what you set this to. Just remember to add a DNS entry for it later so your devices know where to send that traffic. In my demo environment, these are using the same NIC, and so if you use Unicast, the hosts will not be able to see each other. In a production environment this would not be the case, so use whatever mode fits your needs.
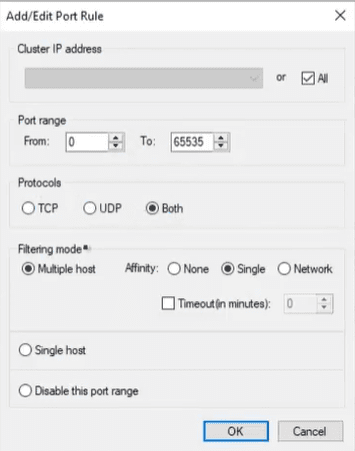
On the last page, set the Port Rules. I have left them as default for demo purposes, but in a production environment you could add specific ports for your applications. Load percentages can be defined here as well. By default, the hosts are set to share loads equally, but if a primary and secondary scenario was desired, the loads could be changed to reflect that.
Since our goal is to set this up with Recast Agent Gateway, we will want to make sure to use an Affinity of Single under Filtering Mode. This is the default, but it also ensures that any traffic from a client once assigned will continue to flow to that single host in the cluster instead of equally distributing the traffic among the hosts. This is to ensure there are no issues with the way Recast Agent is using SignalIR.
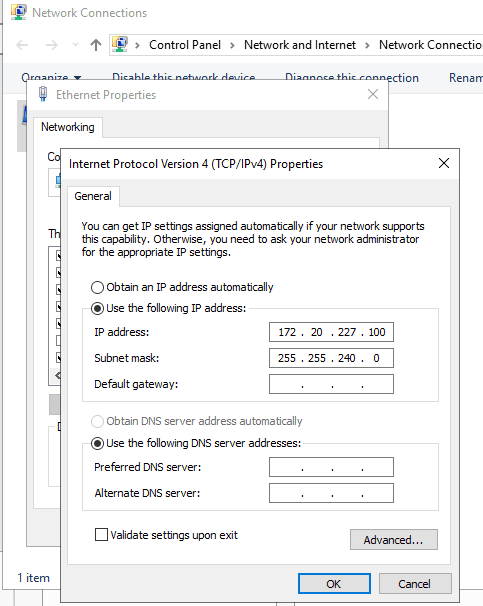
After each host is added to the cluster, you will need to manually update the network adapter’s IPv4 Properties with the proper Default Gateway and DNS servers. You can see in the screenshot below, this is how IPv4 Properties will look without manual intervention after the completion of the NLB cluster wizard.
Now that the cluster has been configured and a first host added, right-click on the new cluster and select Add Host to Cluster. From here, go back through the options to add the second host created to the cluster. Those hosts are now a part of a cluster for network load balancing.
Everything else that comes after is going to be application dependent.
A Wrap
There you have it, a very brief and high-level overview of how to use Microsoft’s Windows Network Load Balancing feature. Watch for part II on how to utilize the load balancer with our Recast Agent Gateways.
Learn more about Recast Software here.