


Normally, we just assume that hardware inventory is working, but what if it isn’t working? Let me explain. The other day, I was helping someone troubleshoot why .NET 4.0 wasn’t getting inventoried by Configuration Manager (ConfigMgr/SCCM). As per usual, I directed them to my Troubleshoot ConfigMgr Hardware Inventory Issues blog post. After following the steps in that post, however, everything worked as expected.
Next, I called their attention to the post, My Two Favorite ConfigMgr Run Scripts. That post shows you how to create a ConfigMgr script in order to force a full inventory (Heartbeat, Hardware, Software, and File collection). Again, after following the steps in that post, their problem wasn’t solved. This, of course, left me very perplexed. What was the problem? Then it dawned on me – is the MOF file edit correct? What is actually being inventoried?
These are the questions that formed the basis of this post:
- Does the hardware inventory actually exist?
- What are we seeing on the computer itself?
After I finished writing this, I realized that this post is actually the precursor to my first blog post on how to Troubleshoot ConfigMgr Hardware Inventory.
Background
Depending on the WMI class type, there are a lot of different ways you can review the underlying data, but at a high-level the troubleshooting steps are all basically the same. These are three WMI class scenarios I will be talking about later on in this post:
- The Windows WMI class (e.g. Win32_BIOS) is inventoried.
- The custom WMI class (e.g. Enhansoft Monitors) is inventoried.
- Reading dynamic registry keys (e.g. .NET keys) via a custom WMI class is inventoried.
ConfigMgr Hardware Inventory: Define the Problem
Before I talk about each WMI class type and how to query WMI, you first need to define the problem. A lot of time, folks say, “It is not working, there is no inventory.” When you dig deeper into their problem, however, it turns out to be one of these four issues:
- There is no inventory.
- There is inventory, but only for one item.
- There is inventory, but one attribute is missing or wrong.
- There is inventory, but not all items are listed.
This blog post mainly covers the first problem, “There is no inventory.” All of the steps for troubleshooting this problem, however, are still helpful when reviewing other issues like the third problem, “There is inventory, but one attribute is missing or wrong.” Keep in mind that when troubleshooting the second and fourth problems (and sometimes the third problem) it generally comes down to the wrong client setting (sms_def.mof for us old-timers) being imported, or the details are NOT listed for the local system. Take mapped printers, for example, the local system account never sees a user’s printer account when WMI is queried.
High-Level Steps
Here are the high-level troubleshooting steps:
- Query the WMI class using a normal user account.
- Query the WMI class using a local administrator account.
- Query the WMI class using a local system account.
- Review the underlying data.
The only difference between the first three steps is the account that’s used to view the results. This makes a big difference in the results for some classes, but in others, the results are exactly the same.
How to Query a WMI Class
It doesn’t matter what WMI class is queried. This step is all about validating that the data exists on the computer itself. If it is not there, then it NEVER will be within SCCM.
For this example, I am using my personal (gartekgarth) account, which happens to be a local administrator account too (skipping to the second high-level step) and I will be employing WBEMTEST to read dynamic registry keys via a WMI class. Just in case you are not aware, WBEMTEST is found on all Windows computers.
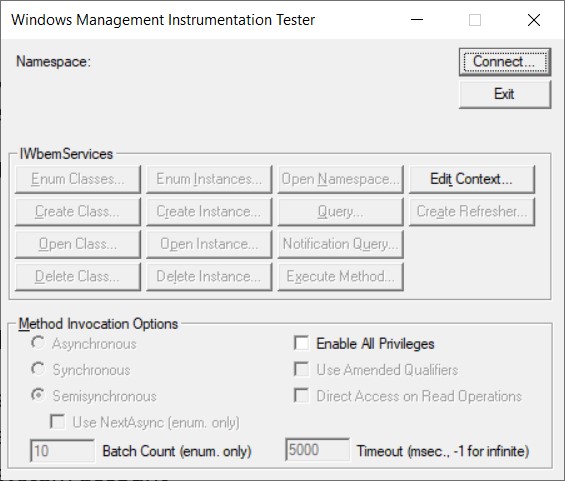
Once wbemtest.exe is launched, click on the Connect… button.
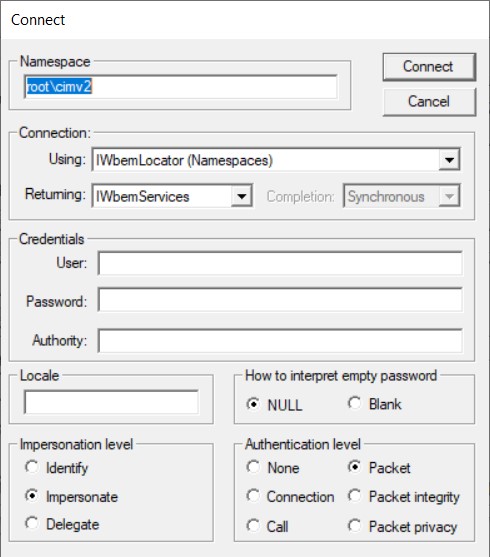
Ensure that the Namespace is rootcimv2 and click Connect.
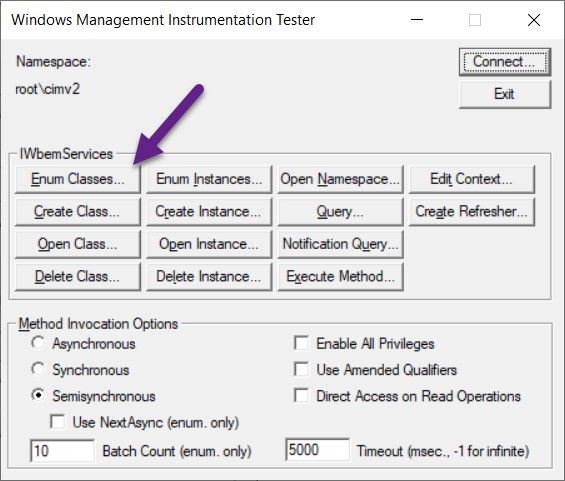
Click on the Enum Classes… button.
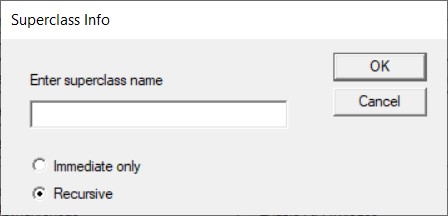
Select Recursive and click OK.
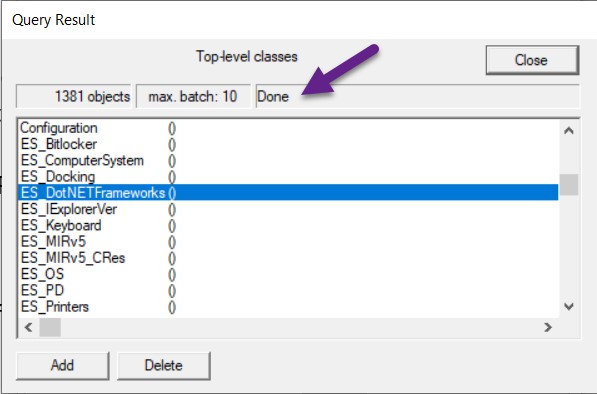
Wait for the Done message to appear and then locate the WMI class you want to review. Double-click on it. In this case, I want to review ES_DotNETFrameworks.
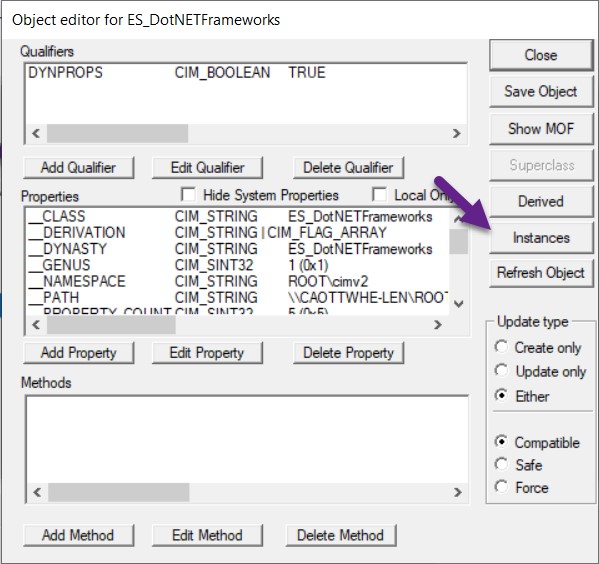
Click Instances.
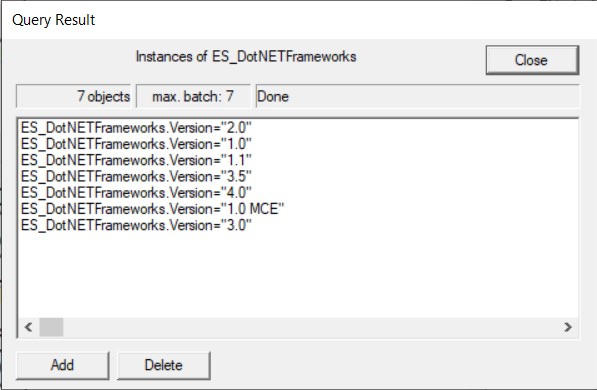
Double-click on the instance that you want to review. In my case it’s 4.0.
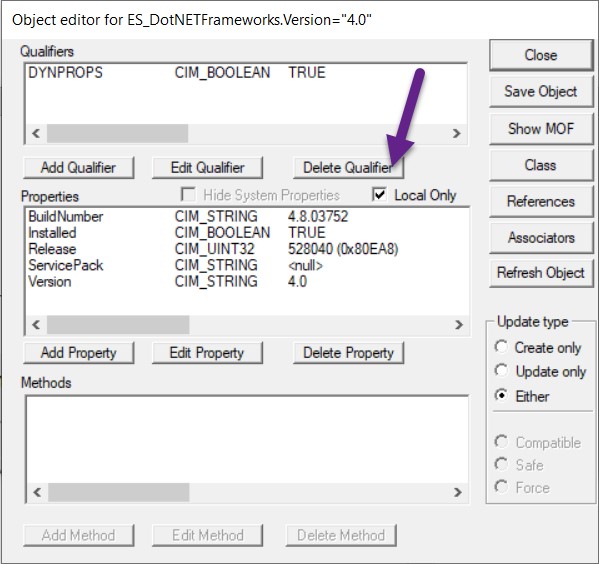
In the new window, select the Local Only option (purple arrow). This shows you only the properties for that instance. At this point, confirm that the results are what you expect.
In this case, everything, but ServicePack, looks exactly as I expected. Why is ServicePack set to <null>? It shouldn’t be, so I will look into that later on. Overall, this test confirms that everything is working as expected, except for the ServicePack attribute.
Most of the time, you don’t really need to repeat the WBEMTEST steps with a different user account or local system account. Oftentimes, I skip these steps and don’t perform them unless everything else I’m testing comes back correctly. In that case, I repeat the WBEMTEST with the other accounts until I find the problem.
Errors with WBEMTEST
If you get any errors when querying a WMI class with WBEMTEST, this could mean a few things. The problem could be with the configuration.mof file, or it could be that the class doesn’t exist within WMI, or there is a typo in the registry key path. The solutions to WBEMTEST errors are not simple fixes. In all cases, the configuration.mof file must be reviewed and you must confirm everything.
Correct Results, but NOT in SCCM
What should you do if the results are correct here, but not within SCCM? This normally never happens, BUT if it does, your first step is to force a full inventory. This blog post, My Two Favorite ConfigMgr Run Scripts, helps by showing you how to create a script to force a full inventory. Second, you need to confirm that the results are returned to SCCM correctly. If, after forcing a full inventory and things are still not correct, and you have reviewed the Troubleshoot ConfigMgr Hardware Inventory Issues blog post, please contact us. We’d love to see if we can help you, or at least reproduce the problem in our labs.
Wrong Results
See the next few sections for help with troubleshooting these issues.
ConfigMgr Hardware Inventory: Review the Underlying Data
How you review the underlying data depends on the WMI class type. Is it a Windows WMI class, a custom WMI provider, or is the problem when reading dynamic registry keys? Below, I talk about each one.
Windows WMI Class
Unfortunately, there isn’t much you can do with this one. At best, you can open a support ticket with Microsoft and they can work with you to solve your problem.
Custom WMI Class
A custom WMI class uses a custom WMI provider, which is basically just an exe (executable) file. Your best bet is to review the vendor’s documentation.
Reading Dynamic Registry Keys
This WMI class is created by MOF file edits. There isn’t a big trick here. Open the configuration.mof file found on your site server under <install directory>inboxesclifiles.srchinv. On the computer, review the registry key that’s not providing results. Don’t forget to check BOTH the x86 and x64 keys.
MOF File Edit Testing
In this section, I won’t be explaining how to create a MOF file edit from a registry key. Instead, I am showing you the snippet of the MOF file edit for .NET 4.0.
[DYNPROPS]
instance of ES_DotNETFrameworks
{ Version=”4.0″;
[PropertyContext(“local|HKEY_LOCAL_MACHINESOFTWAREMicrosoftNET Framework SetupNDPv4Client|Install”),Dynamic,Provider(“RegPropProv”)] Installed;
[PropertyContext(“local|HKEY_LOCAL_MACHINESOFTWAREMicrosoftNET Framework SetupNDPv4Client|SP”),Dynamic,Provider(“RegPropProv”)] ServicePack;
[PropertyContext(“local|HKEY_LOCAL_MACHINESOFTWAREMicrosoftNET Framework SetupNDPv4Client|Version”),Dynamic,Provider(“RegPropProv”)] BuildNumber;
[PropertyContext(“local|HKEY_LOCAL_MACHINESOFTWAREMicrosoftNET Framework SetupNDPv4Client|Release”),Dynamic,Provider(“RegPropProv”)] Release;
};
From the snippet it is fairly easy to see that this information is coming from the HKLMSOFTWAREMicrosoftNET Framework SetupNDPv4Client key. I am looking at these four attributes: Install, SP, Version, and Release.
REGEDIT
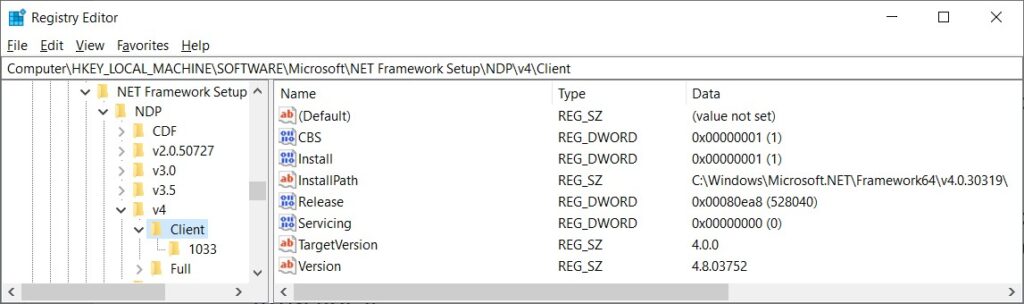
Now, I review the registry by using Regedit. I quickly see that Install, Version, and Release are there as expected, BUT the MOF file is looking for the SP attribute and there isn’t one listed in the registry. This explains why I saw a null value in WMI when I queried it with WBEMTEST. The solution to this problem is to have the MOF file look at the Servicing attribute instead of the SP attribute. Once I update the configuration.mof file, ConfigMgr is able to collect the Servicing details and .NET 4.0 is now inventoried.
Confirming ConfigMgr Hardware Inventory Functionality
Before you start troubleshooting why hardware inventory isn’t displayed within ConfigMgr, you really need to ensure that the details exist on the computer(s) in question. If they don’t exist there then they will never exist within ConfigMgr. I don’t know about you, but I frequently skip this step and assume that the details already exist on the computer, so from now on, when I’m not getting the results that I expect, I will turn to these troubleshooting steps.