


Recast Proxy Deployment
In this post, we’ll cover deployment of the Recast Proxy Software. In the last post, the manual method was demonstrated, and you can check out the official documentation
Using ConfigMgr to Deploy the Proxy Installer is pretty easy and can be done in a few different ways. If you need to deploy the Recast Management Server’s self-signed Cert, you can write a small installer script in PowerShell to do it all at once. If you have PKI, or used a trusted authority for your Cert, then you don’t need to worry about the extra steps and can do a single command line install. We’ll cover both options.
- Command Line Options
- Device Proxy
- Service Account Proxy
- Parameters
- PROXYTYPE
- SERVICEACCOUNTDOMAIN
- SERVICEACCOUNTUSERNAME
- SERVICEACCOUNTPASSWORD
- RCTENTERPRISESERVER
- PowerShell “Wrapper” to include Certificate.
- Uses Same info as above, but you add whatever else you need to include to customize the installation.
Device Proxy (Silent Install)
- MSIEXEC /i “Recast Proxy.MSI” /qn PROXYTYPE=DeviceProxy RCTENTERPRISESERVER = HTTPS://RECASTSERVER.FQDN:444
- Requires URL of Server in FQDN Format with the Port of your Server (Default is 444)
- Example: MSIEXEC /i “Recast Proxy.MSI” /qn PROXYTYPE=DeviceProxy RCTENTERPRISESERVER = HTTPS://RECASTMS.CORP.VIAMONSTRA.COM:444
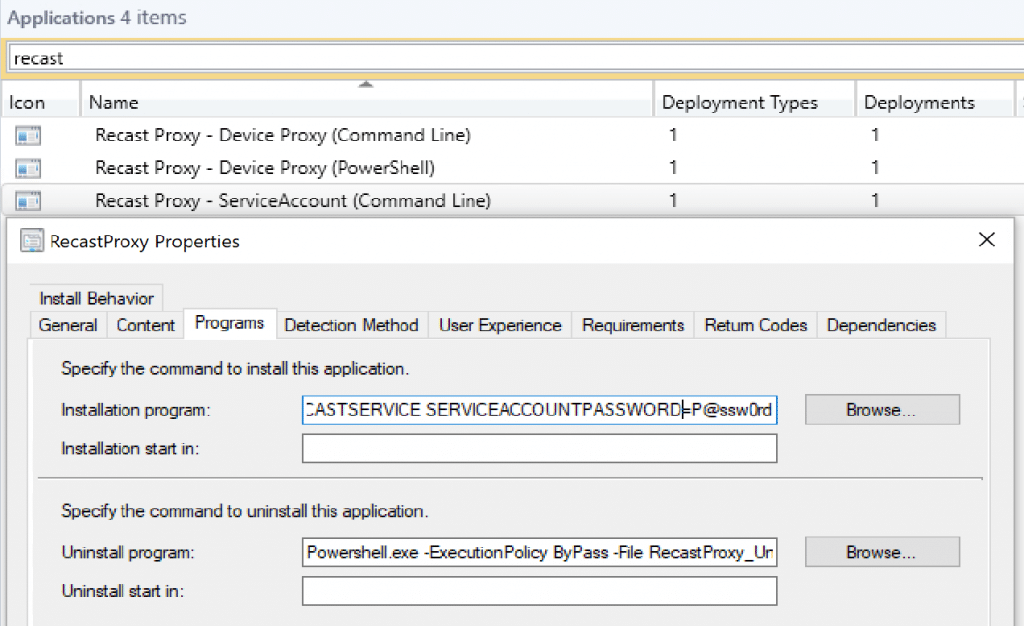
Service Account Proxy**
- MSIEXEC /i “Recast Proxy.MSI” /qn PROXYTYPE=ServiceAccountProxy RCTENTERPRISESERVER = HTTPS://RECASTSERVER.FQDN:444 SERVICEACCOUNTDOMAIN=CORP.RECASTVILLE.COM SERVICEACCOUNTUSERNAME=RECASTSERVICE SERVICEACCOUNTPASSWORD=PASSWORD
- Requires URL of Server in FQDN Format with the Port of your Server (Default is 444), and your Service Account Information.
- Example: MSIEXEC /i “Recast Proxy.MSI” /qn PROXYTYPE=ServiceAccount RCTENTERPRISESERVER = HTTPS://RECASTSERVER.FQDN:444 SERVICEACCOUNTDOMAIN=CORP.RECASTVILLE.COM SERVICEACCOUNTUSERNAME=RECASTSERVICE SERVICEACCOUNTPASSWORD=P@ssw0rd
- ** I would strongly encourage you to look into ways to deploy this securely and NOT have plain text passwords in your scripts or install command lines. While deploying it this way is possible, you’ll probably do it very infrequently, and you’ll probably just do it manually and type in the username / password.
ConfigMgr Application Model
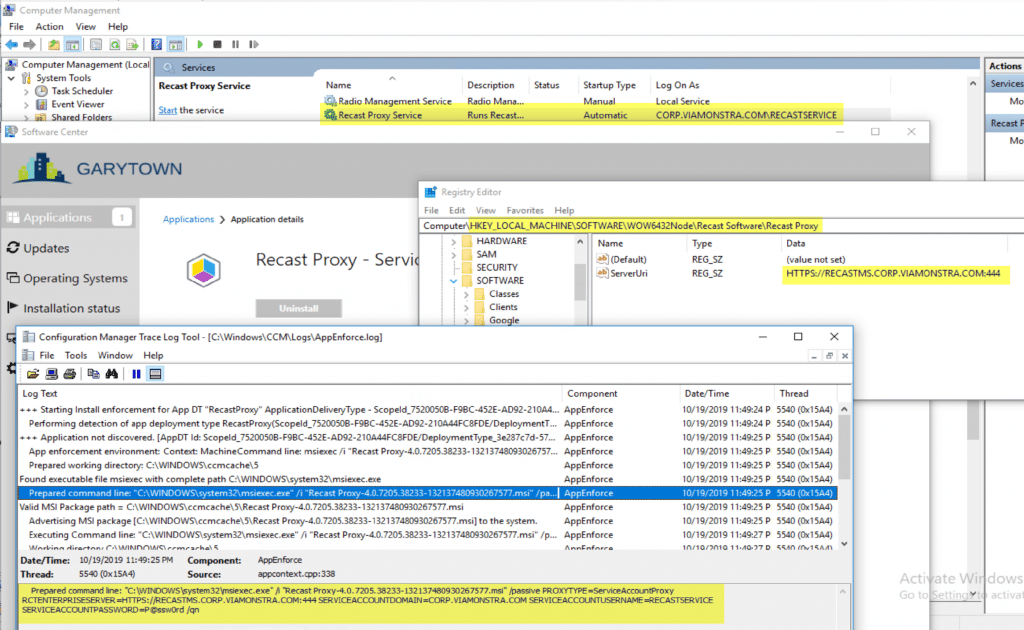
The AppEnforce Log shows the exact install command, including the password of the Service Account. This is why we’d advice against doing this.
But, you can see that it works. The Recast Proxy Service is installed and using the Service Account to run, it’s pointing towards the Recast Management Server, as shown in the Registry.
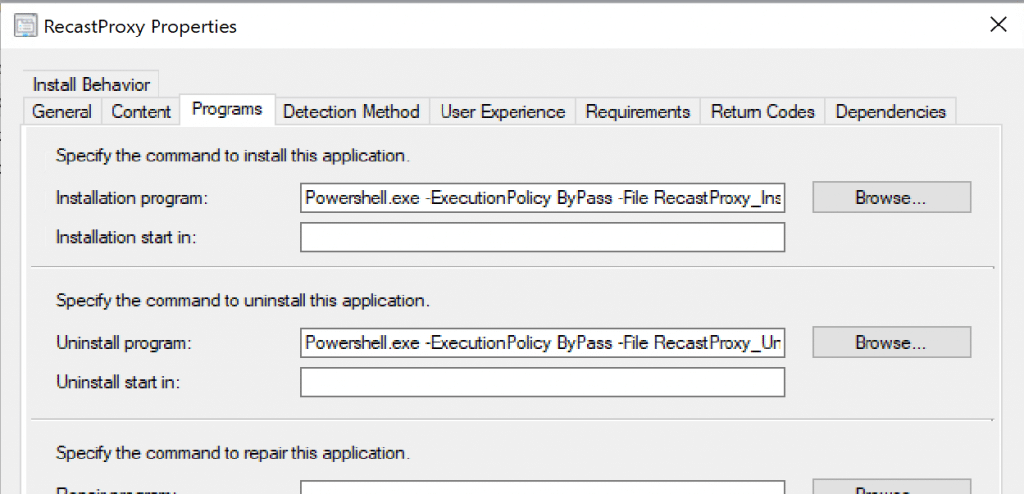
PowerShell Script for Install and Importing the Cert
Now for the Device Proxy, using a PowerShell Script to both Install the Proxy software in Device Proxy mode & Importing the Cert:
#Make sure the Proxy MSI installer & the Self-Signed Cert (Or CA Cert) if you need the cert on the machine you’re installing the Proxy on.
#This installs the Proxy in DEVICE Proxy Mode – NOT Service Account Mode.
#Import the Self-Signed Cert
$CertStore = “cert:LocalMachineRoot”
Import-Certificate -FilePath $PSScriptRootRecastCert1.cer -CertStoreLocation $CertStore
#Get the Full Path & Name of the Proxy MSI Installer
$Installer = “$($PSScriptRoot)$((Get-ChildItem $PSScriptRoot*.msi).Name)”
#Run the Installer: Device Proxy Mode
Start-Process msiexec.exe -Wait -ArgumentList “/I “”$($installer)”” /passive PROXYTYPE=DeviceProxy RCTENTERPRISESERVER=HTTPS://RECASTMS.CORP.VIAMONSTRA.COM:444″
<#
Uninstall Command – Nice for Testing
msiexec -x “$Installer” /qb!
#>
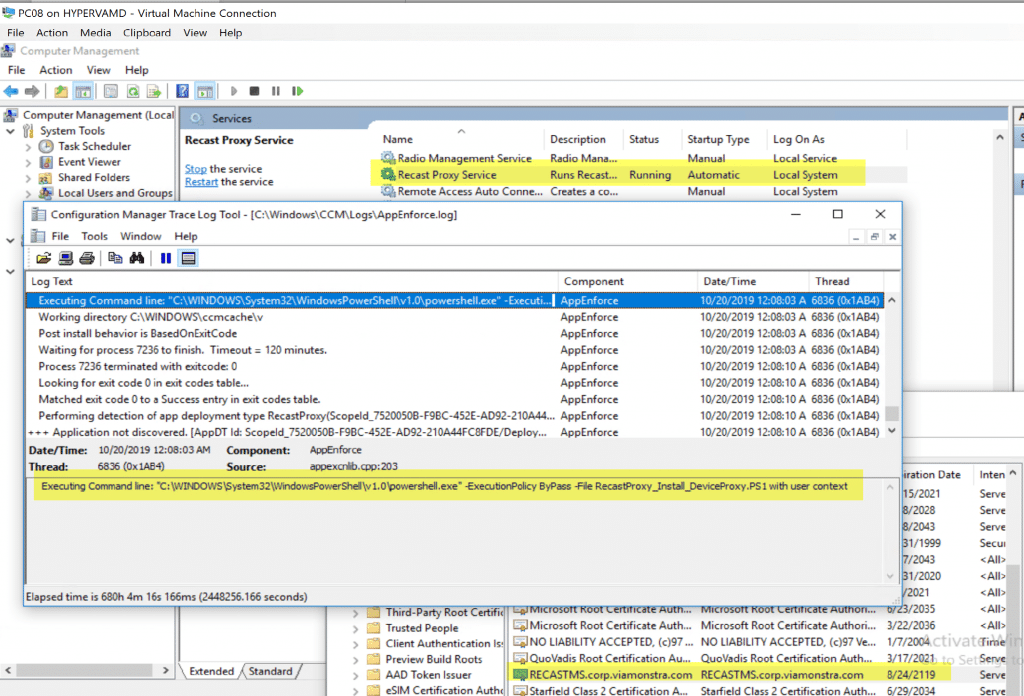
You can see the Proxy Service is running as Local System and the PowerShell script installed the Self-Signed Certificate we need (since we don’t have PKI setup).
If you want to 1/2 automate the install, you can use ConfigMgr to kick off the installer, and pre-populate some of the information in the command line:
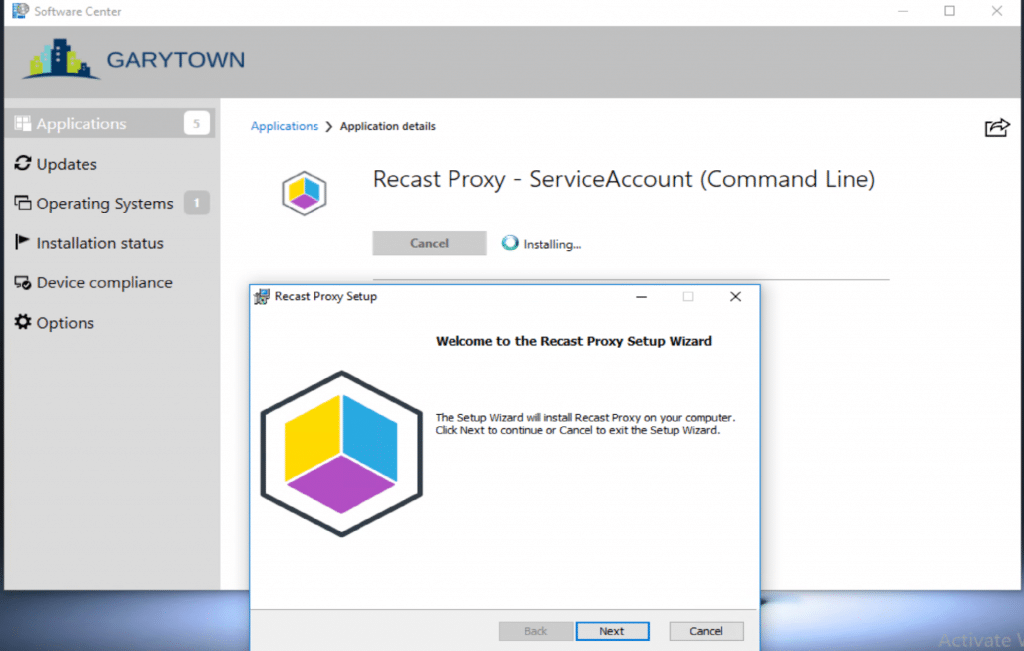
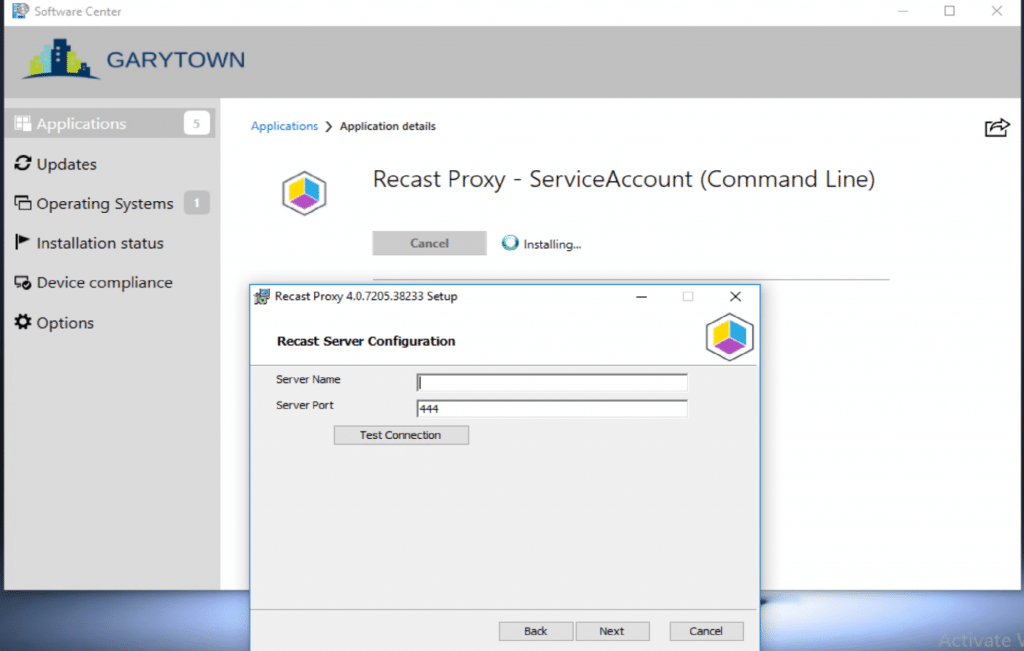
Even though we have the info command line, it doesn’t pre-populate this in the dialog, but it does get applied during the install.
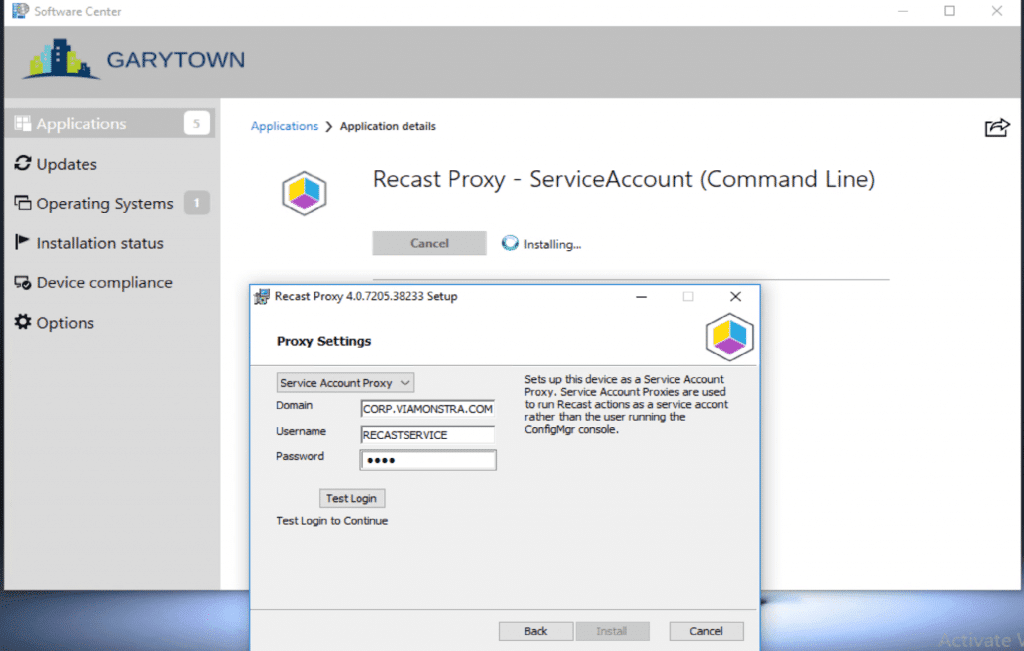
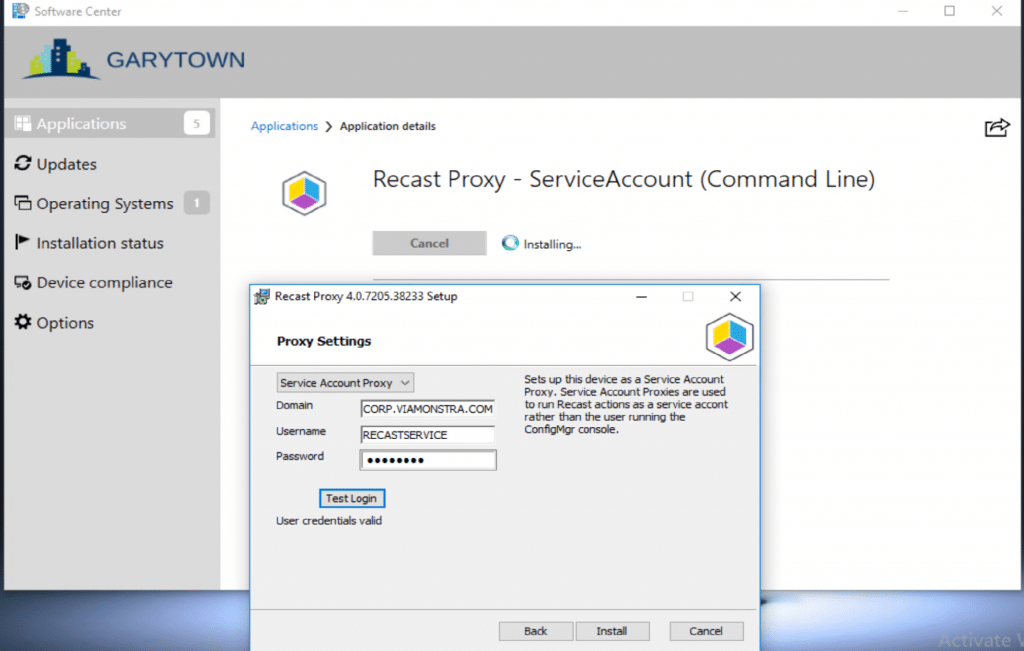
It does pre-populate these fields, we’re using a fake password, then just updating it manually.
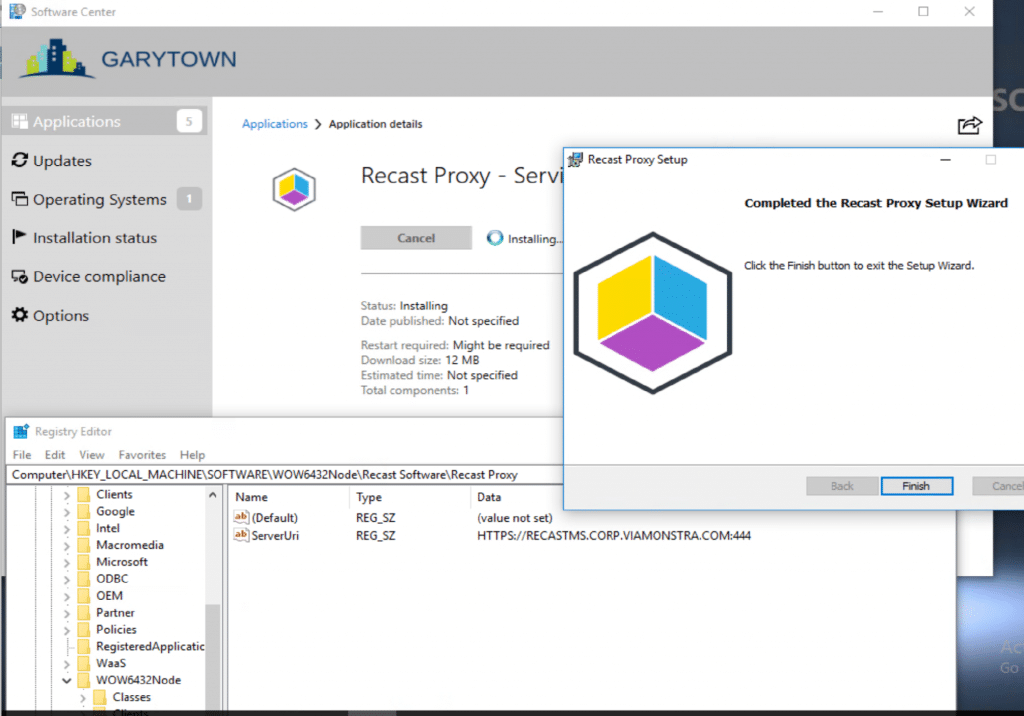
You can see that the Recast Server info was populated into the registry and that all was well.
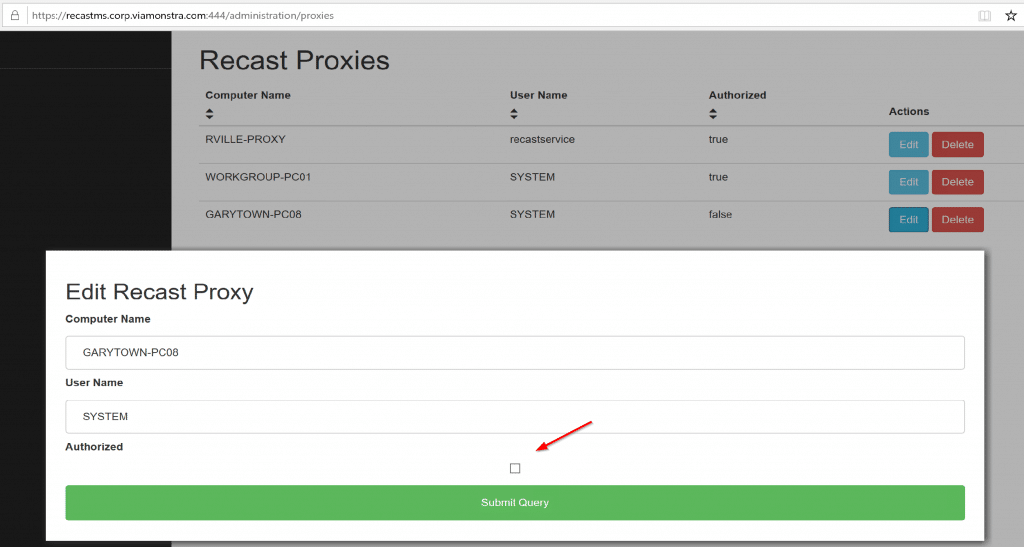
After you install the Proxy software, you need to authorize it.
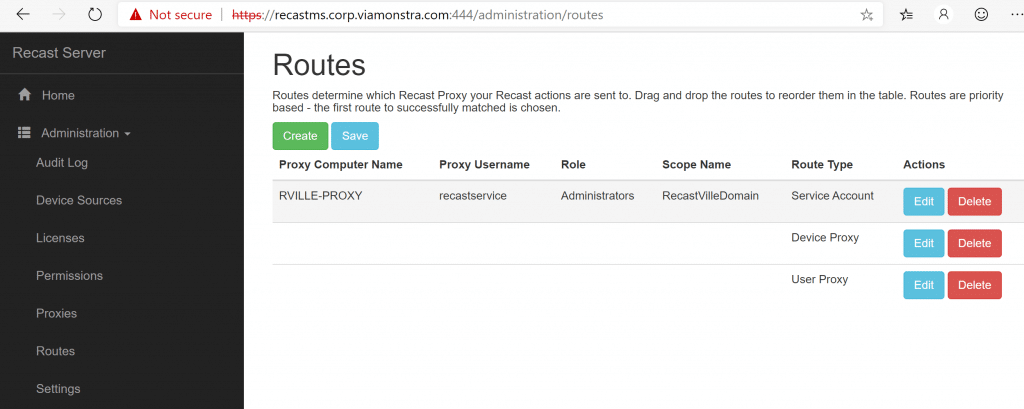
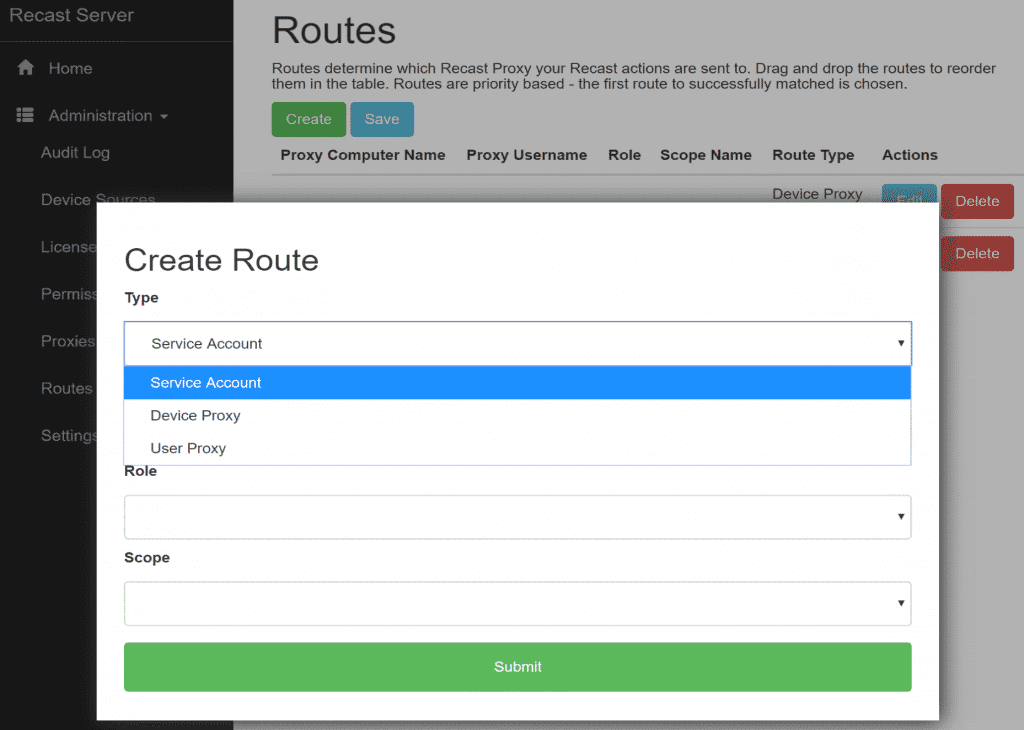
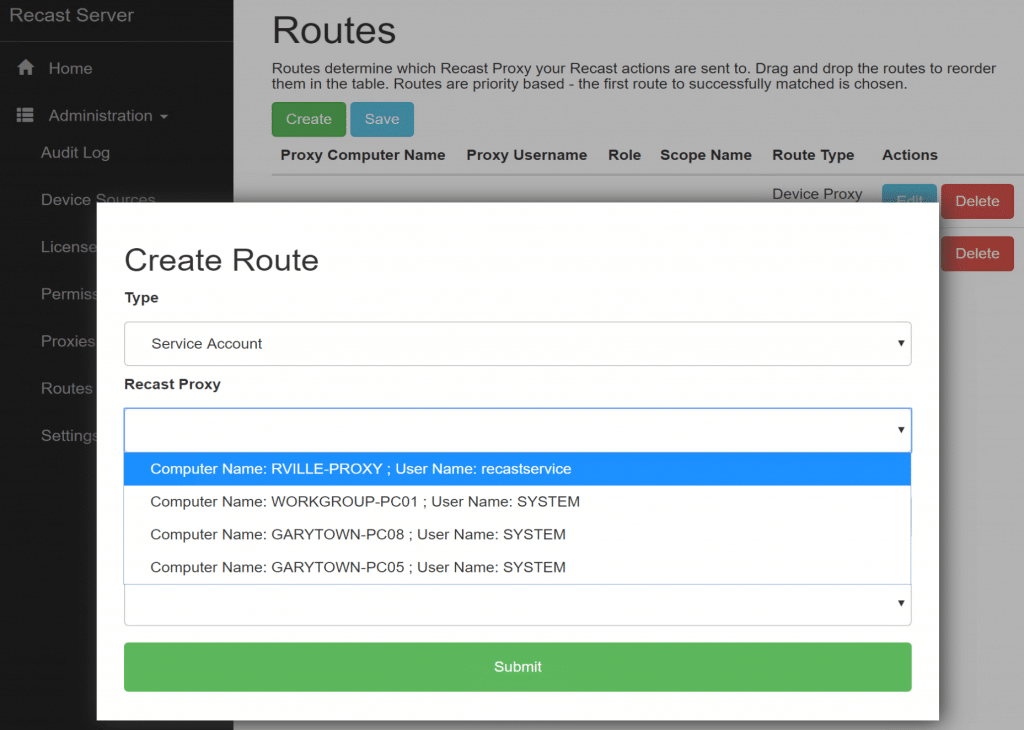
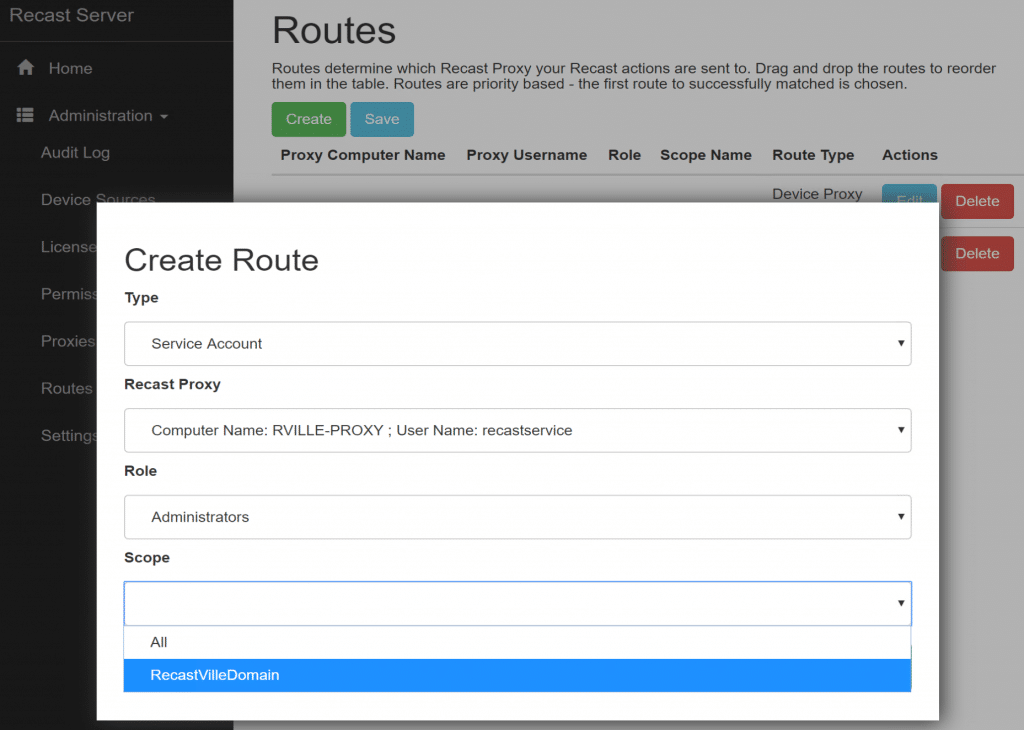
After you authorize it, if you’re using a Service Proxy, you need to setup the routes [Docs Route Link] in the Recast Portal. Using the Untrusted Domain Example, lets take a look: (I’ve already setup, here are the settings so you can take a look, but we’ll walk through it anyway). Before you can Add the Route, you’ll have to make sure you have a Role [Docs Role Link] & Scope [Docs Scope Link] to assign to the Route. (Note how the new route is at the top)
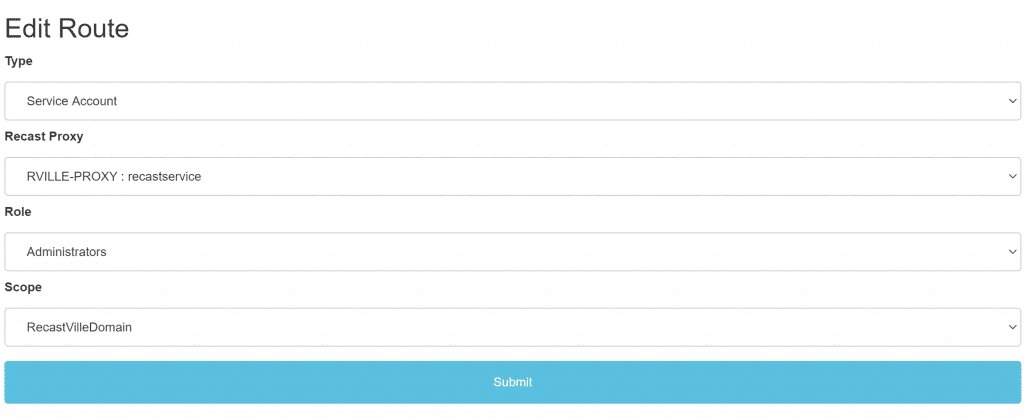
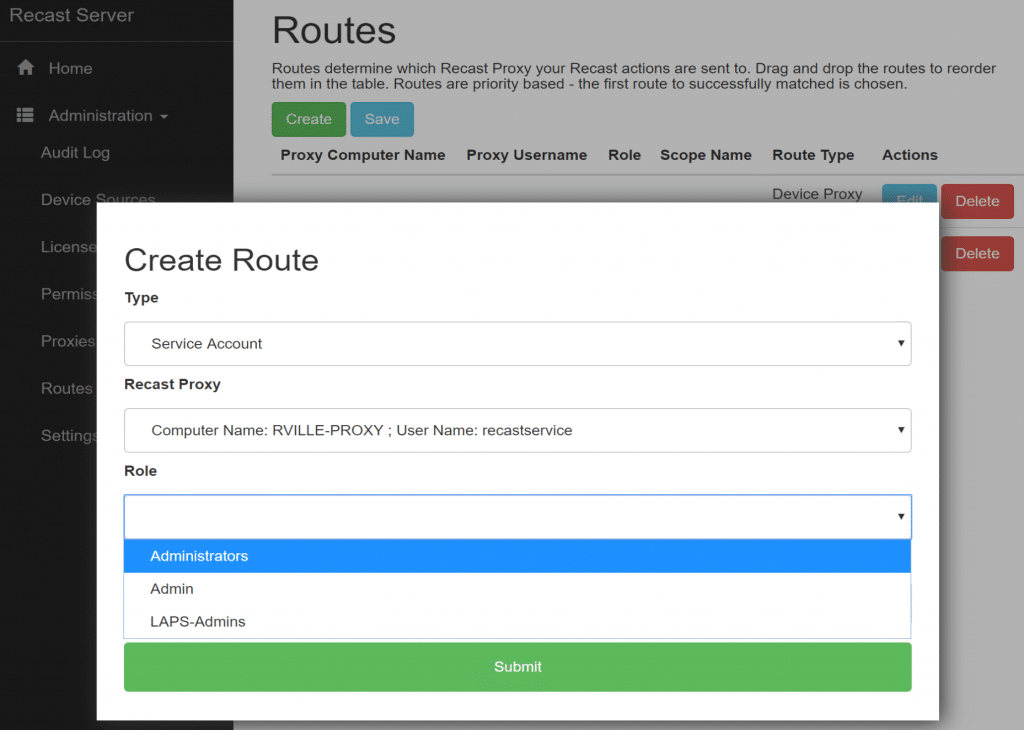
In this example, I’ve used the Role “Administrators” which is the built-in default role, allowing anyone using this proxy to perform any Recast Action. If you want to limit users abilities through this proxy, you can assign a custom role. I’ve had to create a scope “RecastVilleDomain” and assign. It’s a simple SCOPE set to Domain:

After you’ve created your Scope & Confirmed you have a Role setup for your proxy, go ahead and create the Route.
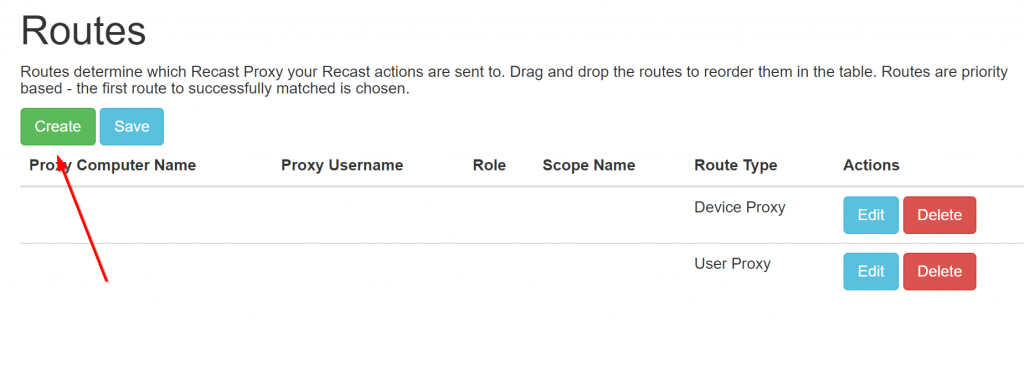
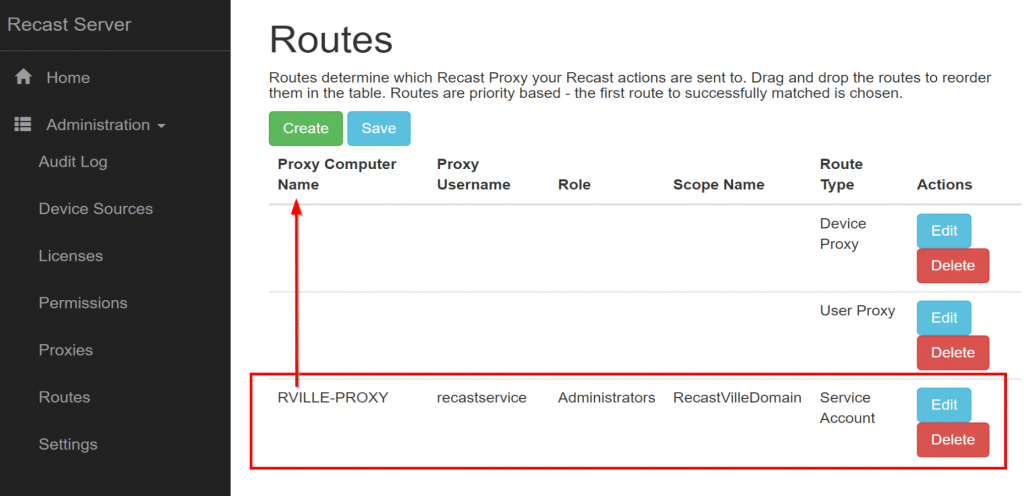
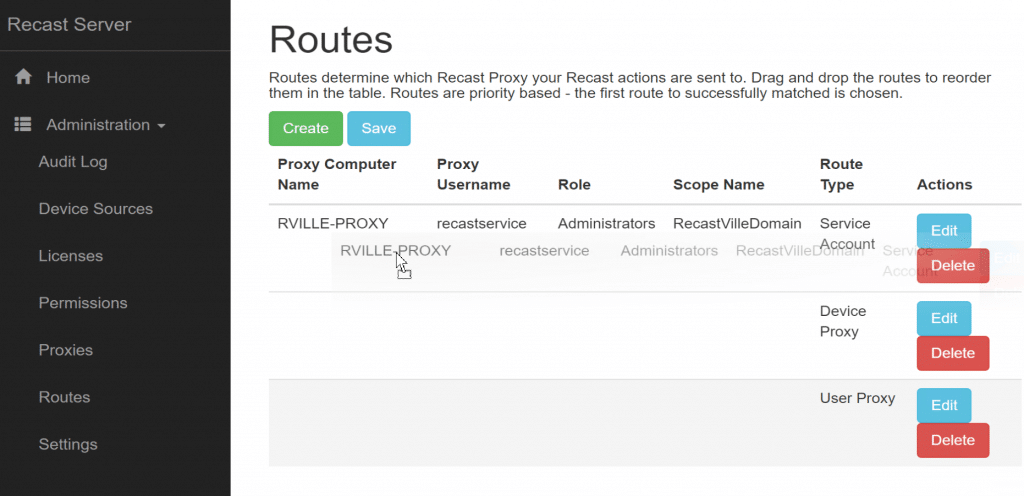
Proxies are selected in order from top to bottom which means you probably want your new service proxy ahead of the others.
You need to drag-n-drop to re-order them. (As show in the image)
You need to click save to save your changes.
Recast Proxy Deployment Conclusion
Now you’ve got some options for deploying the Proxy Software, if you have any additional questions, please contact Recast Support.
Check out this video to learn more about the Recast Management Server with proxy setup process.