


How to Implement Unified Write Filter Manager with Right Click Tools
In this post we’ll cover Microsoft’s Unified Write Filter (UWF) technology and how Right Click Tools removes some of the pain of implementation of UWF. I covered the basics and the native functionality and implementation of Unified Write Filter in a previous post. This post covers how Recast’s Right Click Tools simplifies implementation and allows you to better manage UWF devices.
Many exclusions you should NOT do have been documented, and you’ll want to keep that list handy. In my testing, I had added some of those and caused the blue screen of death boot loop and I ended up re-imaging the machine.
Assuming you read the previous post, and understand the fundamentals of UWF, I’m going to jump right into how Right Click Tools assists in managing UWF.
How Right Click Tools Helps
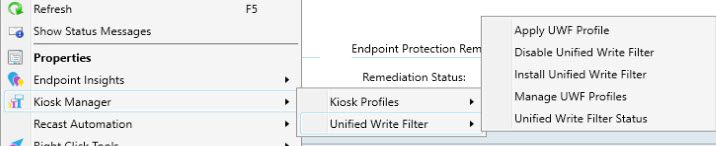
- Apply UWF Profile: Applies a group of UWF settings you’ve pre-created to a specific machine (or set of machines). Settings include file and registry exclusions, overlay type (RAM or disk and size)
- Disable Unified Write Filter: Disables the UWF on drive C:
- Install Unified Write Filter: Installs the Windows Feature Unified Write Filter
- Manage UWF Profiles: Where you create the profile of settings that you deploy in the Apply UWF Profile.
- Unified Write Filter Status: A “Dashboard” for a specific computer that gives you the current status, and allows you to take actions.
Manage UWF Profiles
This is the tool that you’ll be able to create, modify, delete, update profiles…. you know, manage them.
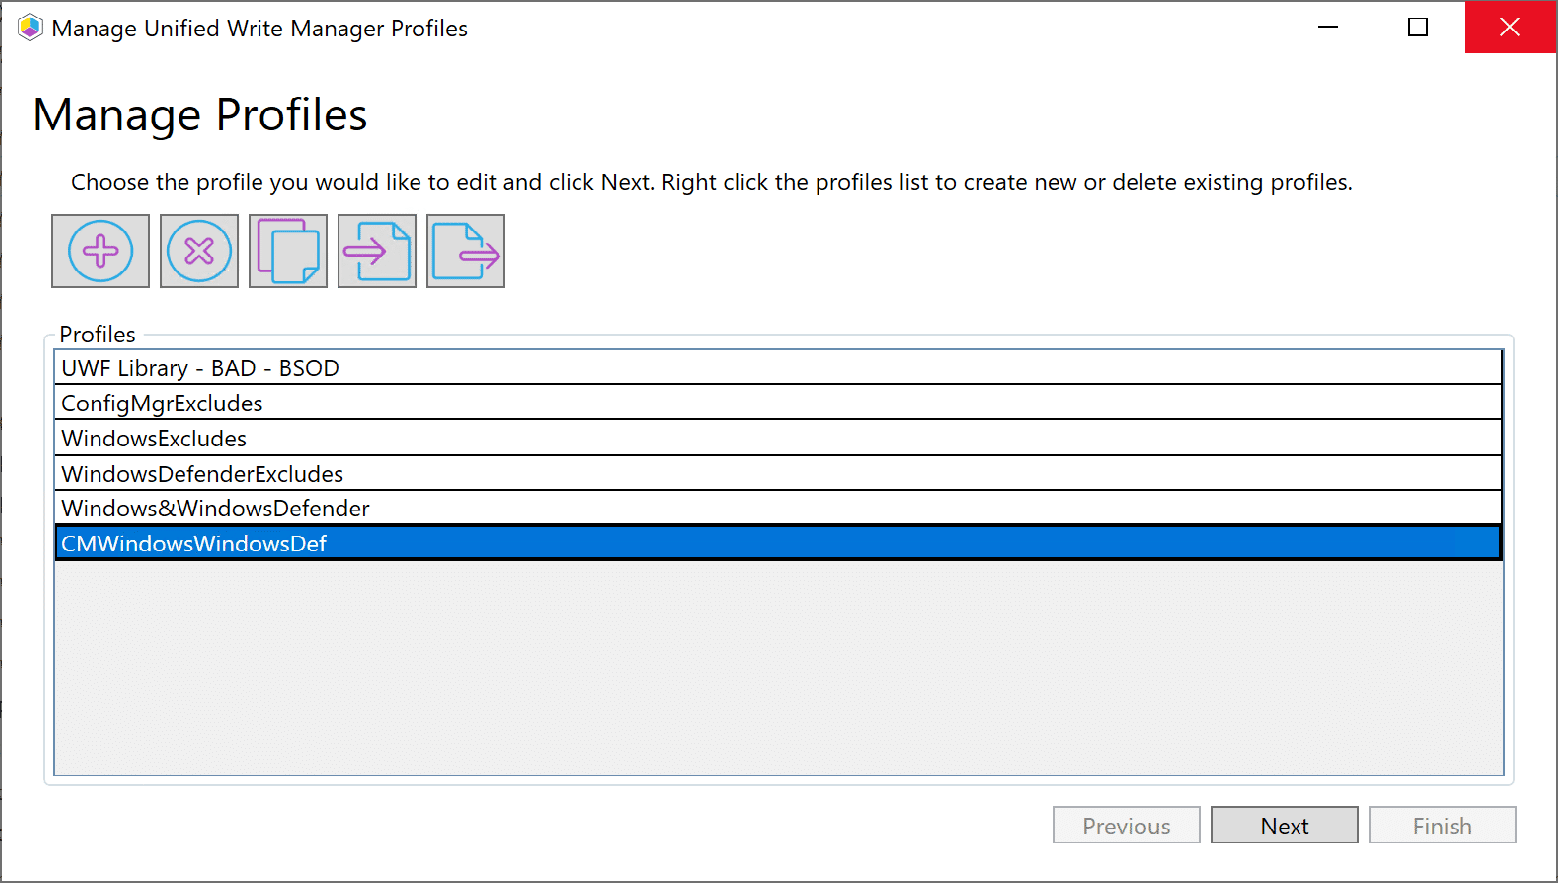

There are two screens, one for managing the profile properties, you can rename it, delete it or export it, along with create a new one. On the second screen you’ll get a list of file & registry exclusions long with the “cache” options. (Virtual Overlay Settings, more info from MS Docs) By default, this will be blank, but we’ve provided several common exclusions you can use to populate the list. In this example I chose “ConfigMgr Client, Windows Defender, and Windows”. This way once applied, when these items make updates to these files / folders / registry items, they will persist through the reboots.
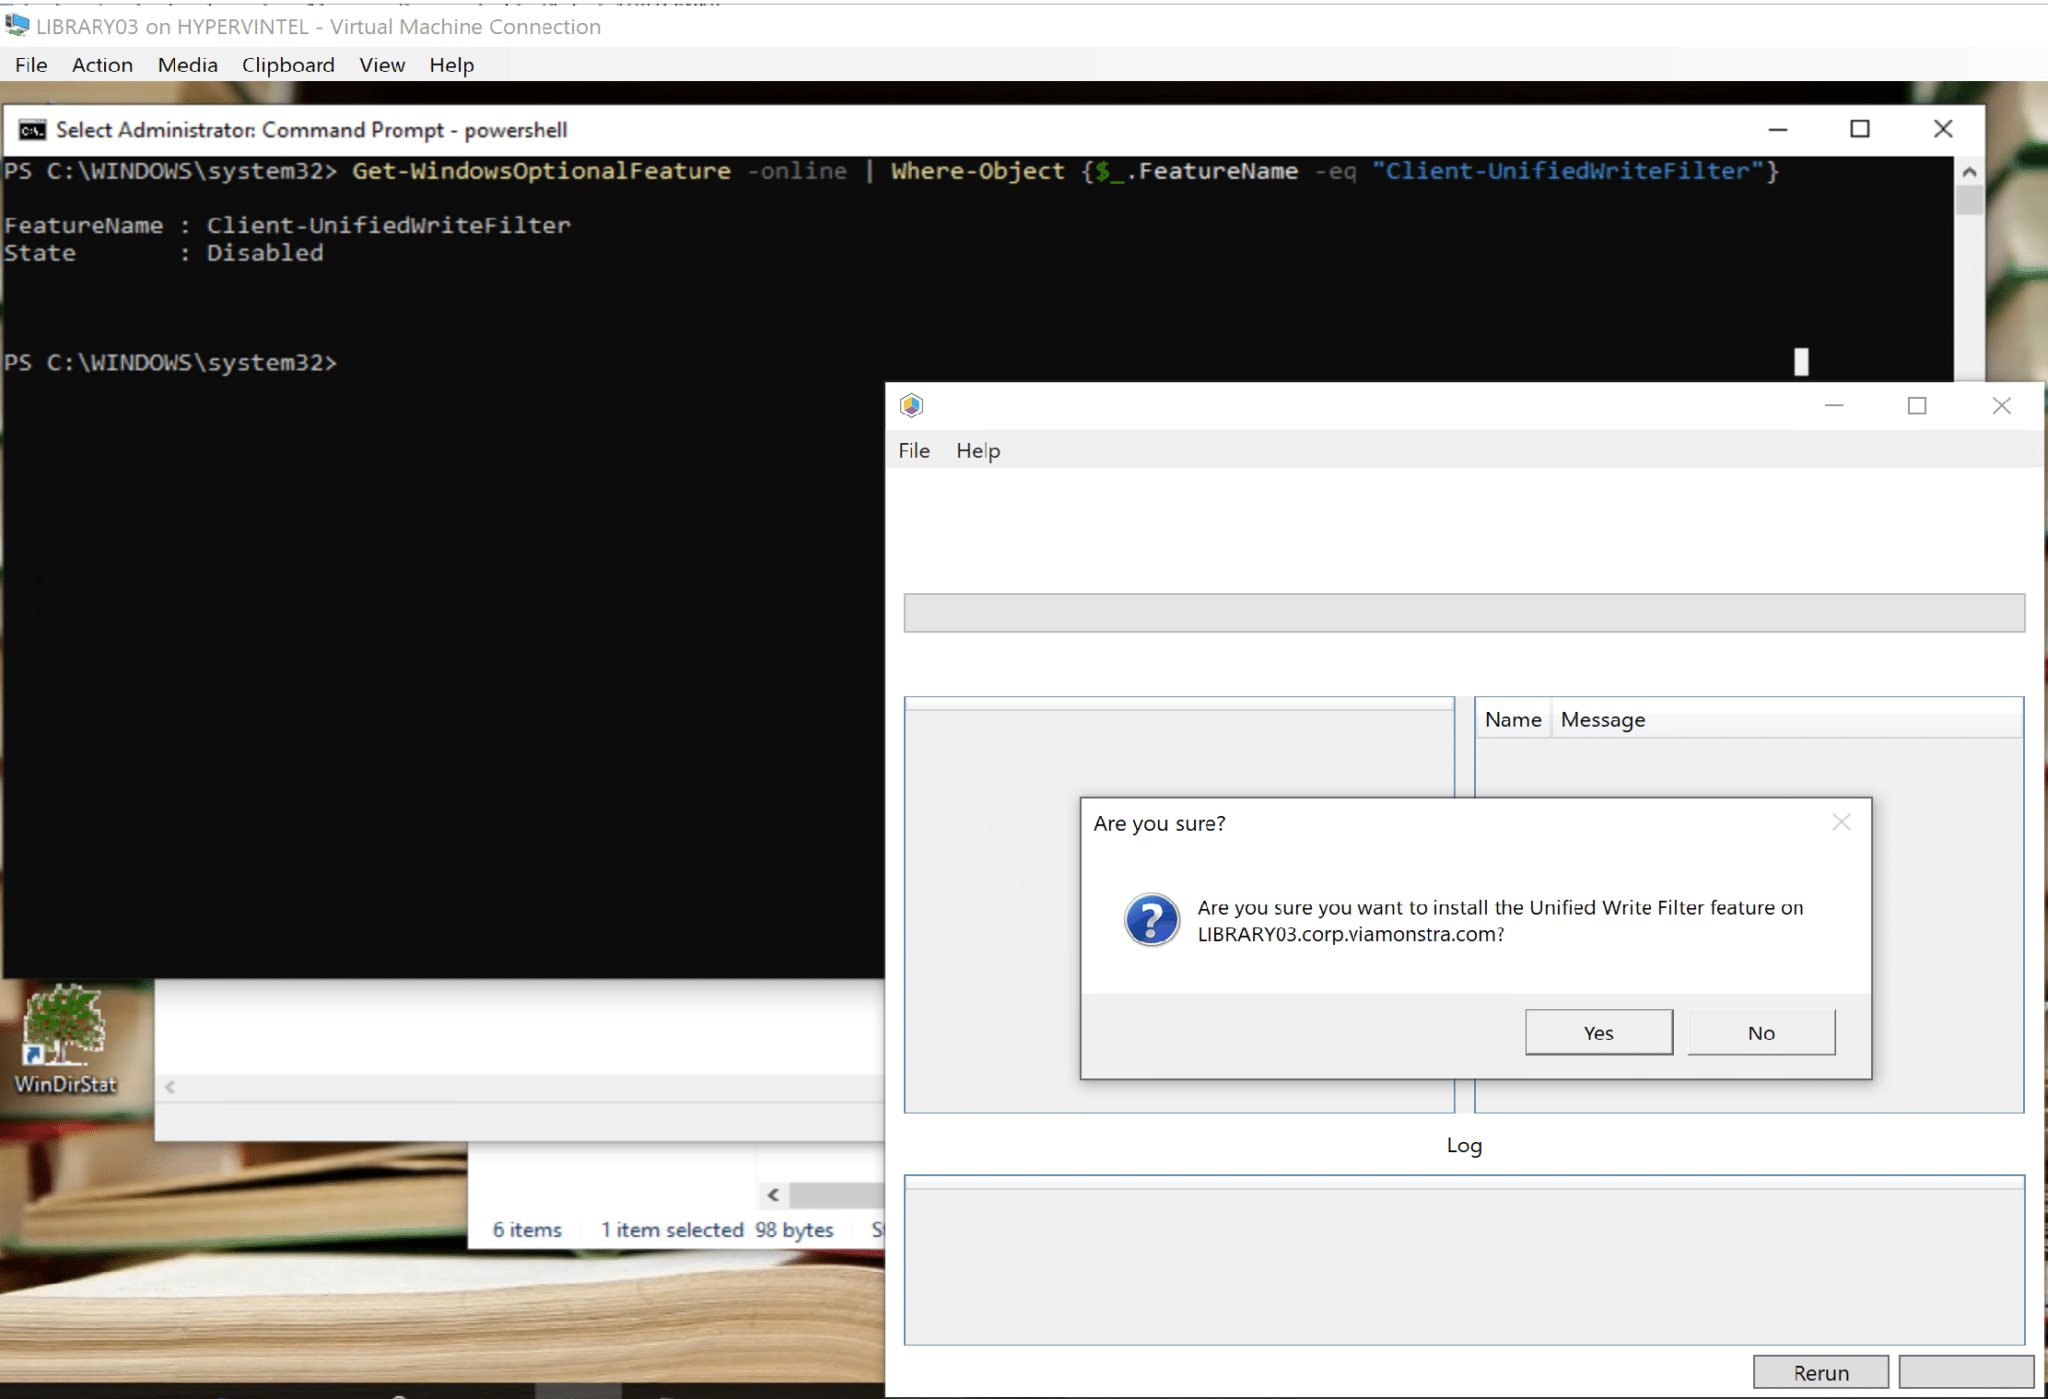
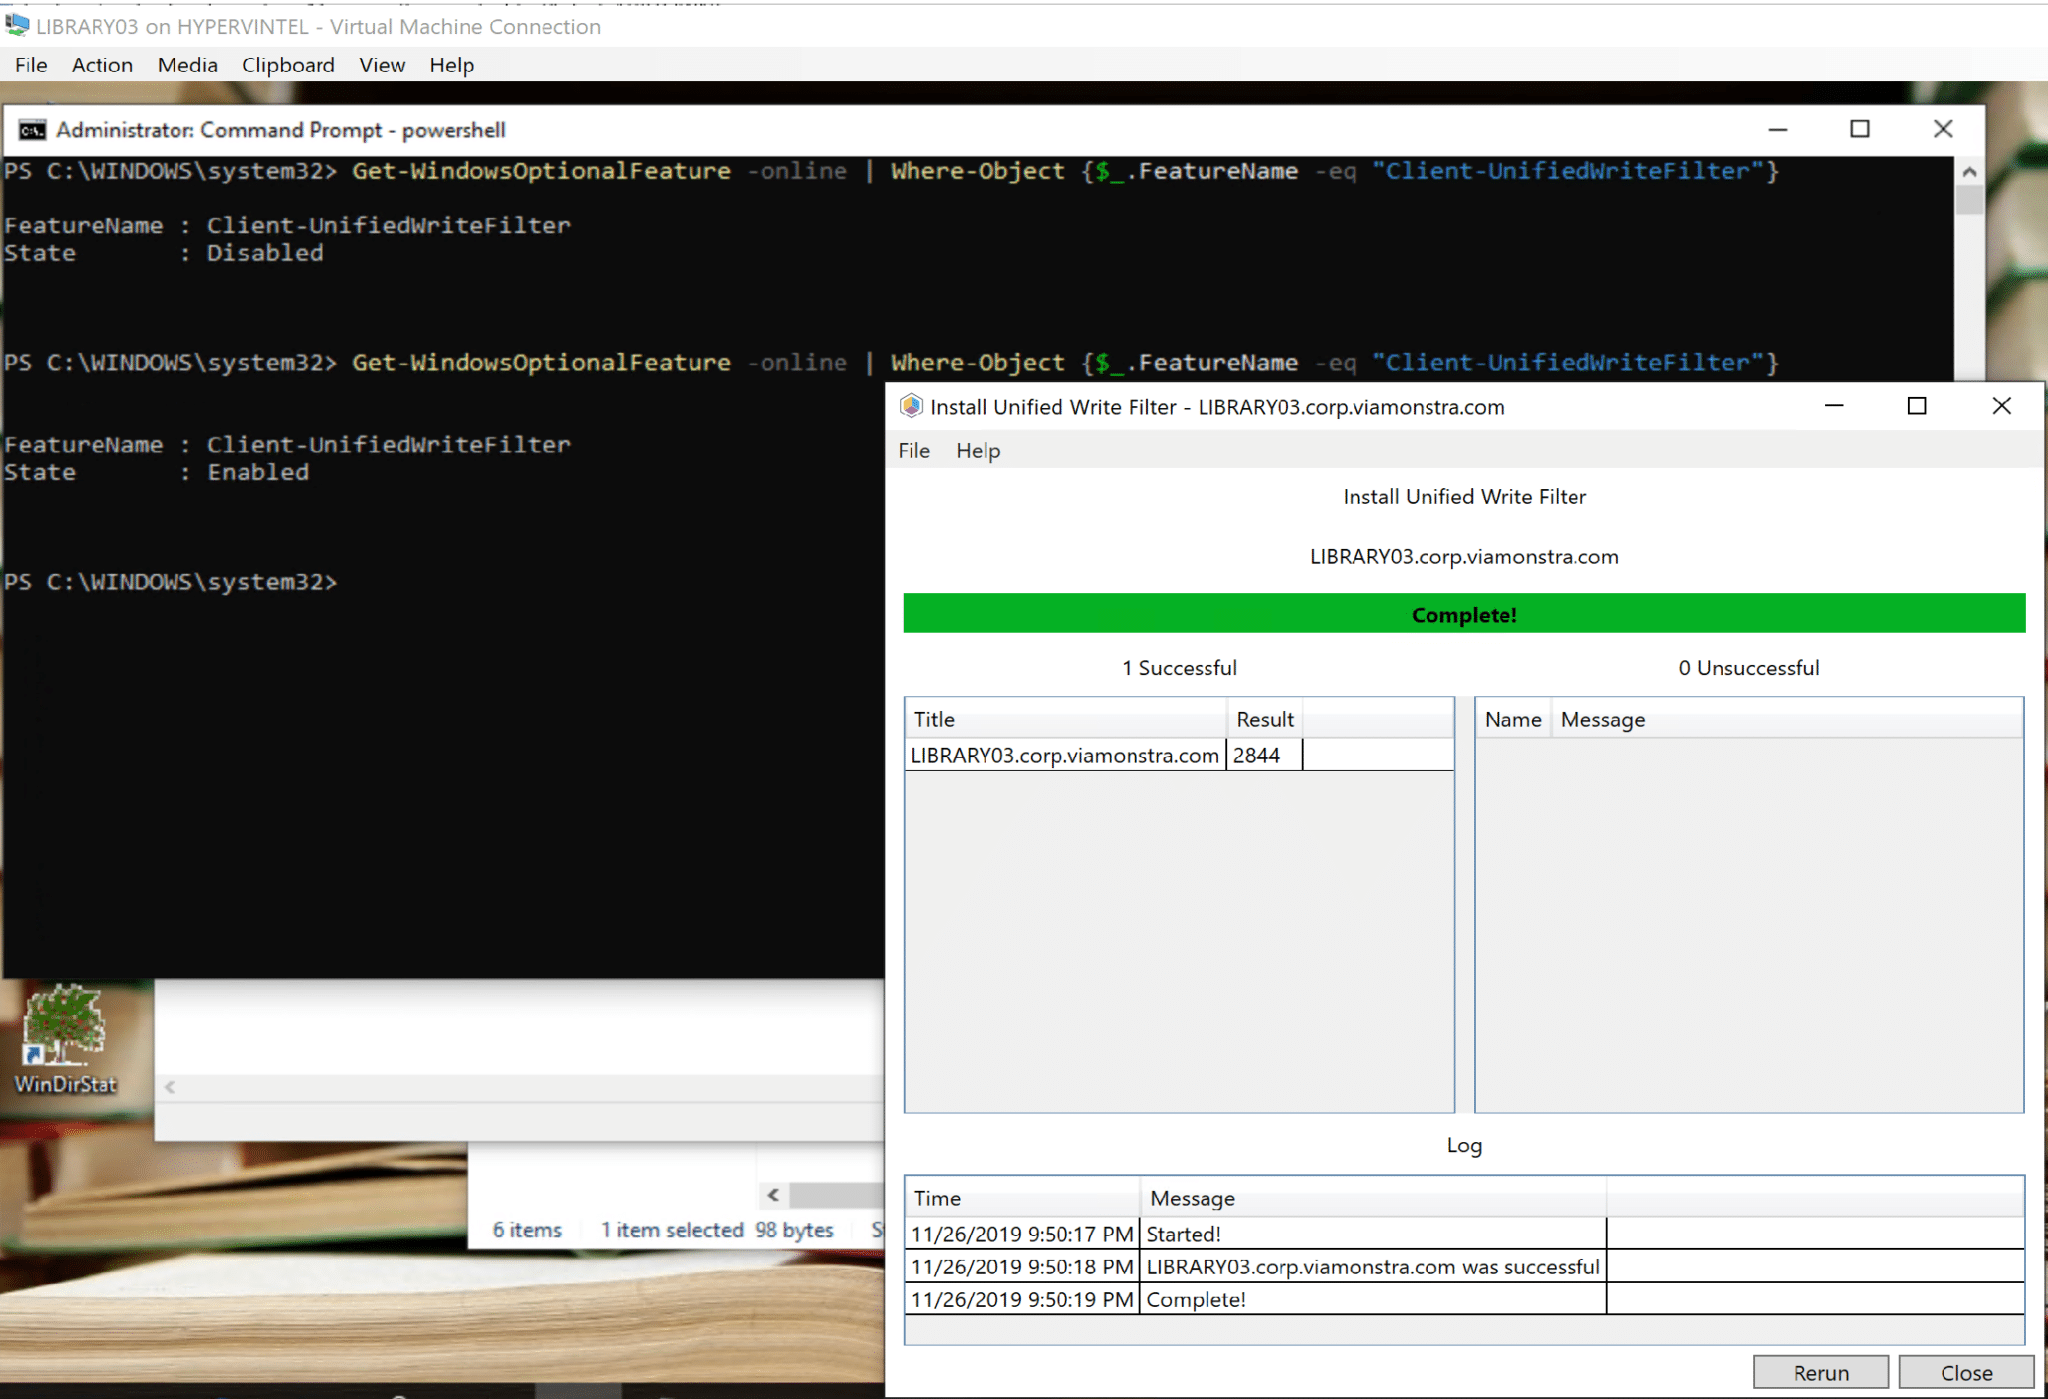
Install Unified Write Filter
Let’s go to a workstation now and install the UWF Feature.
Let’s look at the current status of that machine’s UWF in the command line:
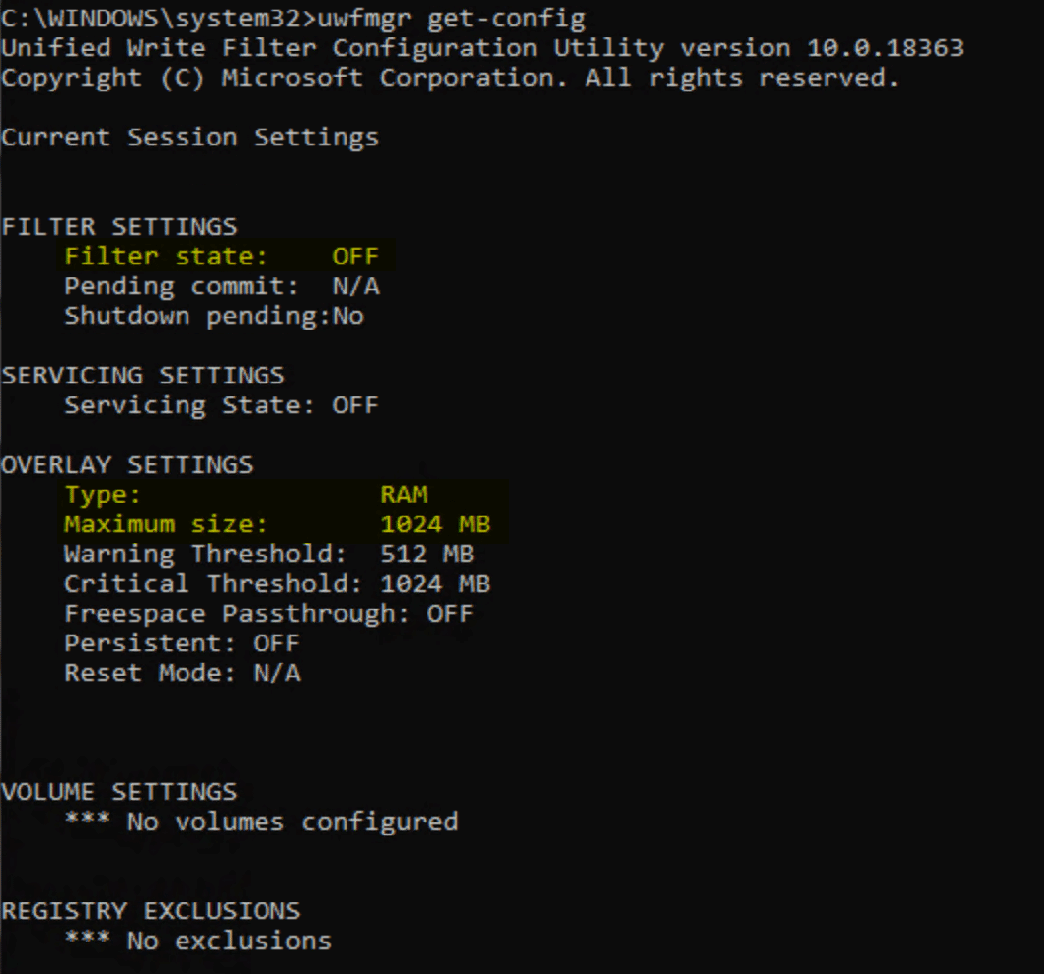
As we would expect, the Filter is “OFF” and the overlay settings are set to the defaults.
Let’s look at the Unified Write Filter Status Tool
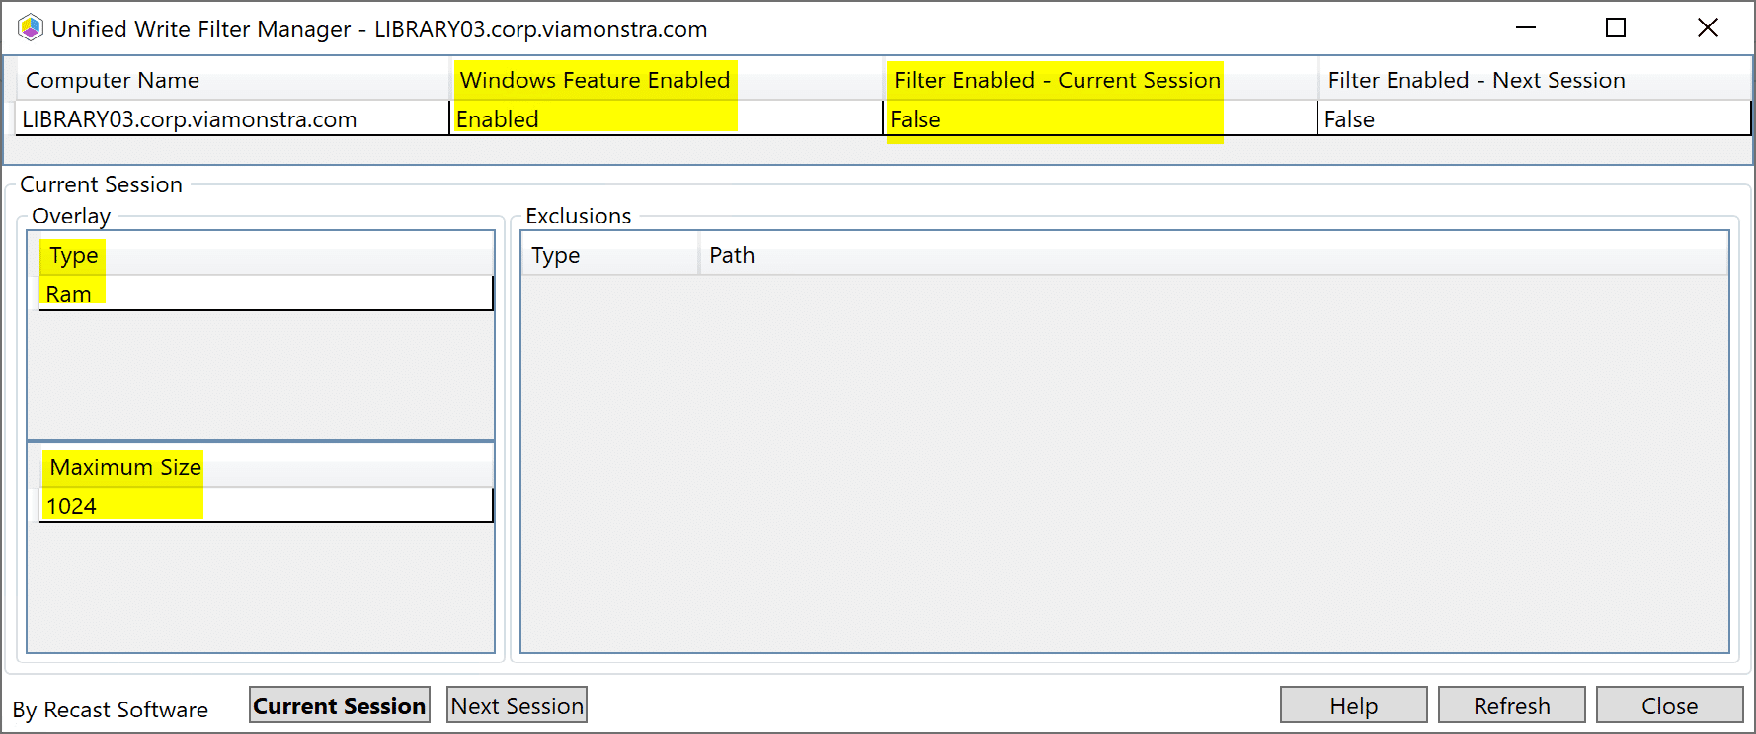
The Data returned is the same as from the command line, except it’s in your ConfigMgr console, and from here, we can now take action, but let’s not get ahead of ourselves.
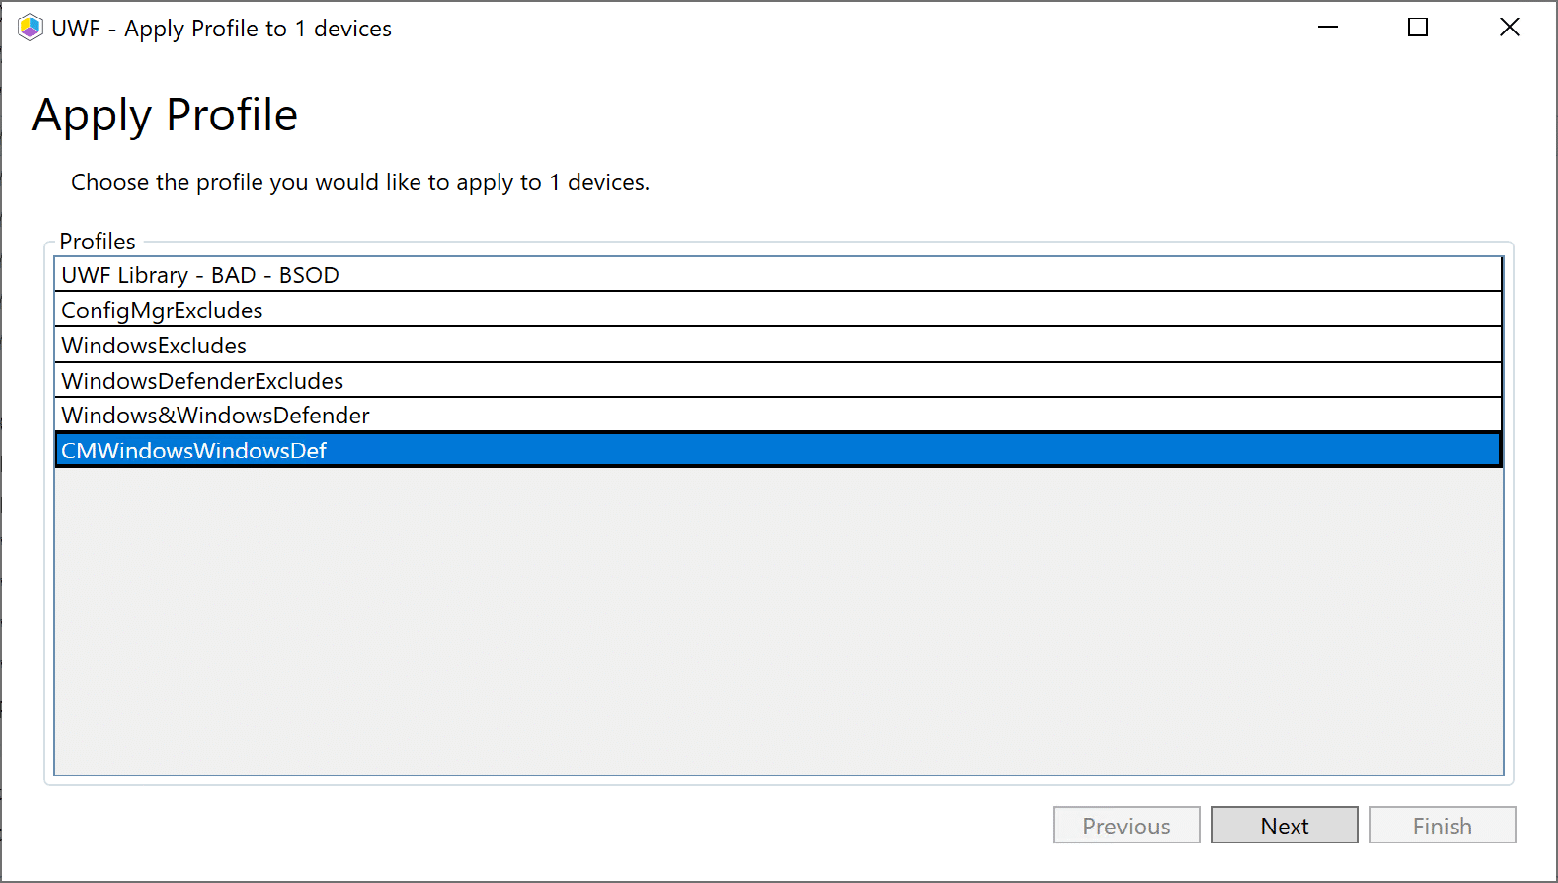
Apply UWF Profile
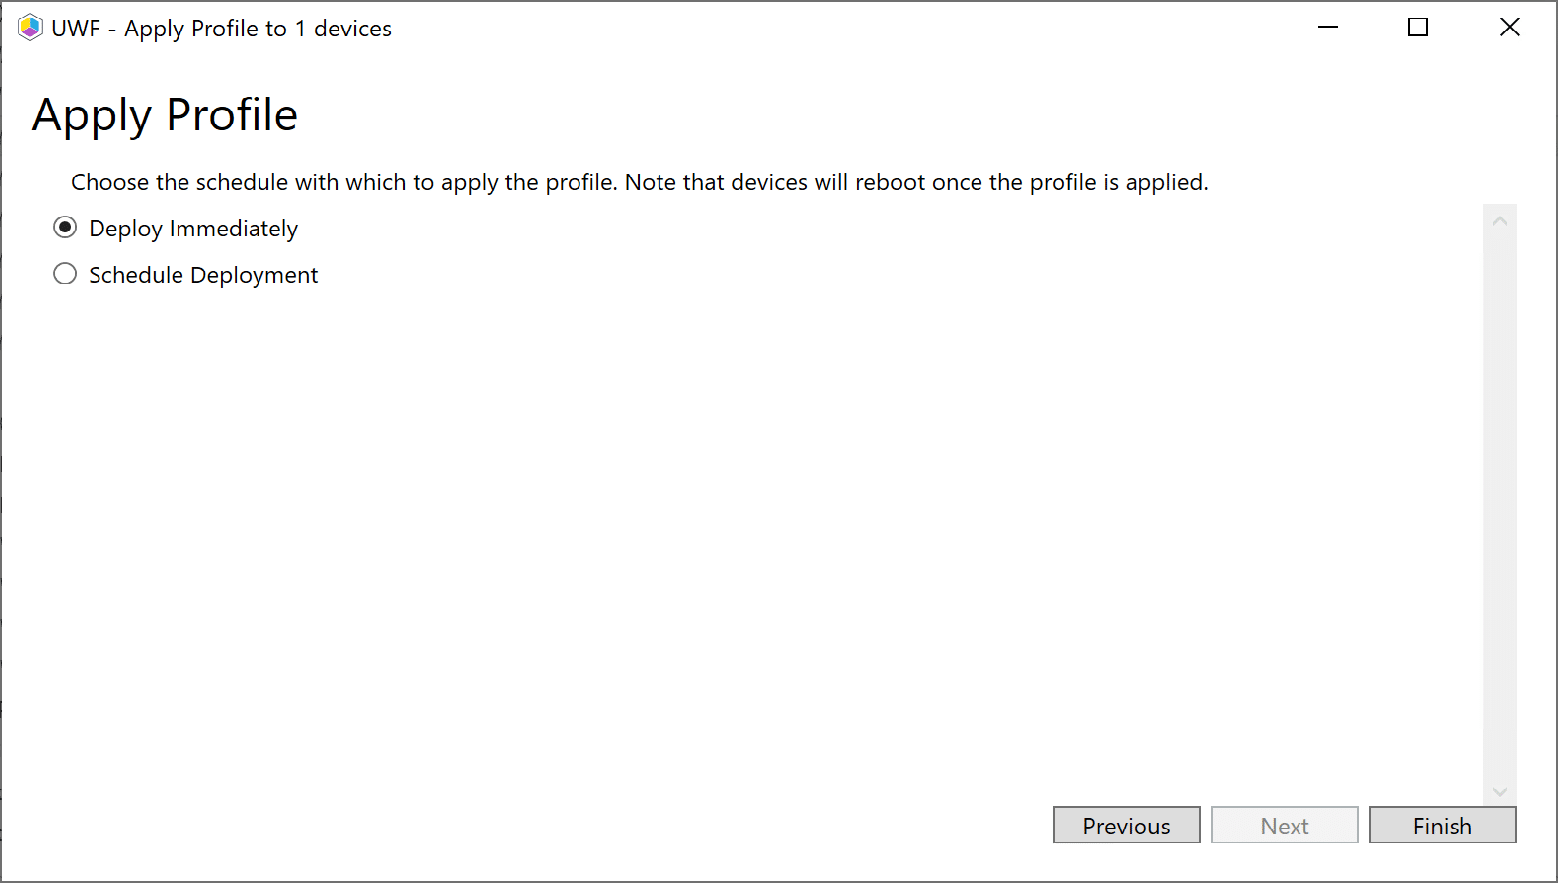
On our demo machine that we’ve installed UWF Feature, I’m going to go ahead and apply the UWF Profile I created.
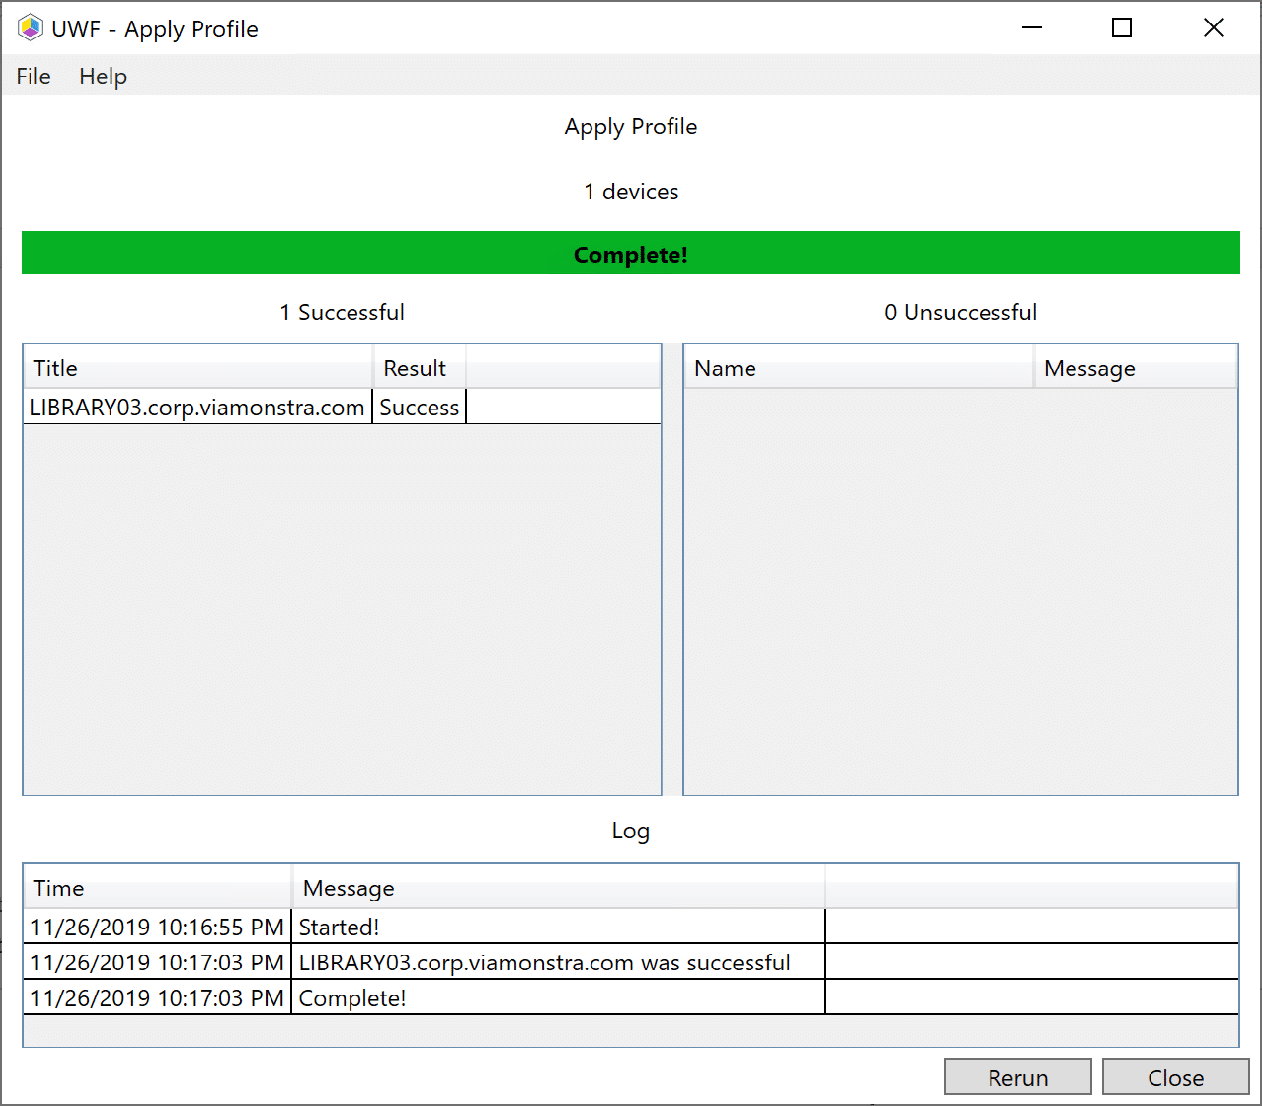
Now the Recast UWF Profile is applied to the machine. Let’s Confirm:
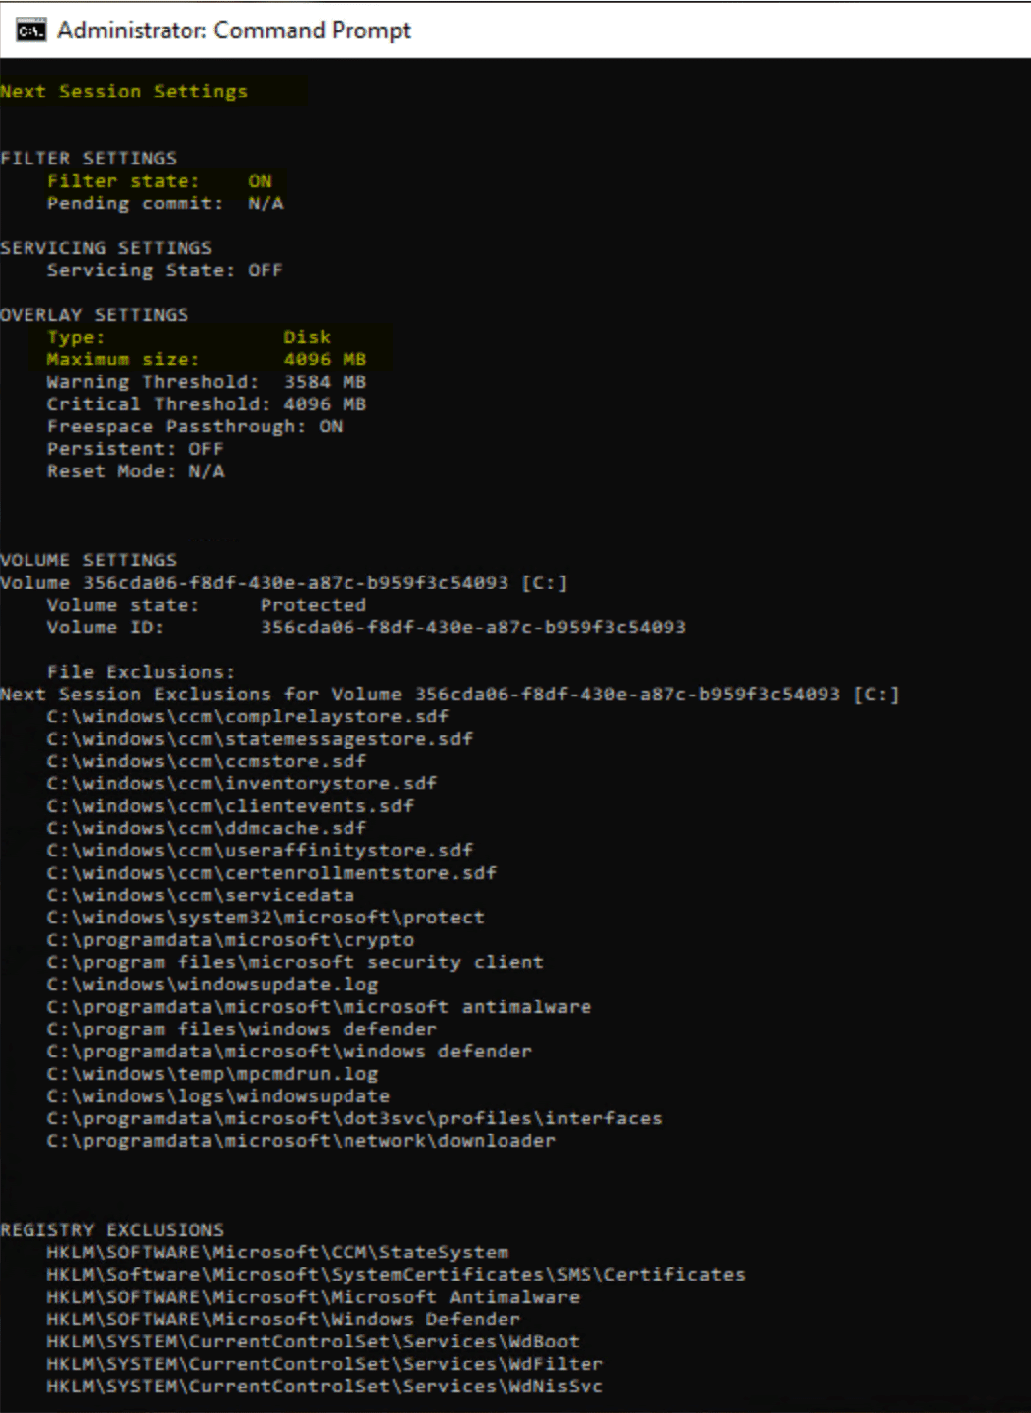
I had to trim a bit, I did not show the top part of the output which shows “Current Session” as nothing changed there, but “Next Session” you can see the filter will enable, the Drive C will be protected, and the exclusions have been added. Let’s look at the Recast Tool.
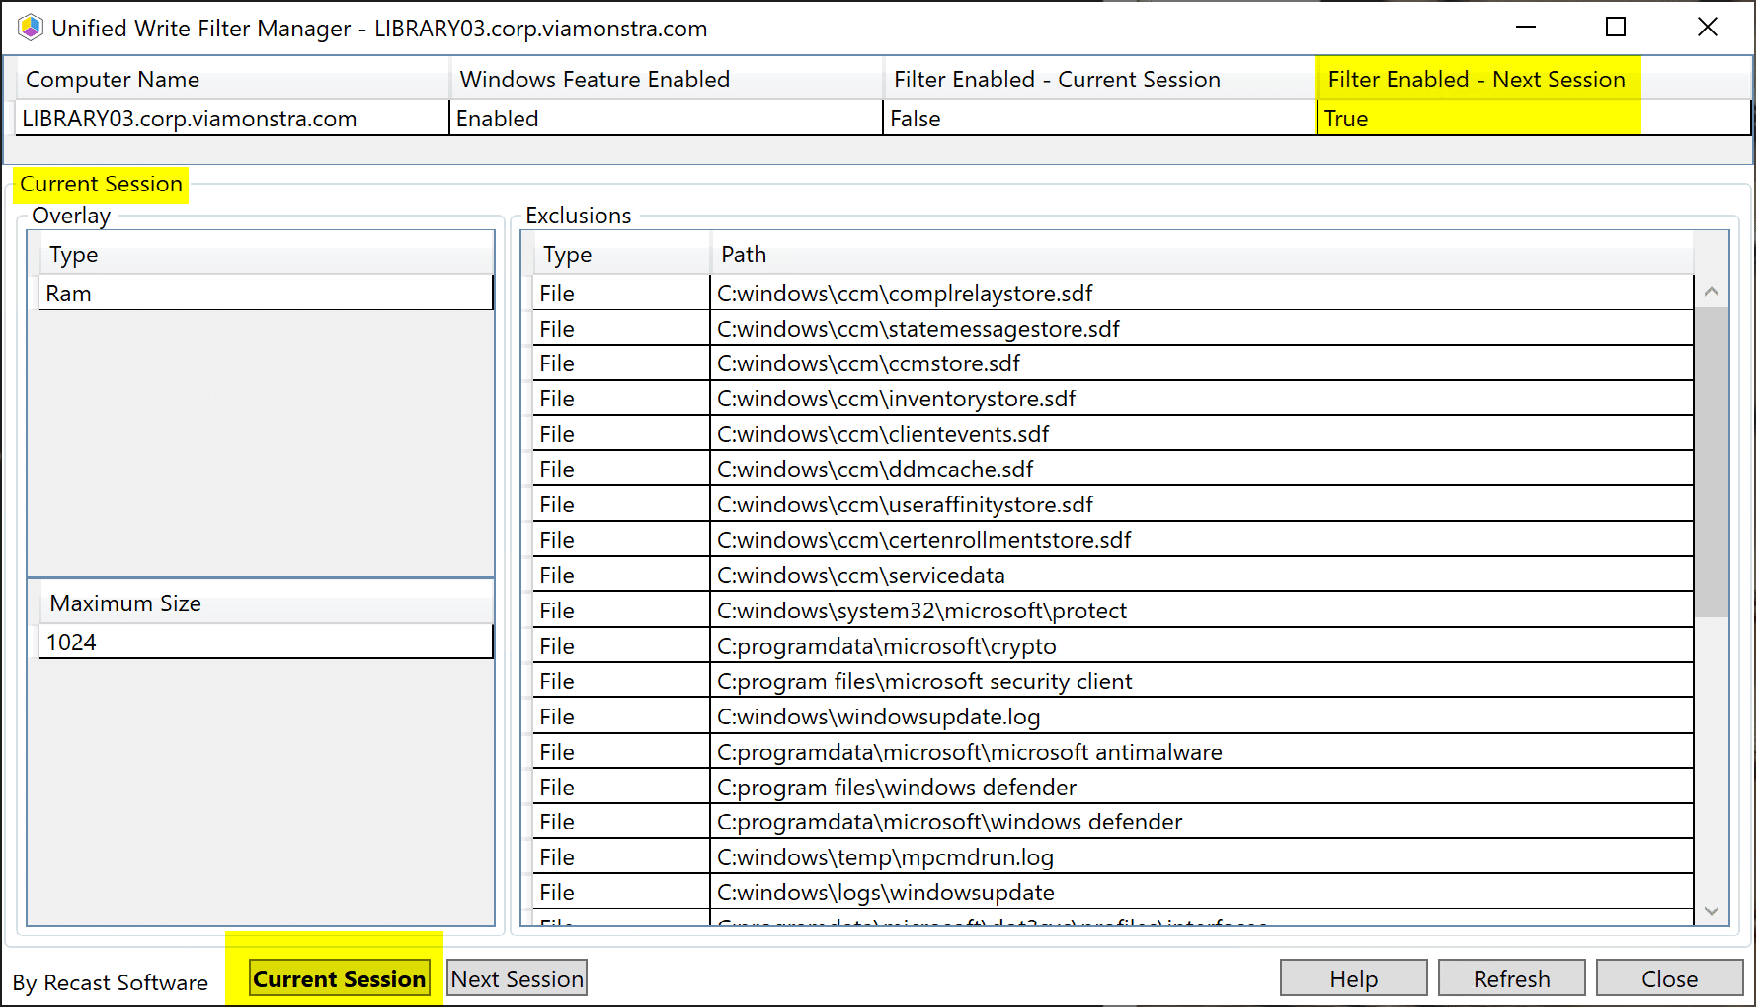
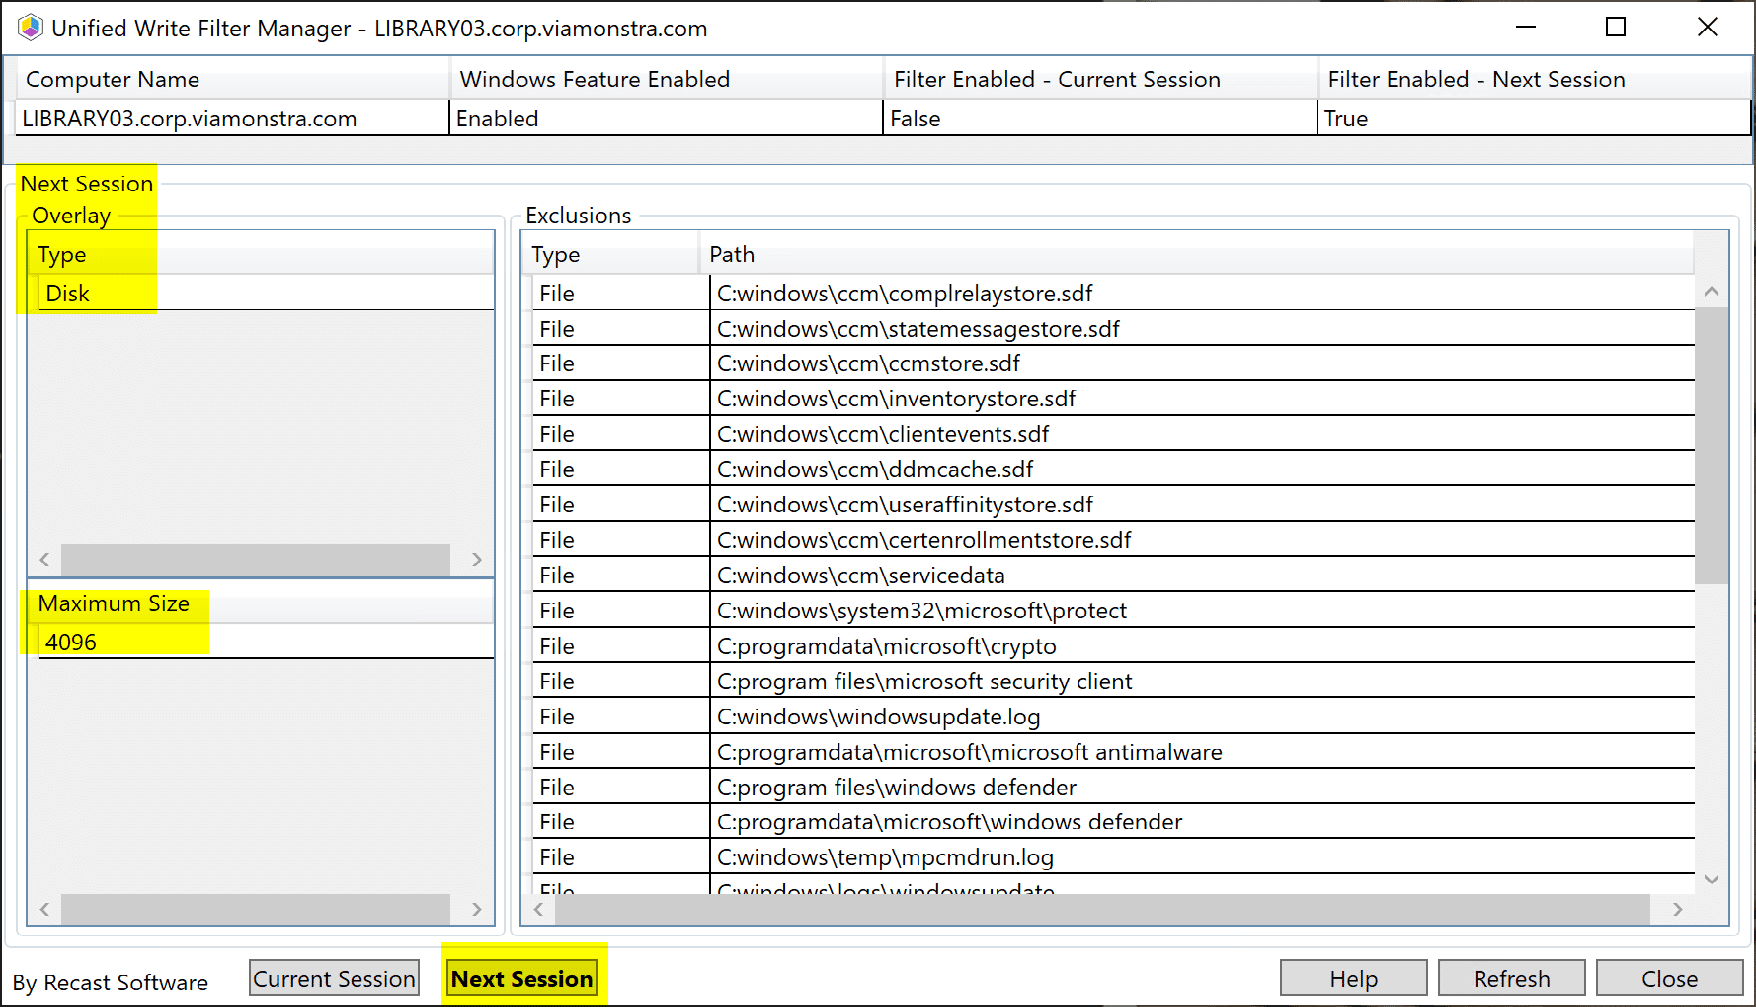
The Recast UWF Status “Dashboard” aligns with the data in the command prompt. We see that when we reboot the machine and it enters the “Next Session” that we’ll be locked down. Let’s reboot.
The UWF Status Manager now shows UWF is enabled. I went ahead and created a file on the desktop to test that it is discarded after the reboot.
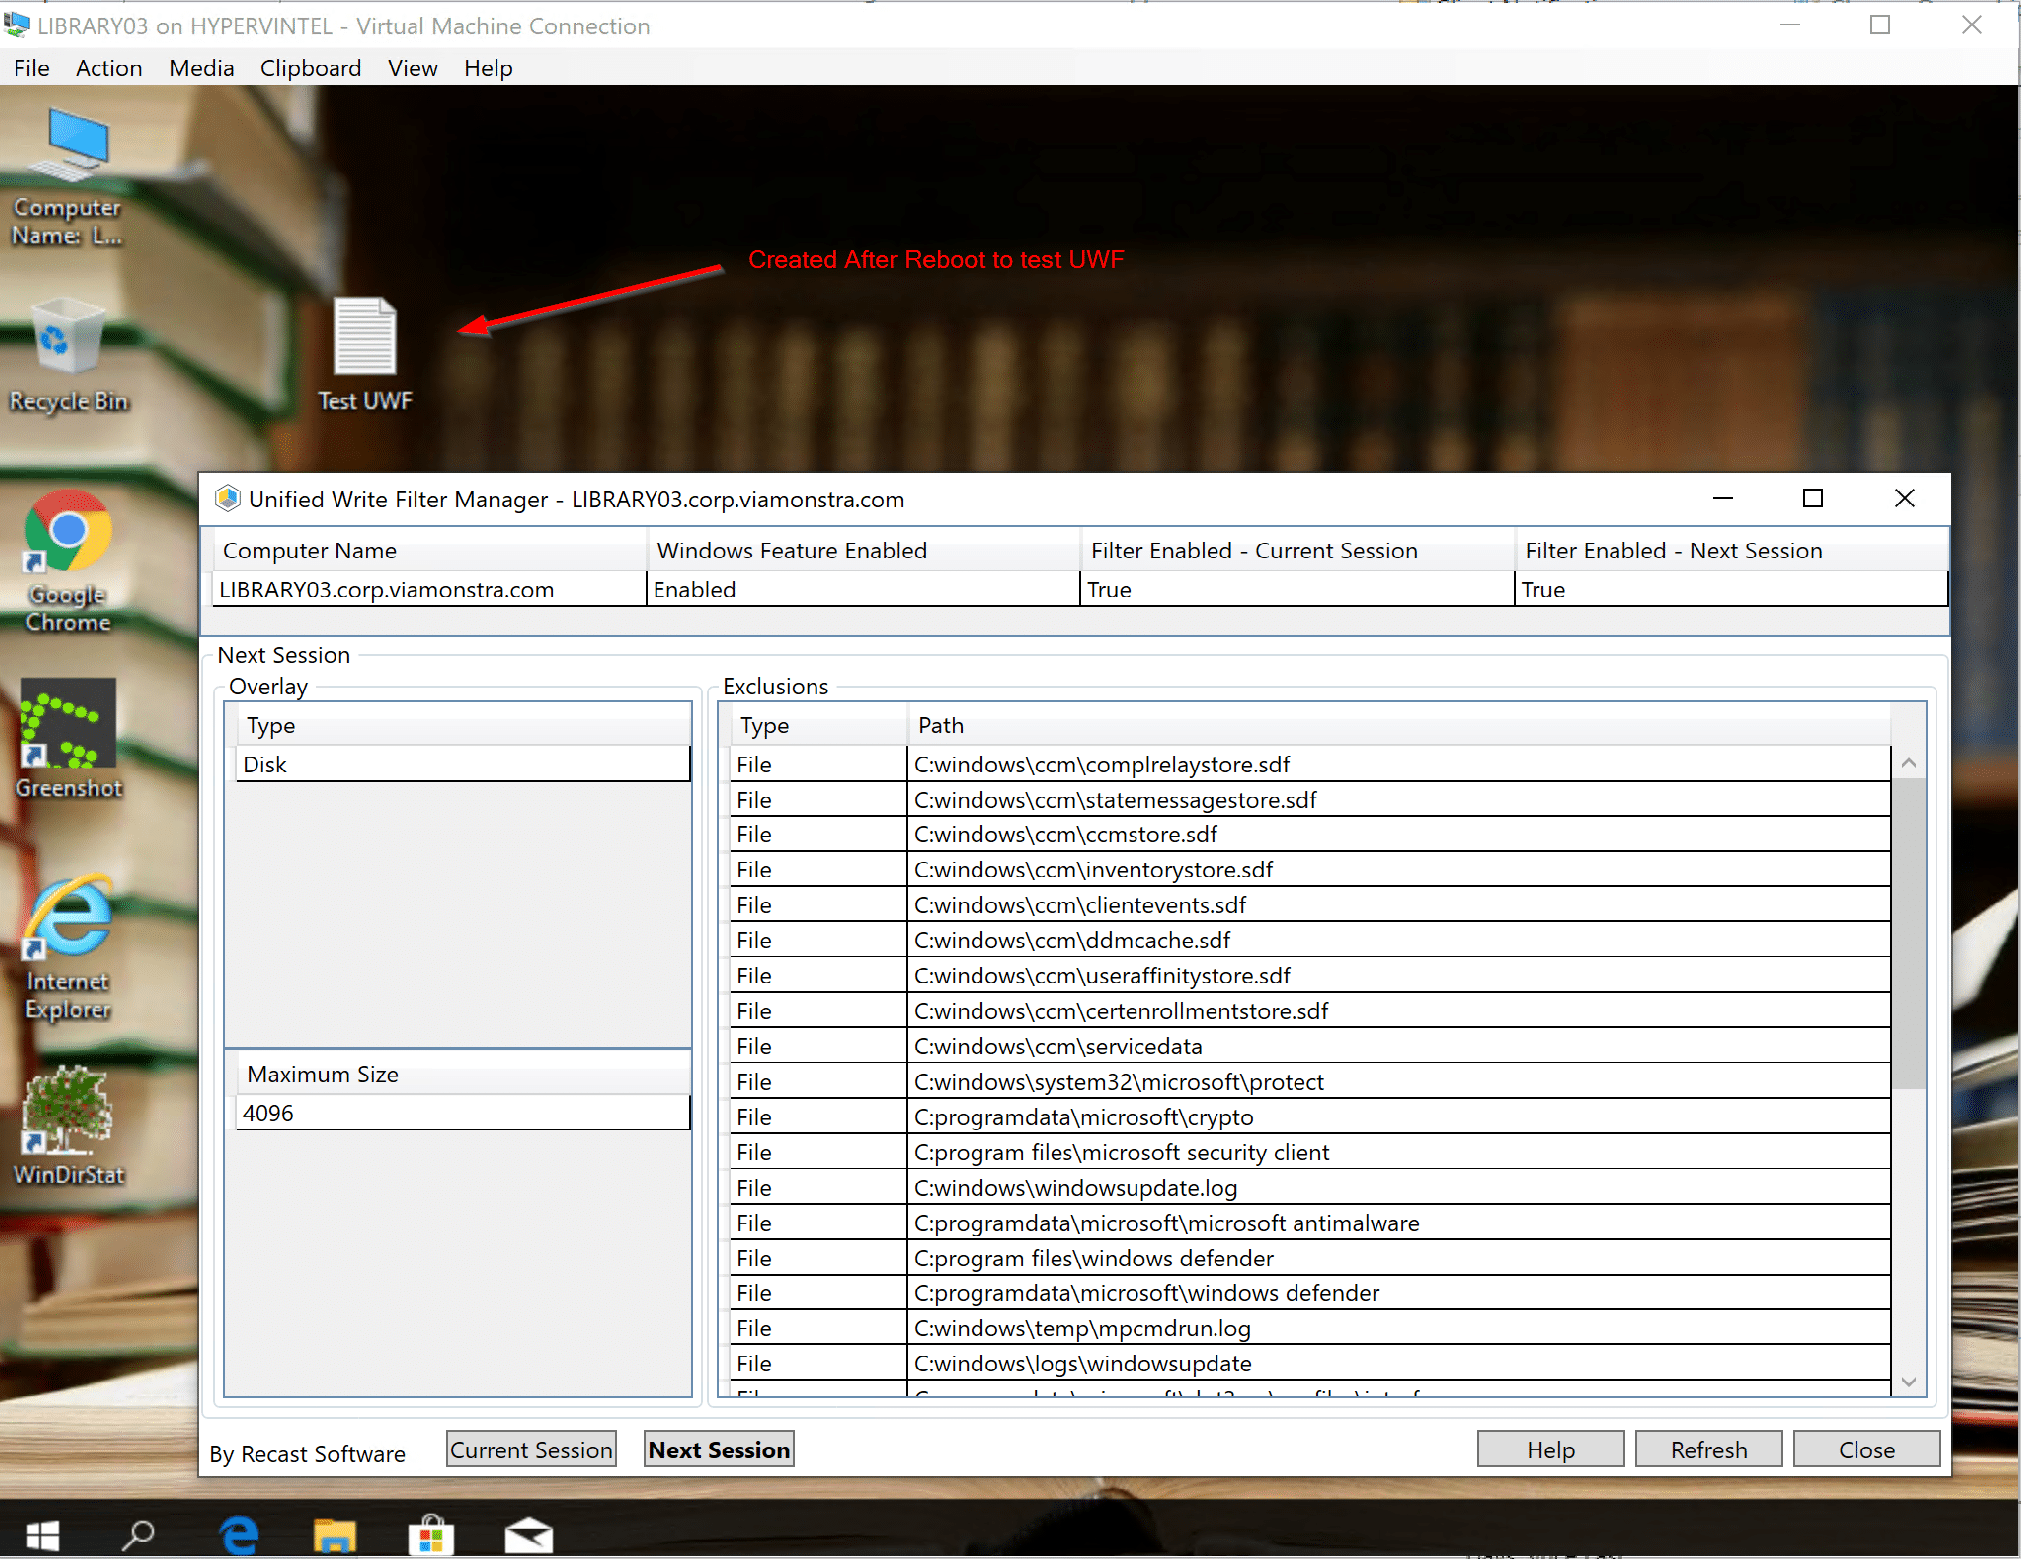
After the reboot the file was gone as I expected, didn’t think you cared enough to see a screen capture without it, I assume you trust me by now.
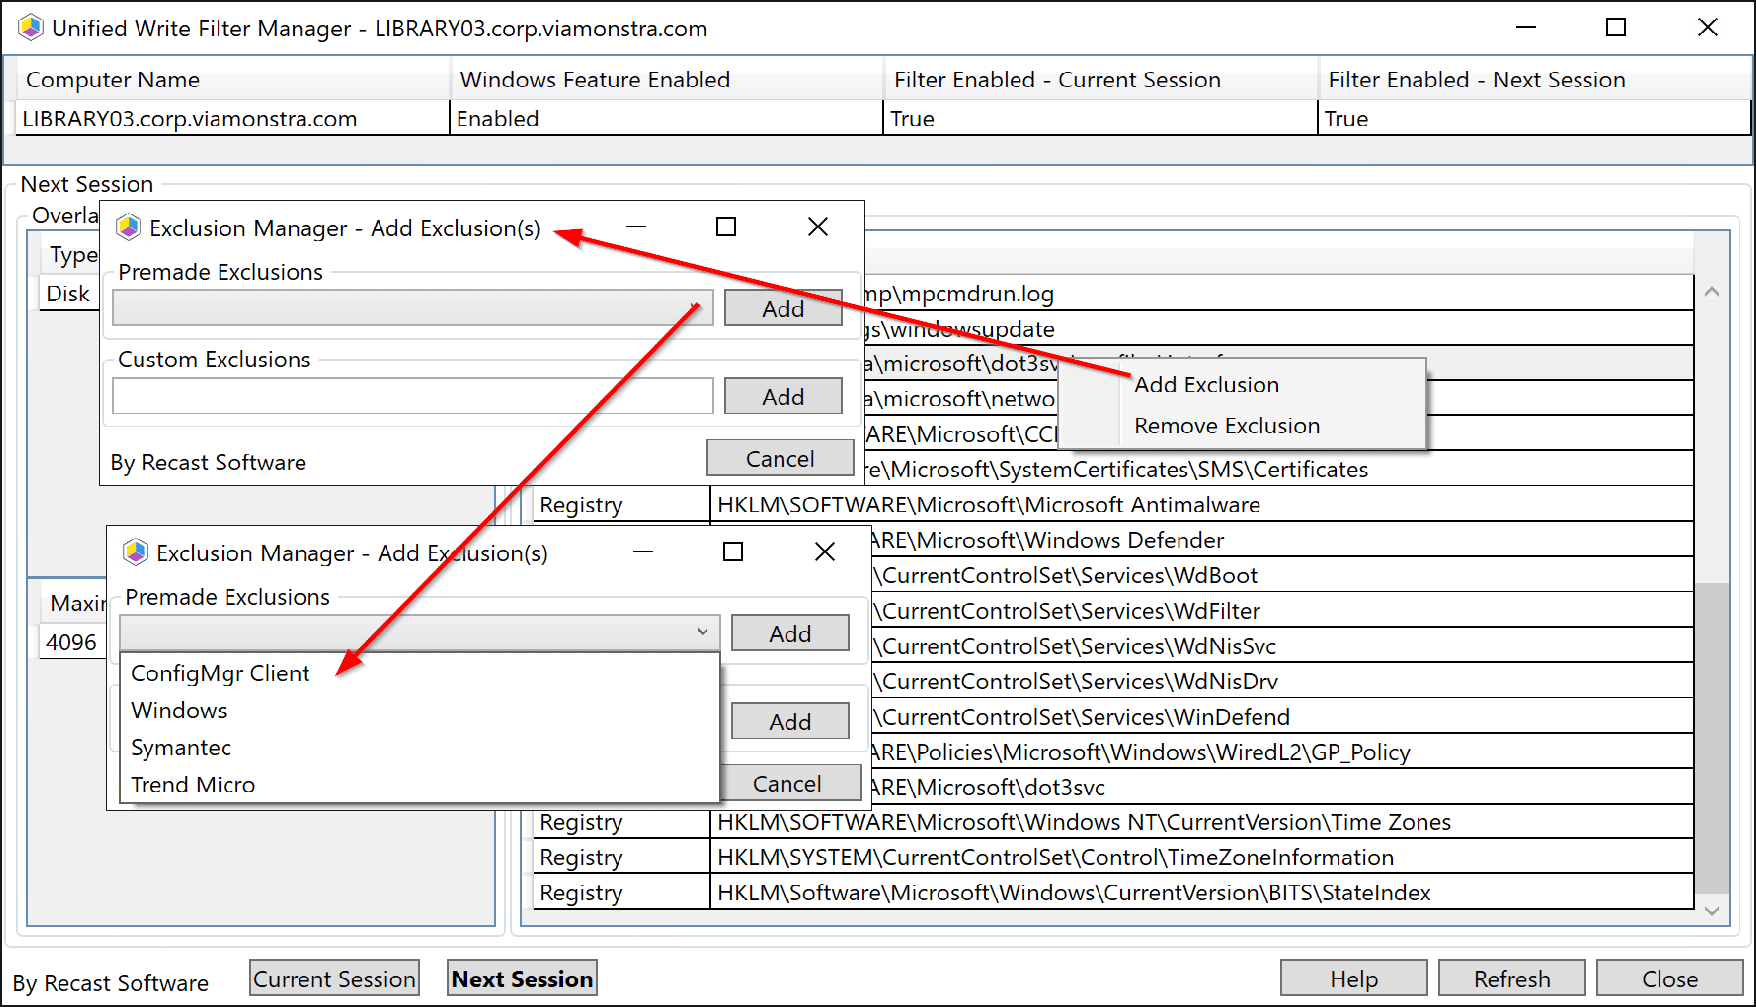
If you’re testing on a machine trying to get it just right before you create a profile and push to your collection, you can easily add and remove exclusions right in the Exclusions portion.
Once you get it tweaked, you can update your main Profile, and push it out. Remember, every change you make in exclusions, you’ll need to reboot for it to take effect.
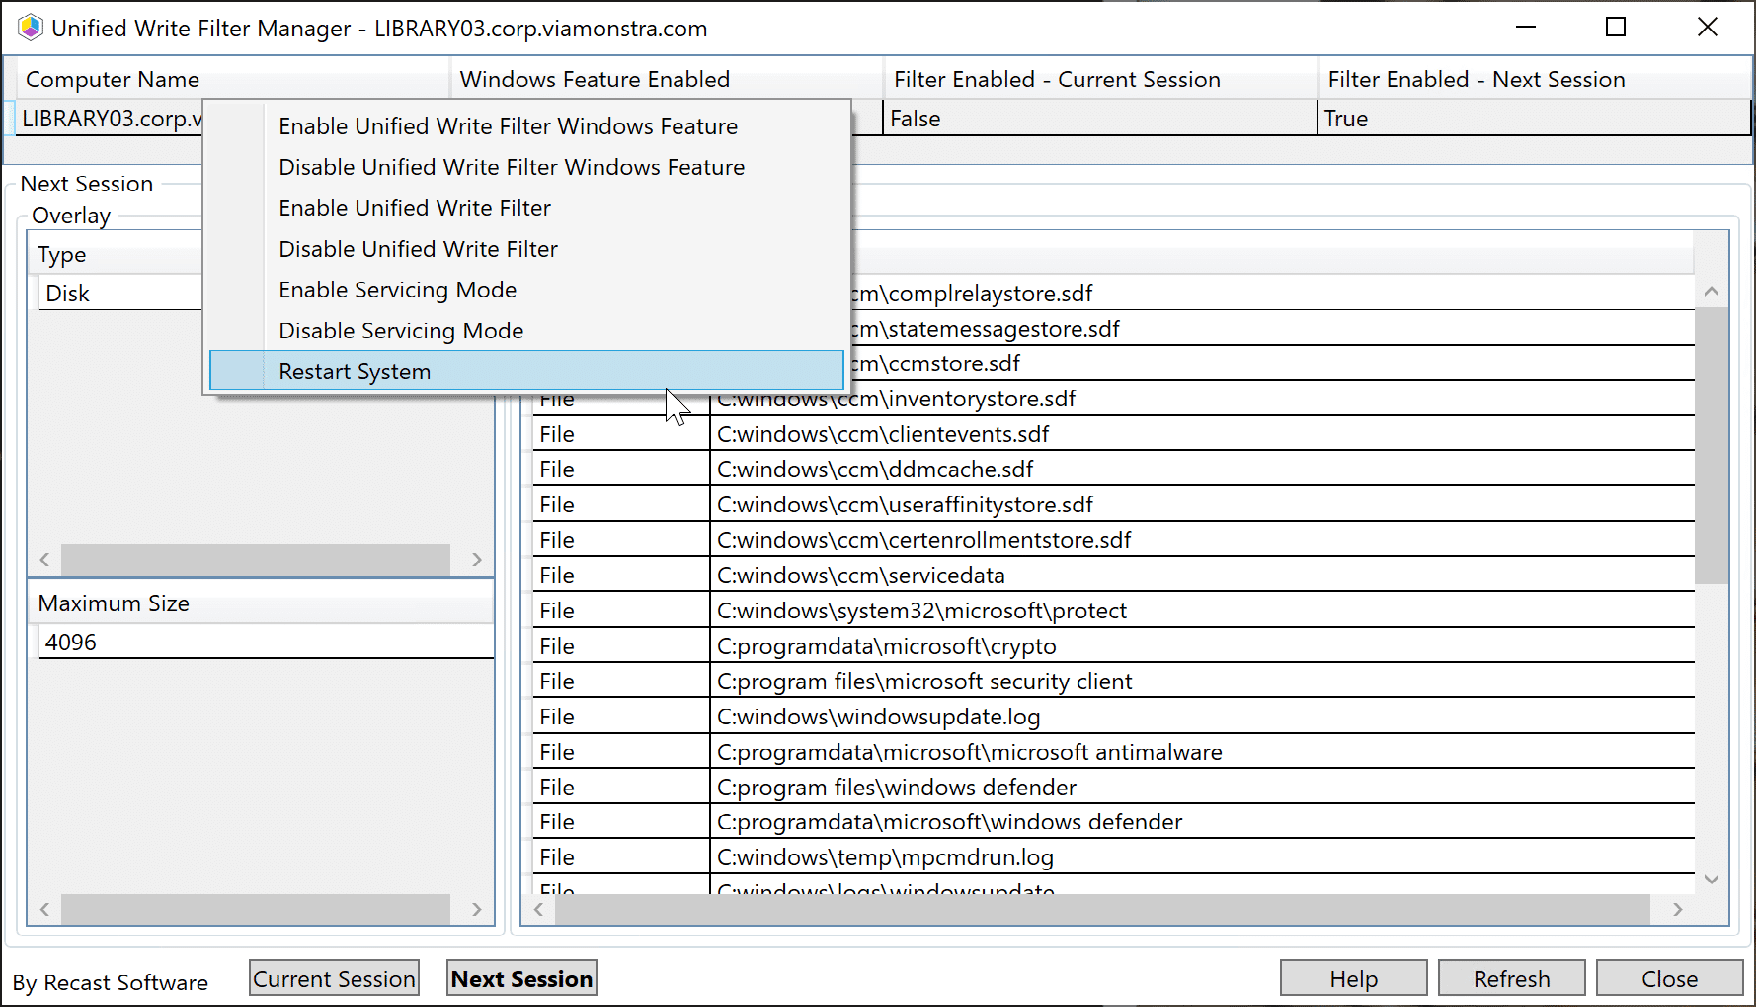
Unified Write Filter Status
So we’ve already spent a fair bit of time inside of this Right Click Tool, but I’m going to cover some of the items you can do with it.
- See overall Current and Next Session UWF Status [MS Docs]
- Add or Remove Exclusions on the machine [MS Docs]
- EnableDisable UWF Windows Feature [MS Docs]
- EnableDisable UWF protections [MS Docs]
- EnableDisable Servicing Mode [MS Docs]
- Restart Machine
If you’d like any additional information about the Recast UWF Manager or in-depth guides to using it for a specific situation, contact support and we’ll be happy to assist you.