Endpoint Insights
Configuration Baseline Remediation – Configuration Item
Topics: Endpoint Insights
In this blog post I will show you how to create a Configuration Item. This comes in handy when you’re dealing with a specific update for hundreds or thousands of systems and also need to factor in that new devices will be added at a later date.
What do I mean? Back in 2013, I encountered a problem where my network drives (Where Are My Network Drives?) were not available to an application when I ran the application using elevated permissions. In order to solve the problem I added a registry value, rebooted the servers, and then tested everything to ensure that it worked correctly. At the time I thought, “What would I do if I needed to do this for hundreds or thousands of systems? That’s a lot of manual work!!” One option would be to create a package and program in Microsoft Configuration Manager (ConfigMgr) to deploy the registry key, but what if you added new systems over time? Configuration Baseline Remediation to the rescue!
I’ll use my original 2013 problem as the example for how to create a Configuration Item, but the steps are universal, so you can use them to create any Configuration Item.
Missing Network Drives
Microsoft blocks access to network drives for security reasons. Although I understand the reasoning behind it, it interferes with my daily tasks. Please see Some Programs Cannot Access Network Locations When UAC Is Enabled for the full Microsoft article.
Fortunately, though, the solution is fairly simple:
Create a registry key EnableLinkedConnections under HKEY_LOCAL_MACHINESOFTWAREMicrosoftWindowsCurrentVersionPoliciesSystem with the value of 1.
Remember a reboot is required before this registry key takes effect. Once it takes effect, this update allows me to see all of my network drives when running applications using elevated permissions.
How to Create the Configuration Item
The steps in this blog post are updated to SCCM Current Branch 1802 because in my original post I was using SCCM 2012. You’ll notice several changes including the wizard interface.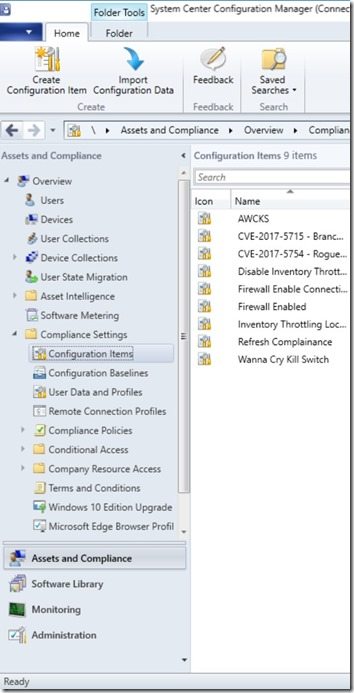
In the SCCM Current Branch console, under the Assets and Compliance workspace, expand Compliance Settings and select Configuration Items. From the ribbon, click on Create Configuration Item.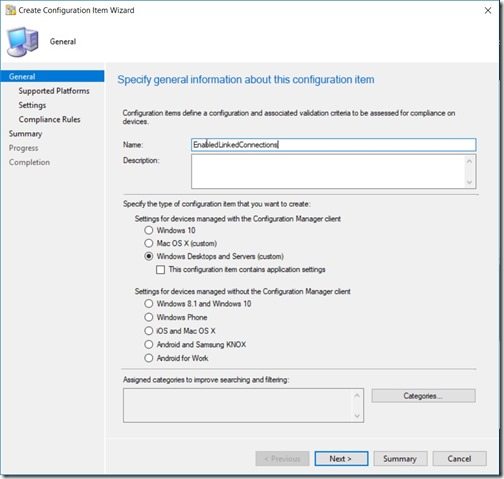
Give the Configuration Item a name. In my example I’m calling it, EnabledLinkedConnections. Keep all other settings as the default and then click on the Next button.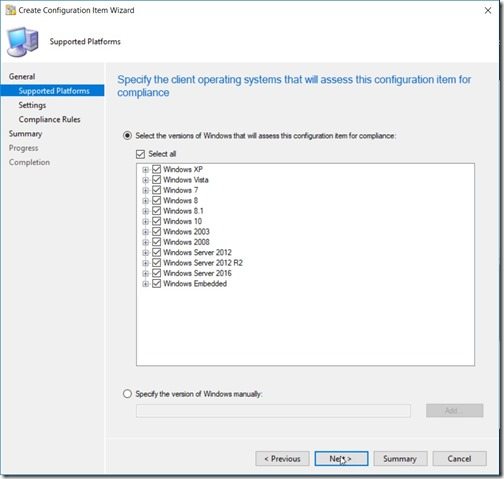
Since this affects me on both workstations and servers, I will deploy it to all operating systems (OS). You might, however, choose to only deploy it to server OS. It all depends on your environment. After you select the supported platforms, click on Next.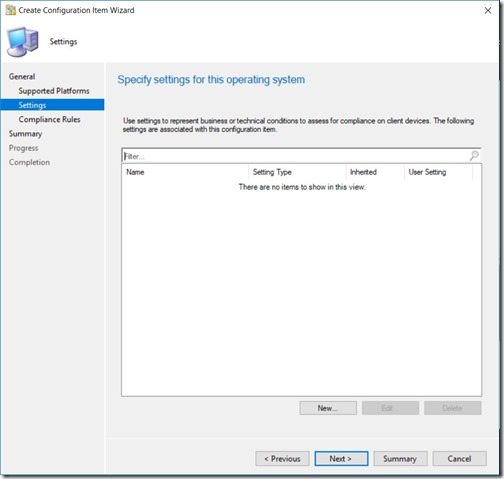
On the Settings page, click on the New… button in order to create a new Configuration Item.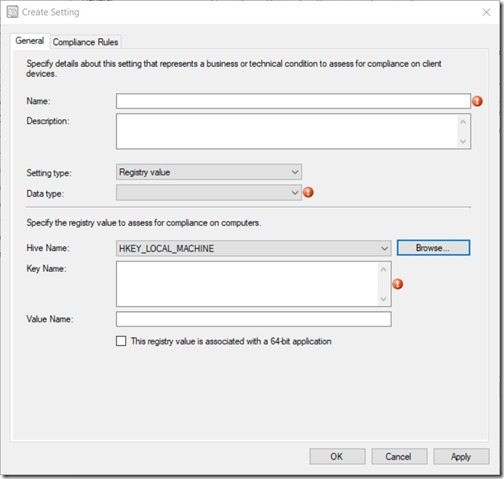
On this page you would think that filling out the Name and Data type fields would be the first step, but it isn’t! Simply by selecting the registry key first, all of those details will be automatically populated. Therefore, click Browse…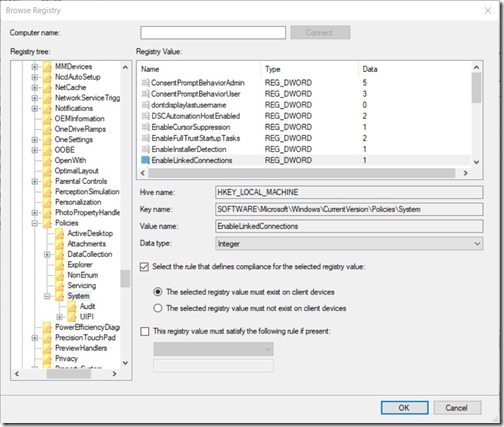
Browse to the registry key. In my case it is: HKEY_LOCAL_MACHINESOFTWAREMicrosoftWindowsCurrentVersionPoliciesSystem.
Select the EnableLinkedConnections entry.
The following two items should be automatically taken care of for you. Data type should be Integer. Select the rule that defines compliance for the selected registry value should be selected.
Also make sure to select this option: The selected registry value must exist on client devices.
Click OK to continue the Configuration Item creation process.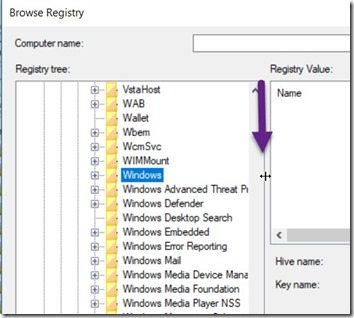
Tip: You can expand the Registry tree window by clicking and dragging the windows area to make it larger. This way it is easier to find the correct registry key.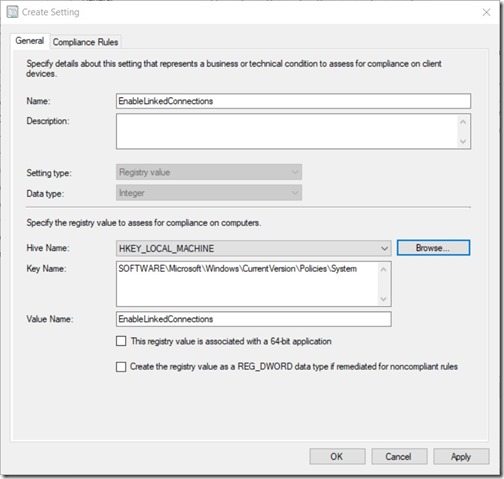
Notice that the General page is now automatically populated. Select the Compliance Rules tab.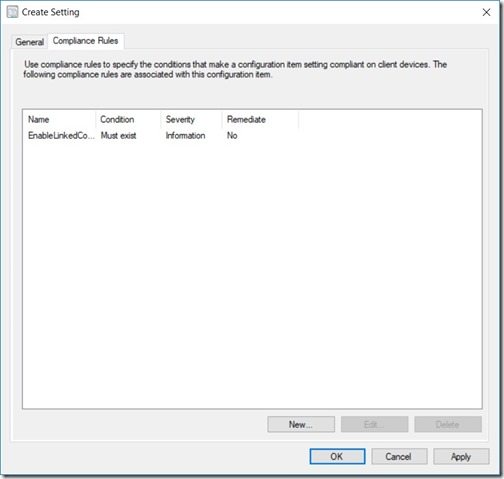
On the Compliance Rules page, click on the New… button in order to create a new remediation rule.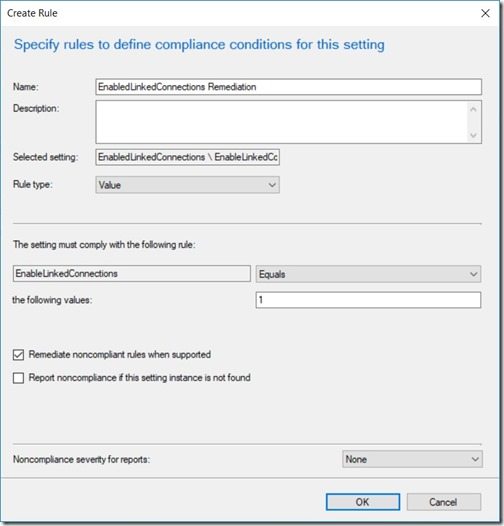
Give the new rule a name. In my example I’m using, EnabledLinkedConnections Remediation. Rule type should be Value. The setting must comply with the following rule: Equals the following values 1. Select Remediate noncompliant rules when supported.
Click OK to complete the remediation rule creation.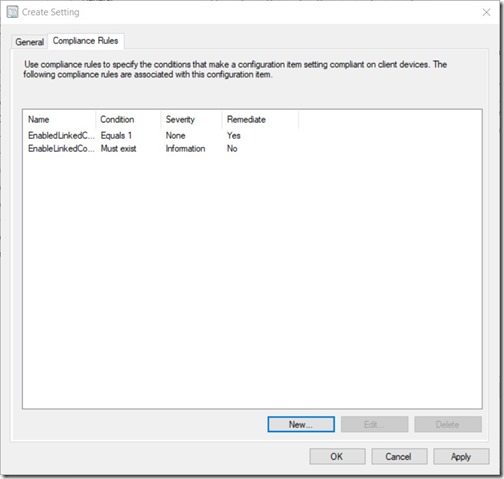
Click on the OK button once again.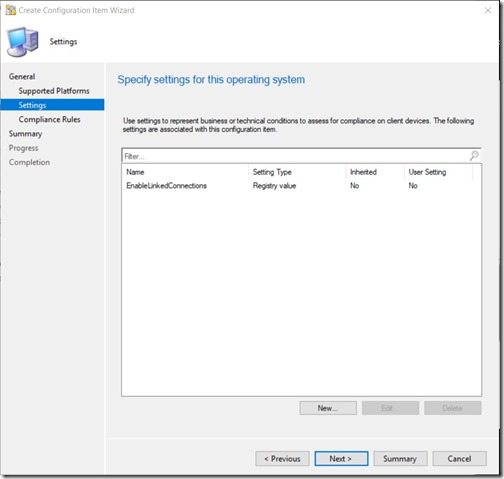
Click on the Summary node in order to skip over to the summary screen.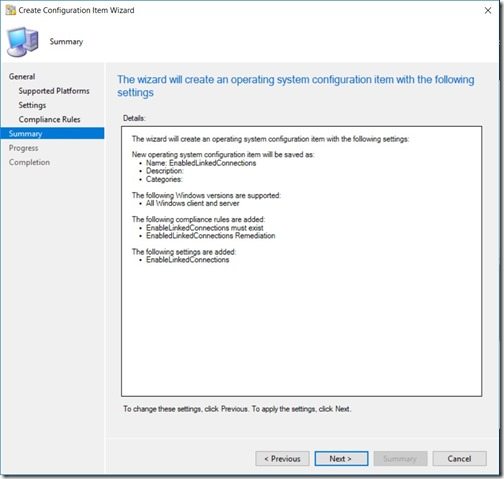
Review the details and then click on the Next button.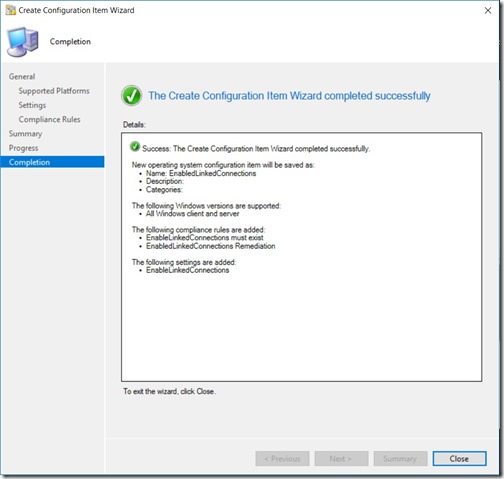
Finally, click on the Close button to complete the creation of the Configuration Item.
In my next post, Configuration Baseline Remediation – How to Create the Baseline, I’ll show you how to create a baseline and then how to deploy it to client systems.


