Endpoint Insights
How to Create an Anti-Malware Policy for Endpoint Protection
Topics: Endpoint Insights
I documented the steps I took on how to create an anti-malware policy for Endpoint Protection because I was certain that I wasn’t the only one who was going to run into a similar problem and would need this information.
Here’s what happened. I asked one of my team members to create a custom utility. They zipped it up and emailed it to me via O365. Once I received the email my system determined that the ZIP file was a virus and automatically deleted the file. Don’t get me wrong, this is exactly what I want my AV software to do, but not in this case. LOL!
Read on as to why I found this funny and how I was able to finally access this ZIP file.
How to Perform a Full AV Scan from the SCCM Console
You should always make sure that your AV definitions are up-to-date. Since this incident, my team member runs a full scan and ensures that all definitions are updated. As a precaution, I do the same thing on my computer. From the SCCM console, I also now force a full scan on the All Desktop and Server Clients collection. I love that I can do that from the console! Below are the steps.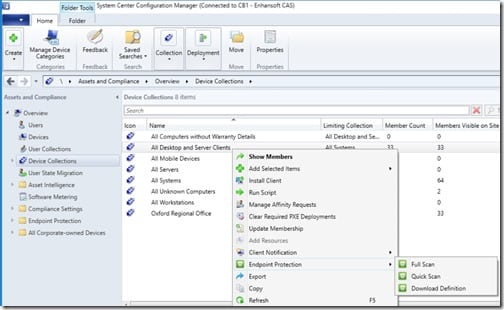
First, open the SCCM console. On the Assets and Compliance node, expand Overview and Device Collections. Highlight the All Desktop and Server Clients collection. Right-click on it and point to Endpoint Protection and click on Full Scan. Isn’t that simple?!
Why Did I Find This Funny?
I’m sure you guessed that neither my computer nor my team member’s computer had a virus on it.
Keep in mind that the ZIP file was emailed to me. Why is that important? We use Office 365 (O365) mailboxes. This means that all emails coming and going are scanned for viruses and spam. This is what the Microsoft docs on the subject (Anti-spam and anti-malware protection in Office 365) say, “If you’re an Office 365 customer whose mailboxes are hosted in Microsoft Exchange Online, your email messages are automatically protected against spam and malware.” I’m certain that the O365 online scanner is the most up-to-date AV scanner on the market. Given this level of protection, if there were any viruses, I would expect O365 to catch it first!
This means that the ZIP file was scanned by both my teammate’s system and by O365. Between those two systems you would think that a virus would be caught before it reached my computer. This was why I was laughing. In the end, I decided to put it down to a false positive, but I still needed the utility within the ZIP file. The only option I had left to get the file was to temporarily disable Windows Defender on my laptop.![]()
I opened the Windows Defender Security Center and clicked on the shield icon.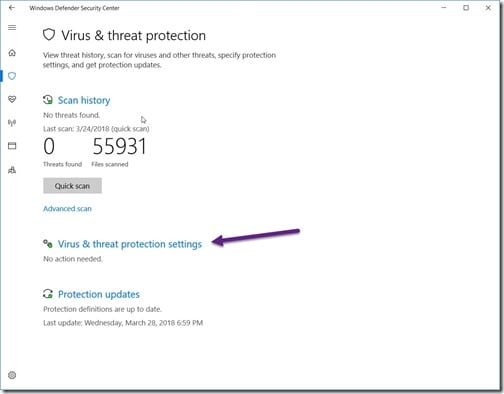
I then clicked on the Virus & threat protection settings link.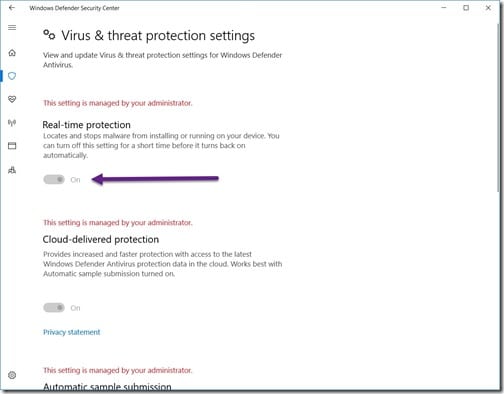
Unfortunately I couldn’t temporarily turn off Windows Defender because, in a nutshell, when SCCM takes over management of a computer all Windows Defender features are automatically locked down. This is true even for administrators! The only way to solve this problem was to create an anti-malware policy.
How to Create an Anti-Malware Policy for Endpoint Protection
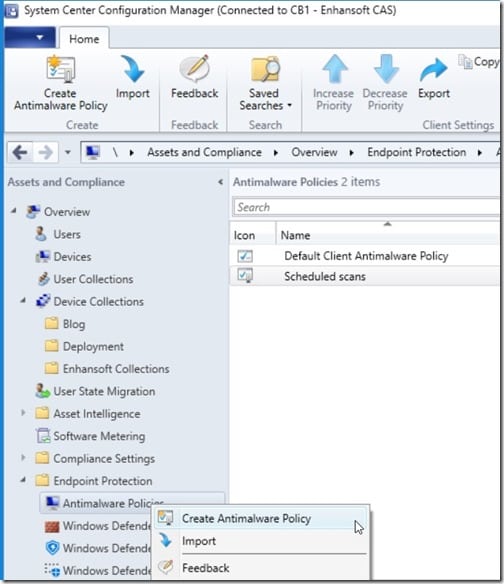
Open the SCCM console. On the Assets and Compliance node, expand Overview and Endpoint Protection, and then select Antimalware Policies. Right-click on it and point to Create Antimalware Policy.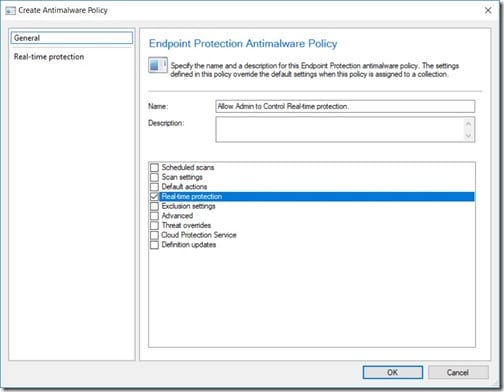
Give the policy a name and then select Real-time protection. Do NOT click on the OK button yet.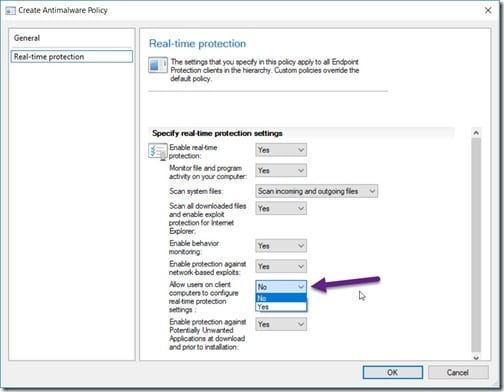
On the left-side pane, select Real-time protection. Change the Allow users on client computers to configure real-time protection settings option to Yes. Then click OK to complete the policy. Now that the policy is created, you need to deploy it to a collection(s), so keep reading!
How to Deploy an Anti-Malware Policy for Endpoint Protection to a Collection
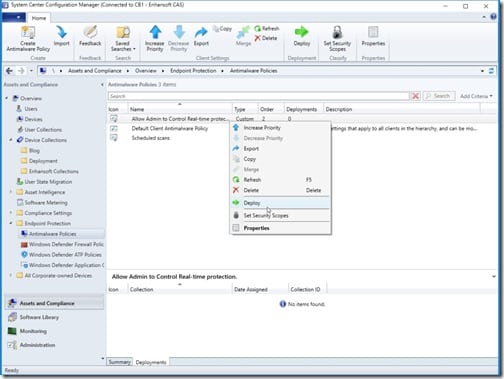
Deploying the policy is like deploying anything else in SCCM. Start by selecting the policy, right-clicking on it and then select Deploy.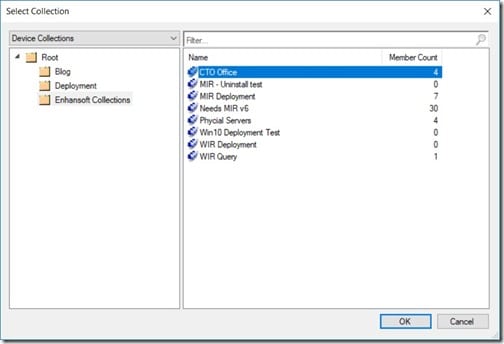
I wanted to target my new policy to only a few computers, so I selected the CTO Office collection. I know that only these computers, including my own, should have this policy. Next, I clicked OK.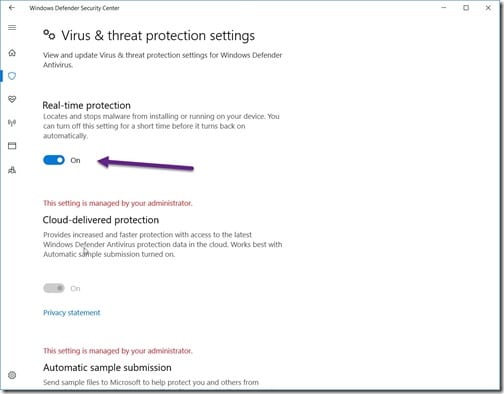
With the policy created and deployed, I can now temporarily turn off Windows Defender. Always remember to turn it back on when you are done!
If you have any questions about how to create an anti-malware policy for Endpoint Protection, please feel free to contact me @GarthMJ.


