Endpoint Insights
Effects of Endpoint Protection on Hyper-V Server Performance
Topics: Endpoint Insights
Effects of Endpoint Protection on Hyper-V Server Performance
Recently, I noticed that one of my Hyper-V test labs consistently had a Disk Queue Length of 5 or more disk read/writes. A disk queue length of one or more means that there’s a bottleneck every time the server/application tries to access the disks. In most cases, the server/application is doing nothing. This explains why you will see pauses in your server/application when it is stuck waiting. Since disk I/O is the number one killer of VM performance, anything to reduce it is a good thing!
This blog post will focus solely on reducing unnecessary disk I/O caused by Endpoint Protection (when it scans for viruses and malware) in SCCM.
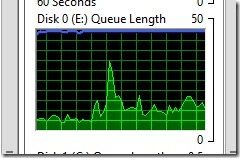
Not too long ago, I wrote a blog post about how to exclude VHD* files from Endpoint Protection scanning, but I wanted to do more, so I searched for a guide that listed other exclusions. I came across this helpful article, Hyper-V: Anti-Virus Exclusions for Hyper-V Hosts, on TechNet.
In this blog post, I will show you how to implement the TechNet article’s suggestions for Endpoint Protection.
Background
In my test lab, similar to any other type of server (physical or virtual), the C: drive is used for hosting the operating system (OS) only (in this case RAID 1), and the physical E: drive is set up as a RAID 10, which hosts all my VM’s VHD files. My D: drive is the DVD drive.
An increase in disk queue length, in my case, meant that the VMs “felt” slow. If I only looked at the VMs I’d never know the real reason behind this problem. Instead, I had to look at the Hyper-V host first in order to understand the true nature of the problem.
Anti-virus (AV) software inspects a file to check for all known viruses and malware. It is this scanning process that slows down an application’s/server’s access to the file. The AV software must finish its scanning before access is granted to the file. It also means that the bigger the file, the longer it takes to scan for viruses and malware.
VM files (VSV, VHD, VHDX, VHDA, & VHDXA) along with ISO are huge, and therefore take a while to scan. This can lead to an increase in disk queue lengths while the AV software is busy scanning these files, as was the case in my test lab. My goal was to reduce the overhead of file scanning. I did this by telling my AV software (Endpoint Protection) to skip checking for viruses and malware on my VM files and ISO.
As I indicated above, this blog post is not about reducing all disk I/O, but it will focus on reducing unnecessary disk I/O caused by Endpoint Protection (when it scans for viruses and malware) in ConfigMgr.
Recommended Exclusions
Using the AV Hyper-V exclusions listed on the TechNet article’s page, I will implement the File, Directory, and Process exclusions that are recommended for Endpoint Protection.
The file types to exclude:
- VHD
- VHDX
- AVHD
- AVHDX
- VSV
- ISO
Process exclusions:
- Vmwp.exe
- Vmms.exe
Directory exclusions:
- %systemdrive%ProgramDataMicrosoftWindowsHyper-VSnapshots
- C:ProgramDataMicrosoftWindowsHyper-V
- C:UsersPublicDocumentsHyper-VVirtual Hard Disks
Process Exclusions Explained
In my opinion, the file types and directory exclusions are self-explanatory, but the process exclusions are not, so here is a short note about both processes.
Vmwp.exe also known as Virtual Machine Worker Process is a component of the virtualization stack. There will be one VMWP.exe for each running VM. This exe can be found within the %windir%system32 directory.
Vmms.exe is the Virtual Machine Management Service. This is the main service used to manage Hyper-V VMs. This exe can be found within the %windir%system32 directory.
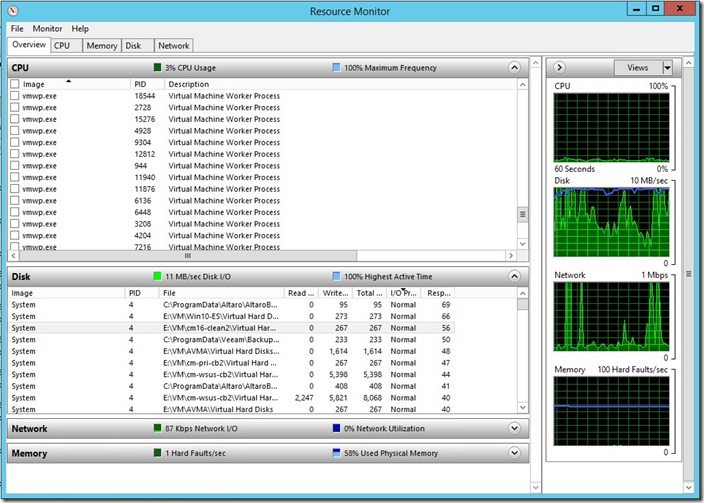
We can see below that vmwp.exe is listed several times in Resource Monitor.
Adding the Exclusions
File Exclusions
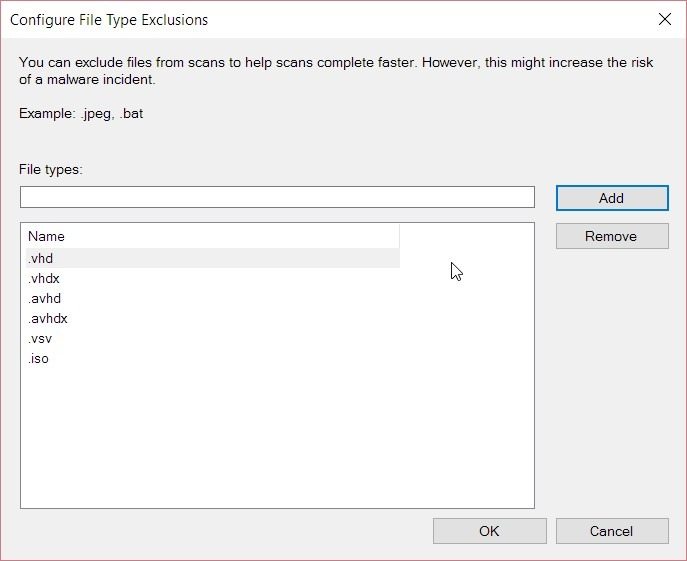
Starting with the file exclusions, I will ensure that all recommended file exclusions are added to Endpoint Protection. For detailed how-to steps, please refer to my blog post, Configuration Manager, Endpoint Protection and Hyper-V.
Ultimately your file exclusions window will look similar to the screenshot below.
With the file exclusions step completed, it is now time to exclude the two processes.
Process Exclusions
Start by opening the Configuration Manager console and expanding Endpoint Protection | Antimalware Policies. Next, select the Default Client Antimalware Policy and click on the Properties button.
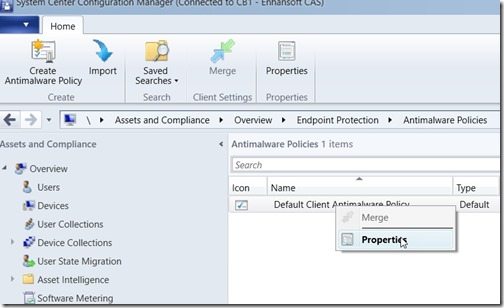
In the Default Antimalware Policy window, select the Exclusion settings node. Then click on the Set button for Excluded processes. In the Processes text box, enter %windir%system32vmwp.exe and then click on the Add button. Repeat the same step for vmms.exe. Once completed click on the OK button to close the open window.
Your process exclusions will look similar to the following screenshot:
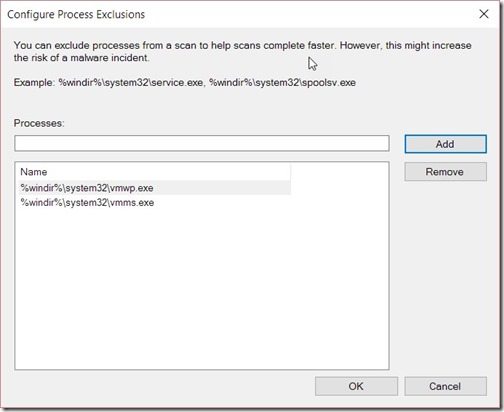
With that last step completed, Endpoint Protection will exclude scanning vmwp.exe and vmms.exe.
Directory Exclusions
It is never recommended to install anything on the OS drive. Instead, you should always have a separate drive for your applications and files. Hyper-V is no exception to this rule. Therefore you should never host your VMs on your C: drive; this also includes VM snapshots.
After reviewing my server, even though I don’t store anything on the C: drive, Hyper-V itself still stores some files within the listed directories. As such, I will exclude each of these directories. Additionally, you should add a few others to match up with your Hyper-V server configuration. In my case, E:VM* is where I store all of my VMs, so I will exclude this directory. Once the folders (directories) are added to the exclusions list, Endpoint Protection will no longer scan these folders for viruses.
Back in the Default Antimalware Policy window, select the Exclusion settings node. Then click on the Set button for Excluded files and folders.
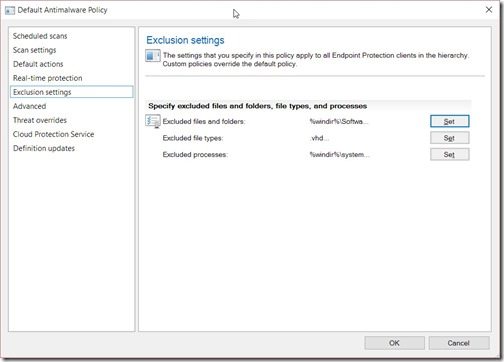
The first thing you will notice is that there are already exclusions listed.
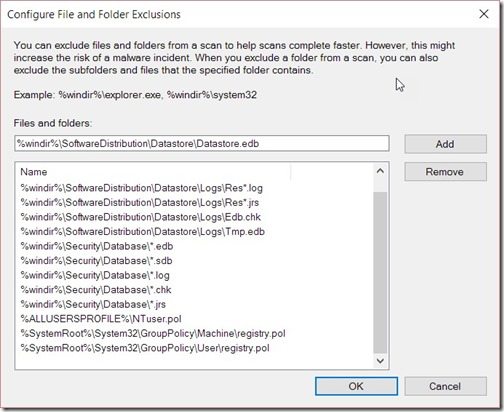
In the Files and Folders text box, add the directory that you want to exclude and then click on the Add button. In my example, it’s the %systemdrive%ProgramDataMicrosoftWindowsHyper-VSnapshots directory.
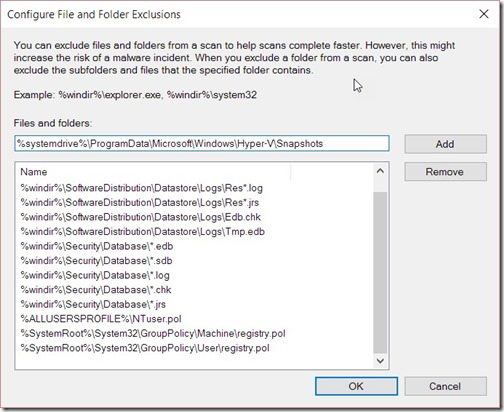
Repeat this process for the remaining folders that you want to exclude and finally click on OK to close all of the open windows. Your results will look similar to the one below.
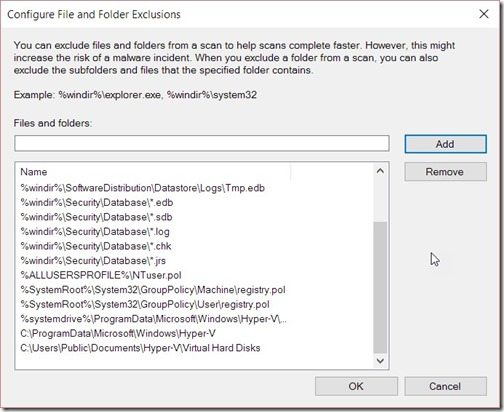
Now that all of the exclusions (AV files, directories, and processes) are added to Endpoint Protection, I know that any “slowness” on the part of my Hyper-V servers will not be a result of Endpoint Protection. If my Hyper-V servers seem slow, I will need to look elsewhere for the cause.
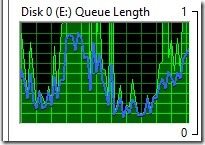
Looking at the scale within the screenshot below you will notice that it is now between 0-1 compared to 0-50 in the first screenshot of this blog post! The disk queue length is now ~0.5 which is much better than before I excluded the files, directories, and processes.
I know that there are many factors that affect disk queue length but, for now, I am happy with my Hyper-V lab.
If you have any questions, please feel free to contact me at @GarthMJ.
Other Hyper-V Blog Posts
Check out our other Hyper-V blog posts:


