Endpoint Insights
Set the Page Size of SCCM Reports
Topics: Endpoint Insights
I always talk about the importance of doing the little things when it comes to enhancing reports and dashboards and also when it comes to creating reports in Power BI. Setting the page size for SCCM reports is no different. Why, though, is a report’s page size important? The short answer is: Service Level Agreements (SLAs).
Service Level Agreement (SLA) and Page Size
You might think that it’s an odd jump to go from page sizing to SLAs, but hear me out. We are seeing more and more companies setting SLAs for SCCM. What I mean by this is that Software Update (SU) status reports are being used for this purpose. Some organizations are using the built-in SCCM reports whereas others are creating their own custom SCCM reports. Either way the SU status report results are recorded in order to show audit compliance over time. Report subscriptions are used to help with recording these report results. You can either set-up a file (How to Set-up a Windows File Share Subscription) or an email subscription.
Why Page Size Matters
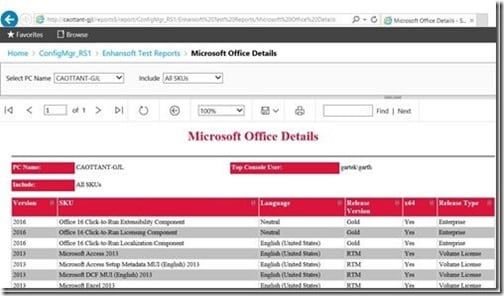
In interactive mode, this report looks perfect. It has all the details neatly laid out and it looks professional.
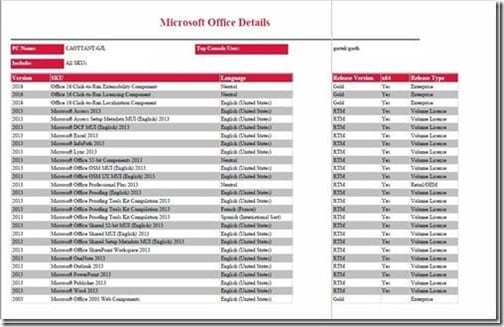
Unfortunately, when the same report is saved (recorded) and then later reviewed by an Auditor or a Manager it’s awkwardly cut up. In this case, the pages are cut into an 8.5” x 11” size because this is the default size for all exported and printed reports.
Reading a printout of a report that’s larger than the default size is very challenging! In addition, it makes the report look unprofessional and unfinished, so this why setting the page size is important.
How to Set the Page Size
I know there is nothing more frustrating than making sure that your report fits perfectly onto a landscape-sized letter page (11 x 8.5 inches) or an A4 (210 x 297 mm) and then finding out that when printed it spills onto a second page. How could this be? You ran the report on the SSRS site and everything looked great, so how do you fix it?
The answer is actually quite simple. Adjust the printed page size.
You now know that when reports are created the default report size for exported or printed reports is 8.5 x 11 inches. You can see this by reviewing the Report Properties within SQL Server Data Tools (SSDT). Note: These same attributes also exist in Report Builder (RB).
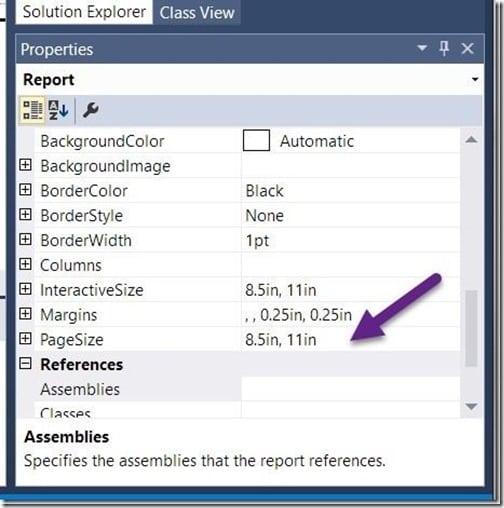
Simply adjust the page size to the appropriate one in Properties. In my case I will change the default setting (purple arrow) to 11 x 8.5 inches. Those are the dimensions of a landscape-sized letter page. With that tiny adjustment, this report will no longer split into two pages.
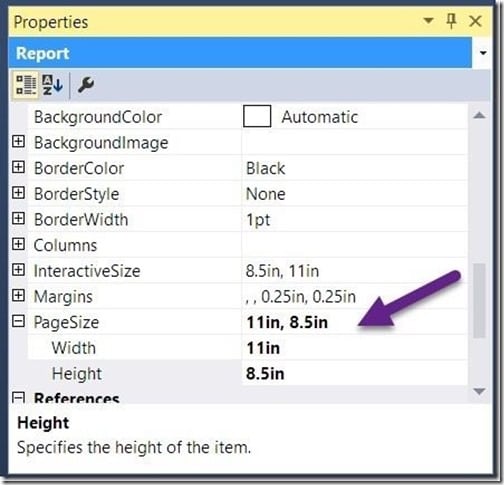
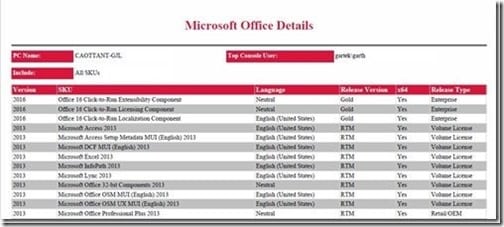
You can see the results below. The last three columns of this report no longer spill onto a second page.
Tip: Watch your margin sizes; by default they are 1-inch on all sides. This 1-inch is added to the report canvas, so if the canvas is 8.5” x 11” and the report looks perfect it isn’t. In reality the report’s size is 10.5” x 13” after the margins are added. Normally I change the left and right margins to 0 and manually setup my report to add a 0.25-inch margin on both the left and right side of the report. This also helps the report look better in interactive mode as the report doesn’t butt up against the left side of your browser window.
I hope you find these page sizing tips useful. Good luck with creating reports! If you have any questions about setting the page size of SCCM reports, please feel free to contact me @GarthMJ.


