


There may be times when you don’t want to wait for the next automated Azure Active Directory (AAD) synchronization to occur or when you want to immediately ensure that your accounts are up-to-date. So, you’ll want to perform a full sync of AD to Azure AD. I’ve set out below how you can manually perform a full synchronization.
1. On your AAD server, from the Start menu, launch Synchronization Service.
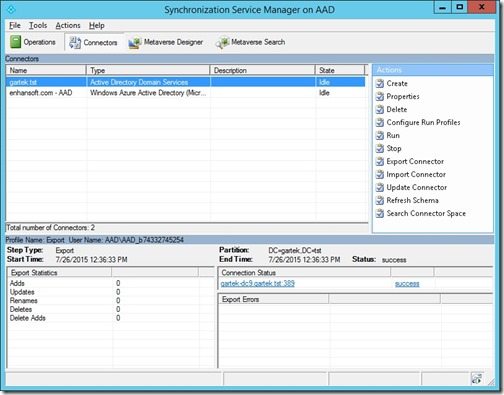
2. Click on the Connectors tab.
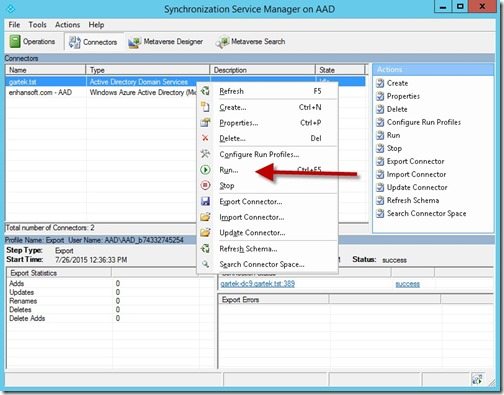
3. Right click on the Active Directory Domain Services row and then click on Run.
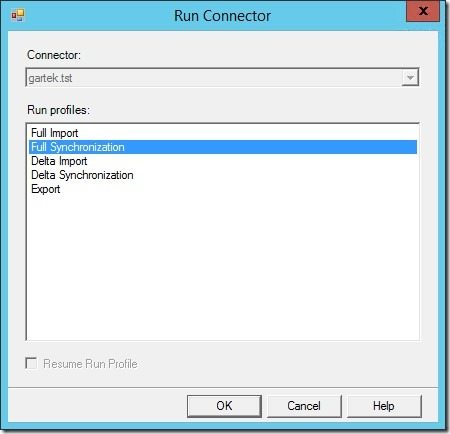
4. Select Full Synchronization and then click on the OK button.
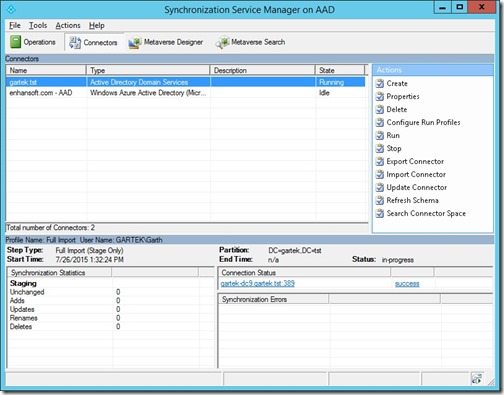
5. Wait for the synchronization to complete. This might take a while if you have a large environment.
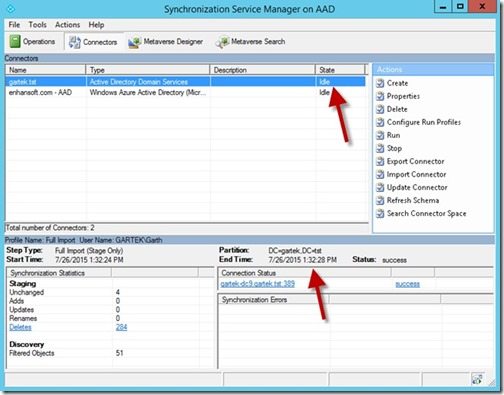
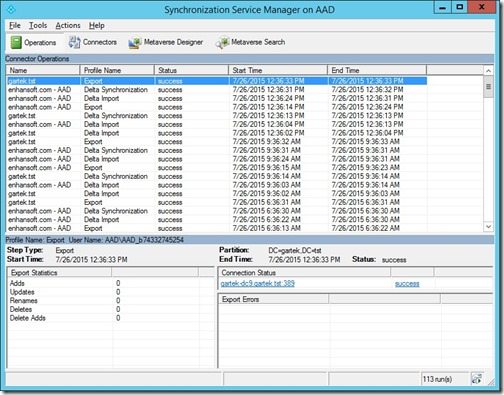
6. You will know when the synchronization is complete when the End Time information is populated (see red arrow) and the State is Idle.
Conclusion: How to Perform a Full Sync of AD to Azure AD
If you have any questions about how to perform a full sync of AD to Azure AD, please contact me on Twitter @GarthMJ or reach out to Recast.